
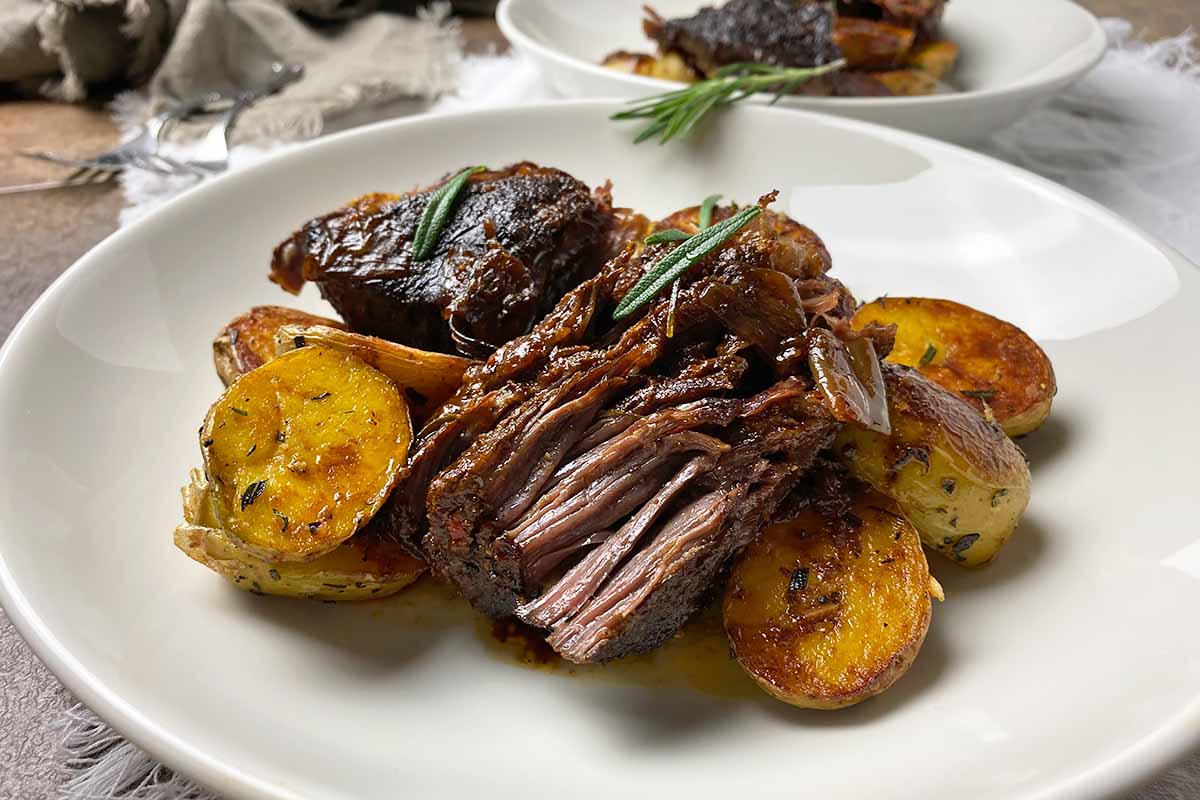
As the weather is turning colder and we’re starting to crave warmer and heartier meals, one-pot recipes like this beef stew are so good to have on hand.
About 10 years ago, my cousin Lynne made a delicious stew that looked very similar to the classic dish I typically make for my family, but with some special changes.
She added shallots to her recipe, which I loved for their softer, more mellow onion flavor.
But there was something else I couldn’t identify at first: a subtly tangy, yet lightly fruity, undertone.

I asked her what it was, and she was excited to reveal her secret ingredient:
One tablespoon of balsamic vinegar added to the beef stock base balances the salty, savory flavors without overpowering the other ingredients.
The recipe below is my own version of Lynne’s recipe. It has become a favorite in our house, especially when the whole gang is home and cozying up together on a cold night.
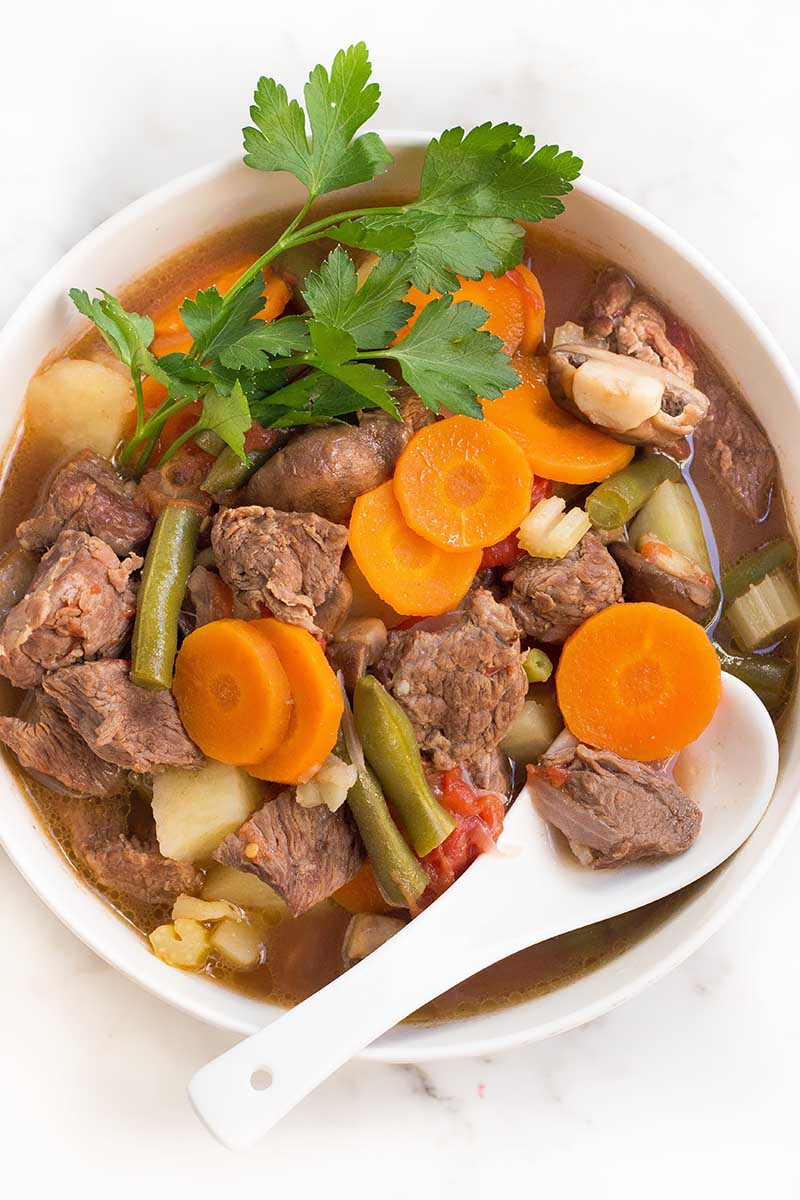
In addition to the vinegar, the rich base is flavored with floral bay leaves, and includes tender pieces of chuck and wholesome vegetables like cremini mushrooms, green beans, carrots, potatoes, celery, and tomatoes.
Delicious with freshly baked warm biscuits or sourdough bread on the side and a glass of merlot wine, it’s a perfect way to enjoy a comforting dinner on a chilly evening…
Without needing to worry about cleaning tons of cookware when you’re too full to move after eating!
Print
Savory One-Pot Beef Stew
- Total Time: 1 hour, 30 minutes
- Yield: 4 servings 1x
Description
Looking for a hearty one-pot dinner to warm your family and friends on colder evenings? Our savory beef stew is the perfect meal.
Ingredients
- 4 tablespoons olive oil
- 1 pound beef chuck, cut into 2-inch cubes
- 1 tablespoon unsalted butter
- 2 medium shallots, coarsely chopped
- 6 medium cremini mushrooms, halved
- 4 cups beef stock
- 1 tablespoon balsamic vinegar
- 1 15-ounce can whole plum tomatoes, quartered, with juice
- 3 medium russet potatoes, peeled and cut into 2-inch pieces
- 2 large carrots, peeled and sliced into 1-inch rounds
- 1 cup fresh green beans, halved with ends trimmed
- 1 stalk celery, roughly chopped
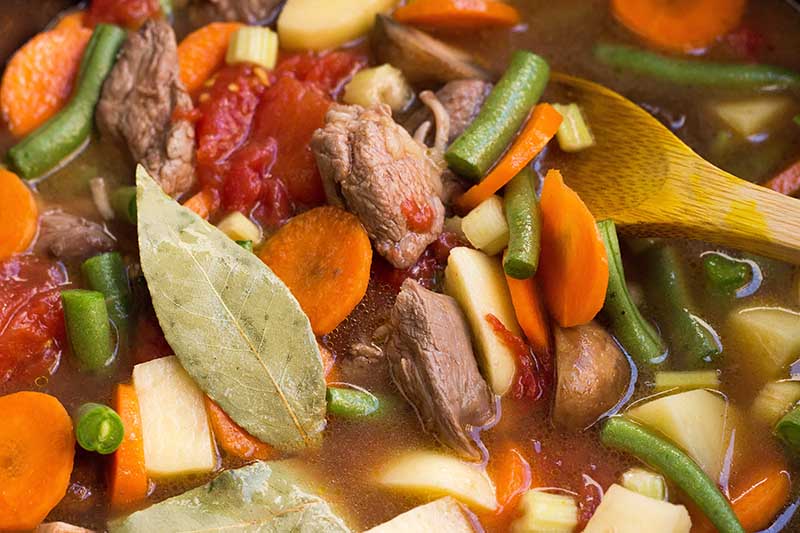
- 2 bay leaves
- Salt and pepper, to taste
- Chopped fresh parsley, for garnish
Instructions
- Heat the oil in a six-quart pot over medium-high heat. Carefully add the beef to the pot in a single layer and sear on all sides until browned, about 2 minutes per side. Transfer the beef to a plate or large bowl. Set aside.
- Reduce heat to medium, and add the butter to the pot. When the butter has melted, add the shallots and mushrooms. Stirring occasionally, cook until the mushrooms are lightly browned and the shallots become translucent, about 5 minutes.
- Reduce heat to low. Return the meat to the pot, and pour in 2 cups of the stock, or enough stock to submerge the ingredients. Stir in the balsamic vinegar. Cover and simmer for 10 minutes, stirring once.
- Add the tomatoes with juice, potatoes, carrots, green beans, celery, and bay leaves into the pot. Stir in the remaining stock. Cover and simmer for 45-60 minutes, or until all ingredients are fork tender, stirring occasionally.
- Remove the bay leaves. Season with salt and pepper to taste. Garnish with chopped fresh parsley and serve.
- Prep Time: 20 minutes
- Cook Time: 1 hour, 10 minutes
- Category: Beef
- Method: Stovetop
- Cuisine: Stew
Cooking by the Numbers…
Step 1 – Prep
Get your ingredients and equipment ready.
Set out a six-quart stockpot with its lid.
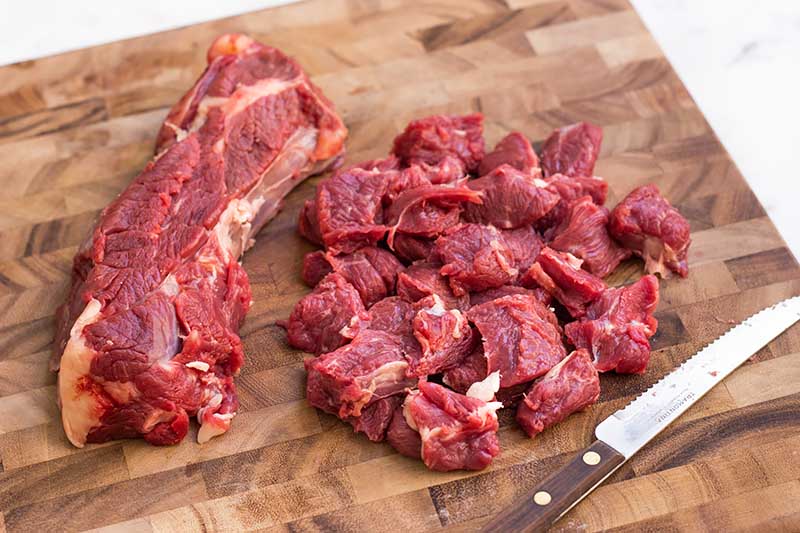
Pat the beef dry with paper towels. If the butcher hasn’t already done this for you, cut the beef into 2-inch cubes with a sharp knife and sturdy cutting board. Prepare this separately from the produce with different utensils to prevent any cross-contamination.
Peel the carrots and potatoes with a vegetable peeler, and remove any strings from the beans and celery. Save any excess scraps for your kitchen compost.
Chop the shallots, halve the cremini mushrooms and green beans, slice the carrots into rounds, cut the celery and potatoes, and quarter the plum tomatoes, reserving the juice in the can.
Measure out the olive oil, unsalted butter, beef stock, and balsamic vinegar.

If you want a more nutrient-dense liquid in this recipe, use an equal amount of beef bone broth to replace the stock.
Set out the bay leaves and salt and pepper – freshly cracked is best!
You can chop the parsley now, and place it in an airtight container in your refrigerator until you’re ready to serve.
Step 2 – Sear the Meat
Heat the oil in the stockpot over medium-high heat.
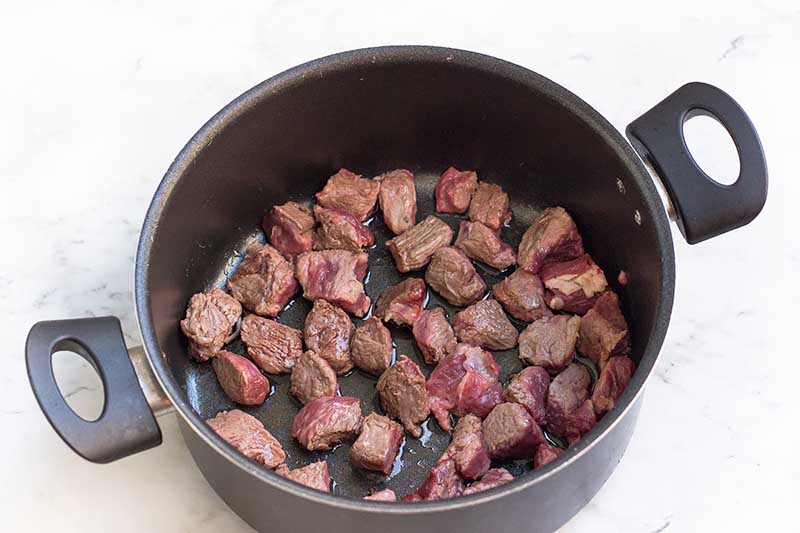
Avoid any injuries and stay safe from the hot oil by carefully placing the meat cubes into the pot using long tongs. Make sure the pieces are in a single layer to prevent steaming. Sear the meat on all sides until they are just browned. This will take about two minutes for each side.
Transfer the meat to a platter or large bowl and set aside for now.
Step 3 – Cook the Shallots and Mushrooms
Reduce the heat to medium, and then melt the butter in the pot before adding the shallots and mushrooms.
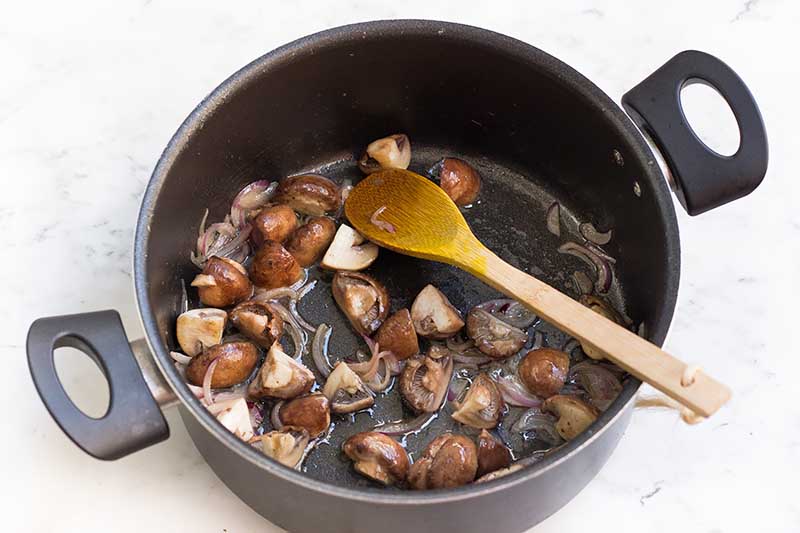
Cook until the mushrooms are lightly browned and the shallots have become translucent. This will take about five minutes.
Make sure to stir the mix with a wooden spoon or heatproof spatula every so often to prevent the shallots from burning.
Step 4 – Simmer the Meat with Some of the Stock
Reduce the heat to low and return the meat to the pot. Now add the balsamic vinegar and just enough beef stock to submerge the ingredients, about 2 cups of the stock.
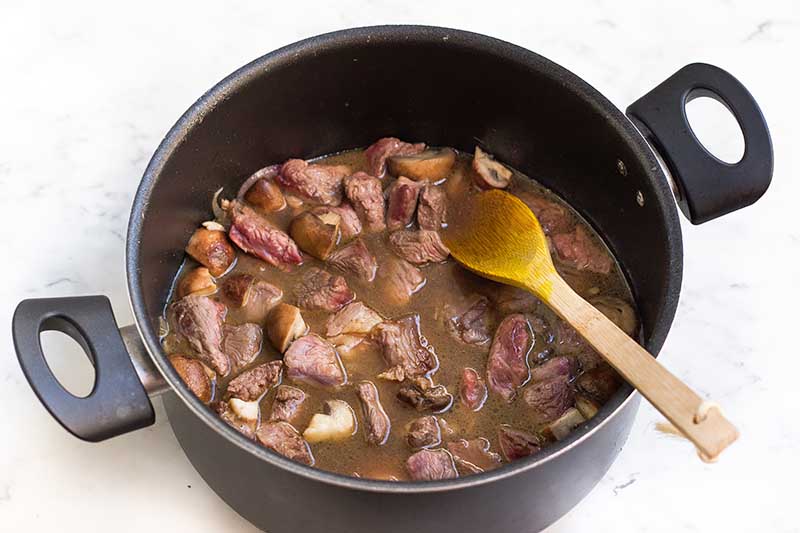
Simmer for 10 minutes, stirring just once midway through the cooking process.
Step 5 – Add the Other Vegetables and Remaining Stock
Add the tomatoes with juice, potatoes, carrots, green beans, celery, and bay leaves into the pot.
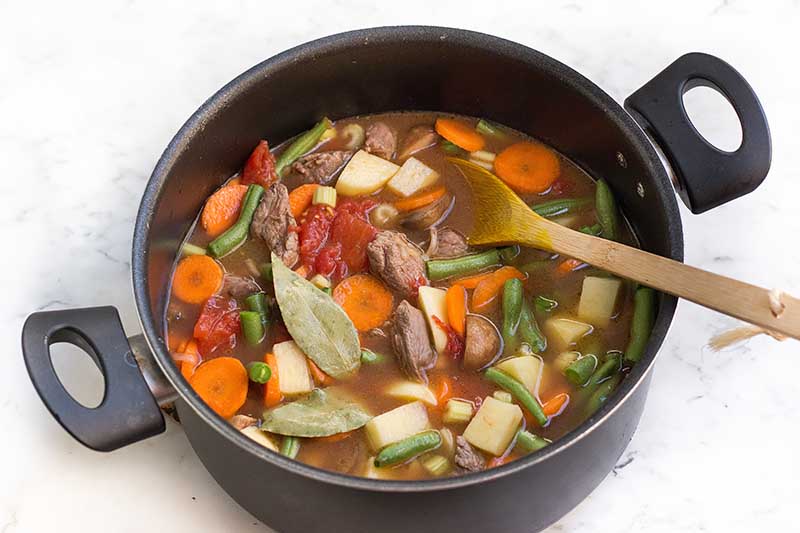
Now, pour in the remaining 2 cups of the beef stock. If the stock is not enough to submerge all of the ingredients, add just enough water to do so.
Step 6 – Cover and Simmer
Cover the pot and let everything simmer together for 45 minutes to one hour until the meat and vegetables are tender when they are pierced with a fork.
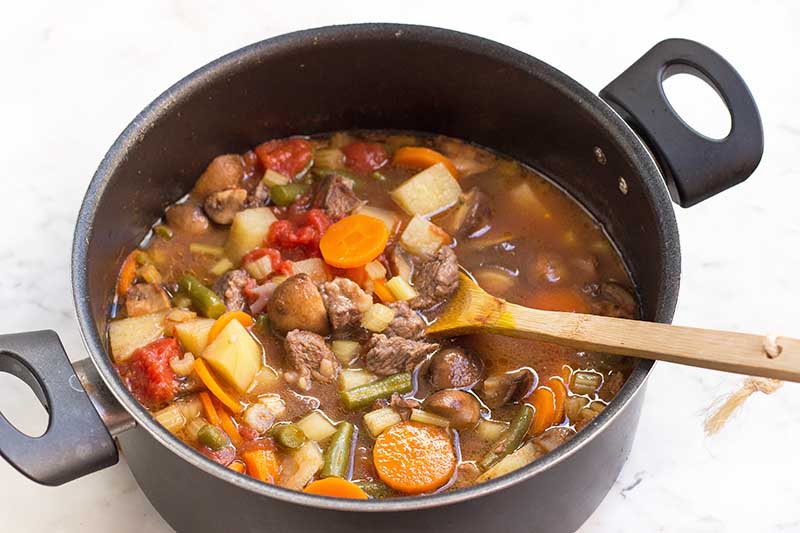
If the meat is still a little tough, continue cooking and checking in 10-minute increments.
Do you like a thicker broth? Consider the addition of a thickening agent! Here’s how to do it:
After the 45-minute simmering time, whisk together two teaspoons cornstarch and two teaspoons water in a small bowl to create a smooth slurry. Gradually pour and stir this mixture into the stew and cook gently over medium-low heat for about 5 to 10 minutes, stirring occasionally – you’ll see that the broth will slightly thicken during this time frame.
When ready to serve, remove the bay leaves.

Finally, add salt and pepper to your taste level. If you accidentally added too much salt, read our solutions for fixing too much salt in the stew.
All that’s left to do is to divide the contents into dinner bowls, garnish each with chopped parsley, and enjoy!
If you want to save significant time cooking in the kitchen, learn how to prepare beef stew in the electric pressure cooker with our tutorial.
Spin Your Stew Your Way
As with any recipe, once you have all the basics down, you can experiment with variations that your family and friends may enjoy.
Do you think you’d like to try this recipe with lamb? If so, I recommend using sweet green peas instead of beans, and adding two fresh sprigs of marjoram during the last 10 minutes of cooking.
Want to serve a vegetarian rendition? Leave out the meat, double the amount of mushrooms, and use a vegetable broth.

Sometimes I use leftover vegetables from a past dinner in this recipe to repurpose potential food waste. Simply add them during the last five minutes of cooking. I just did this the other week when I made a ton of roasted root veggies as a side dish.
How do you like to update your family’s favorites? Tell us all about your own secret ingredients and tricks in the comments below!
Our secret addition in this stew can offer its bold personality in far more unexpected ways. Try these three recipes next featuring balsamic vinegar, and see if anyone else can guess what the special flavor is:
About Nan Schiller
Nan Schiller is a writer from southeastern Pennsylvania. When she’s not in the garden, she’s in the kitchen preparing imaginative gluten- and dairy-free meals. With a background in business, writing, editing, and photography, Nan writes humorous and informative articles on gardening, food, parenting, and real estate topics. Having celiac disease has only served to inspire her to continue to explore creative ways to provide her family with nutritious locally-sourced food.


This stew was absolutely divine! The flavors melded together perfectly, and the beef was so tender. This is definitely going into my regular dinner rotation.
The recipe was alright, but I felt it needed a bit more seasoning. The beef was tender, but the overall flavor was just okay for me. I added a splash of Worcestershire sauce for some extra umami flavor. It made a noticeable difference.
This was my first time making beef stew and it turned out amazing! The instructions were clear and easy to follow, and the result was a hearty and satisfying meal. Can’t wait to make it again.
This beef stew is the definition of a hearty, home-cooked meal. The seasonings were spot-on and the beef was incredibly tender. It’s the kind of dish that makes you look forward to leftovers.
I added some red wine to the stew and it really deepened the flavors. It was a fantastic addition, and I’ll be doing this from now on.
I didn’t have regular potatoes, so I used sweet potatoes instead. They added a slight sweetness that balanced the savory flavors perfectly. Highly recommend this substitution!
This savory beef stew recipe is a winner! It’s rich, hearty, and full of flavor. Plus, the fact that it’s a one-pot dish makes cleanup a breeze. Highly recommend.
It was a decent meal and easy enough to make. The taste was good, not great. Might try tweaking it next time.
I included a can of chickpeas for some extra protein and they worked really well. They added a nice texture and soaked up the delicious stew flavors.
I love how easy this recipe is to make, and the taste is phenomenal. This is the kind of stew that warms you from the inside out. I’ll definitely be making this again. I threw in a handful of frozen peas right at the end for some added color and nutrition. They were a great addition and really brightened up the dish.
The stew was a bit bland for my liking. I had to add extra herbs and spices to give it more depth of flavor.
I tried this recipe last night and it was a huge hit with my family! Even my picky eaters devoured it. The depth of flavor was amazing and it was so easy to make. Thank you for sharing!
Wow! This savory beef stew was so easy to make and absolutely delicious. My whole family loved it, even my picky eaters. It’s definitely going into our regular dinner rotation.
This beef stew was okay. It was quick and convenient since it’s a one-pot dish, but the flavors could’ve been more robust.
I love spicy food, so I added a diced jalapeno to the mix. It gave the stew a nice kick without overpowering the other flavors.
Not bad, but not amazing either. It was a pretty average beef stew. It could use a little something extra to make it stand out.
This is the perfect comfort food! The beef was melt-in-your-mouth tender and the vegetables were cooked just right. It’s definitely a keeper.
Wow, what a fantastic recipe! I love how all the ingredients come together in one pot – it makes clean-up a breeze. The beef was melt-in-your-mouth good and the stew had just the right amount of savory goodness. Can’t wait to make this again!
The stew turned out okay, but it wasn’t as flavorful as I hoped. I might try it again with some adjustments.
Just made this beef stew for dinner tonight and it was a hit! The savory flavors are just what we needed on this chilly evening. Thanks for the fantastic recipe!
This one-pot beef stew wasn’t bad, but it didn’t blow me away. It was a fairly standard stew, nothing exceptional.
What a marvelous beef stew recipe! It’s the epitome of comfort food. The stew was rich, hearty, and filled with savory goodness. This will definitely become a staple in our home. I added some chopped fresh chives over the top of each bowl.
This one-pot beef stew recipe is a keeper! I love how simple yet rich and flavorful it is. The meat was so tender, and the stew was hearty and filling. Definitely restaurant quality!
Just made this for dinner and it was a total success! The savory taste was exactly what I was craving. It’s comforting, delicious, and packed with flavor. Will be making this many more times, for sure.
The aroma while this was cooking was mouthwatering, and the taste did not disappoint! This is the best beef stew I’ve ever had. It’s definitely a new family favorite.
This recipe was fine, but it didn’t really impress me. The beef was cooked well, but the stew itself was a bit lackluster.
I’ve made a lot of beef stews in my time but this one really stands out. The balance of flavors is spot on and it’s so hearty and satisfying. Perfect for a cold winter’s night!