In my prevalently Italian-American home growing up, the eggplant reigned supreme.
When we weren’t rolling meatballs, hand-cutting ravioli and gnocchi, or jarring tomato sauce, we were breading and frying up slices of eggplant grown in the backyard garden to make eggplant parmesan.
I’d try to sneak a few straight out of the frying pan before they were covered in sauce and cheese in the casserole dish – I couldn’t get enough of the crunch of the browned, crusty exterior!

And, luckily for me, Dad was on my side – he was my partner in crime, distracting an increasingly more annoyed Mom with hugs and kisses while the both of us continued to nibble.
Whatever way you enjoy it – as originally intended in a final dish or when it is forbidden by your mother – the eggplant is a versatile ingredient to use in many styles of mouthwatering dishes.

You can cube it up and thrown into stir fries or curries, process it until thick and creamy in baba ghanoush hummus, or add it into a Bolognese sauce.
But I’m still stuck on those breadcrumb-coated memories…
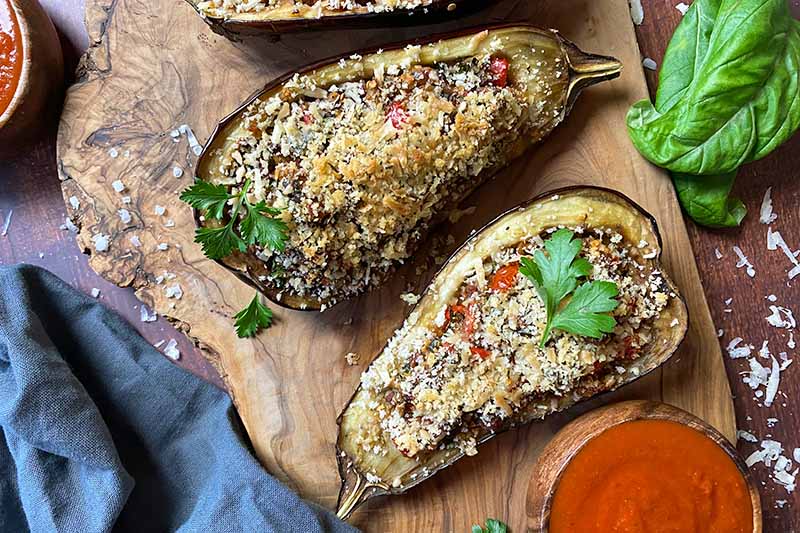
I’ve already eaten far too many eggplant parmesan dishes in my childhood to last a lifetime, so this recipe for stuffed eggplant marches to the beat of its own healthy-ish drum, without losing the crisp breadcrumbs I know and love.
The filling is a savory blend of the eggplant’s tender, melt-in-your-mouth flesh combined with ground beef cooked with onions, bell peppers, tomatoes, garlic, and fresh herbs.
I add some breadcrumbs and grated cheese in this filling, but also save some of this mix to top each eggplant half before they visit the oven to bake.
And we all know what happens when panko breadcrumbs and cheese mingle together with a hot oven.
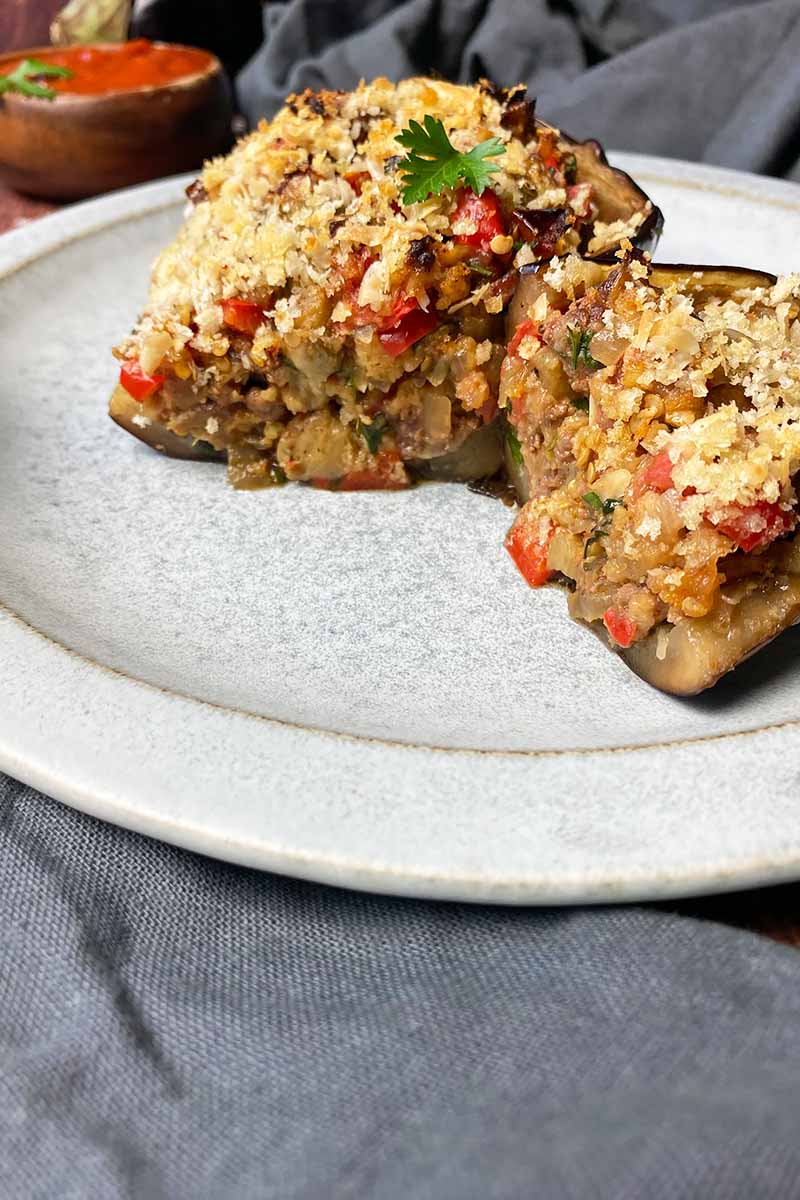
While the filling remains soft and succulent, the topping gets browned and crispy and crunchy and caramelized and toasted and, and, and…
And I need to make this recipe again… now! Join me for dinner, yes?
Mom won’t yell at you, promise!
Print
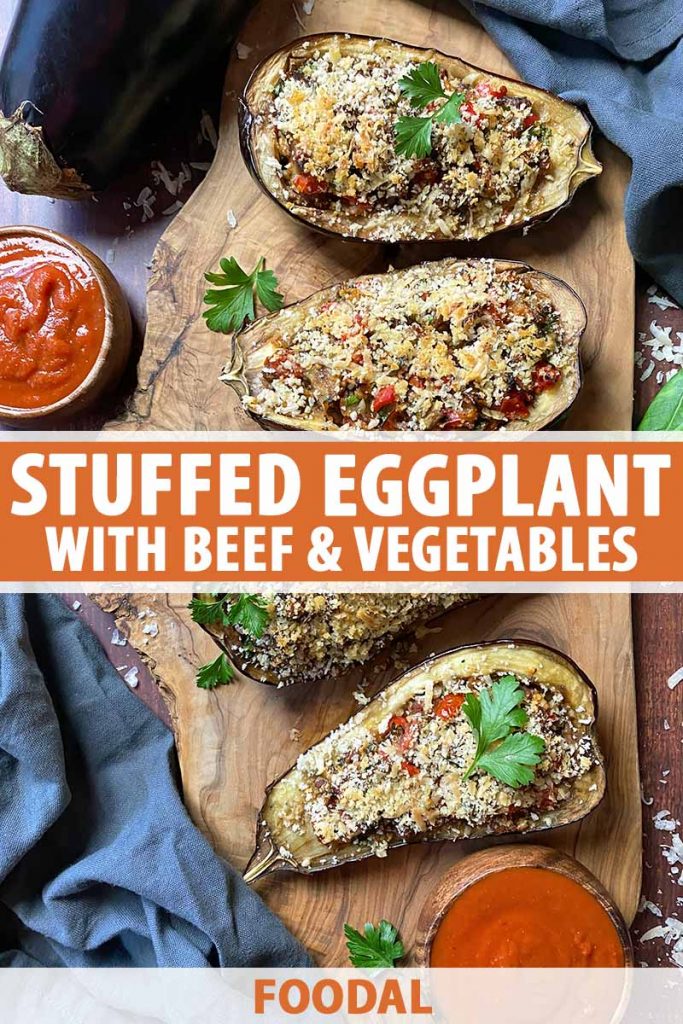
Stuffed Eggplant with Beef and Vegetables
- Total Time: 1 hour, 30 minutes
- Yield: 4 servings (1 half per serving) 1x
Description
A little tired of eggplant parmesan? Learn a new way to cook your aubergines with this recipe for stuffed eggplant with beef and vegetables.
Ingredients
- 2 medium eggplants
- 2 1/2 tablespoons olive oil, divided
- 1/2 medium onion, diced (about 1 cup)
- 1/2 pound 80% lean ground beef
- 2 large cloves garlic, minced
- 1 medium red bell pepper, diced (about 1 cup)
- 2 medium tomatoes, diced
- 1/4 cup chopped fresh basil
- 1/4 cup chopped fresh parsley
- 1 cup grated Pecorino Romano or Parmigiano Reggiano, divided
- 1/2 cup plain panko breadcrumbs, divided
- 1 large egg
- Kosher salt and freshly cracked black pepper, to taste
Instructions
- Preheat the oven to 375°F. Line a baking sheet or pan with aluminum foil and lightly coat with about 1/2 tablespoon olive oil.
- Slice the eggplants in half lengthwise and scoop out the flesh, leaving enough flesh lining the skin so that the halves will still holds their shapes when baked. Roughly chop the flesh of the eggplant that has been scooped out.
- Heat 1/2 tablespoon oil in a medium skillet over medium heat. Place the chopped eggplant in the skillet, and lightly season with salt and pepper. Cook, stirring occasionally, until the eggplant is browned and tender, about 8-10 minutes. Set aside.
- Meanwhile, heat 1/2 tablespoon olive oil in a large skillet over medium-high heat. Add the onions and lightly season with salt and pepper. Cook, stirring occasionally, until very caramelized, about 5 minutes.
- Add the beef and another small sprinkle of salt into the pan with the onions and cook, stirring occasionally while breaking up the beef, until the meat is browned and nearly cooked through, about 5-8 minutes.
- Add the garlic, bell peppers, and tomatoes into the same pan. Continue cooking until everything is tender, another 5-8 minutes, stirring occasionally.
- Transfer the eggplant and beef mixture into a large bowl. Add the basil, parsley, 3/4 cup cheese, 1/4 cup breadcrumbs, and egg. Mix to completely combine everything together.
- Place the eggplant halves on the prepared baking sheet, and use about 1/2 tablespoon olive oil to lightly brush the interiors. Sprinkle each half lightly with salt and pepper.
- Evenly divide the meat mixture between the eggplant halves, pressing down lightly. Mix together the remaining 1/4 cup breadcrumbs and 1/4 cup cheese with a sprinkle of salt and pepper. Lightly sprinkle the tops of each eggplant half with the breadcrumb mixture and drizzle lightly with the remaining olive oil.
- Tent the baking sheet with a large piece of aluminum foil, making sure it doesn’t touch the topping on the eggplant. Transfer the baking sheet to the oven and bake for 30 minutes. Remove the aluminum foil, and bake for another 20 minutes uncovered.
- Remove the baking sheet from the oven. Transfer each half to a dinner plate and serve immediately.
- Prep Time: 20 minutes
- Cook Time: 1 hour, 10 minutes
- Category: Meat
- Method: Stovetop/Baking
- Cuisine: Italian
Cooking by the Numbers…
Step 1 – Prep and Measure
Preheat your oven to 375°F, and line one half-size baking sheet with aluminum foil or a silicone mat. Coat the foil with 1/2 tablespoon olive oil. Be sure to have extra aluminum foil on hand for covering the baking sheet later.
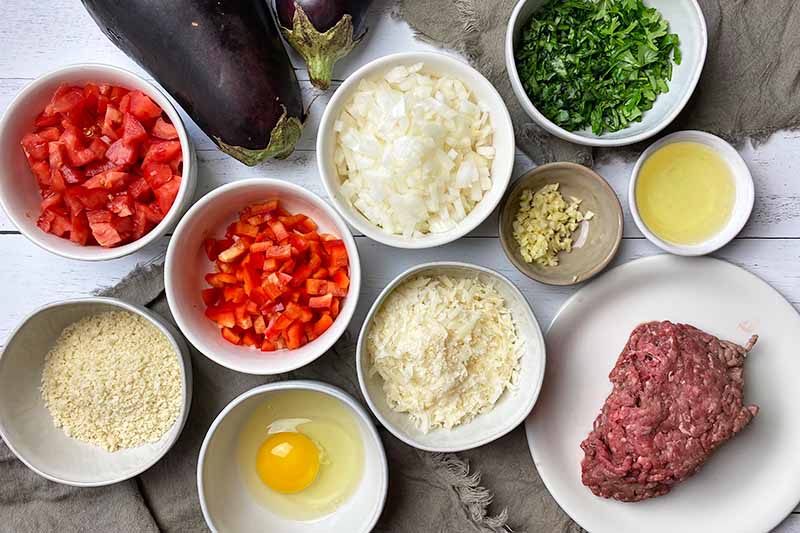
Wash and dry all of the produce.
Measure out the olive oil and breadcrumbs. You can use store-bought breadcrumbs, or minimize your food waste by making your own using any stale bread or those castaway end pieces you have on hand.
Set out your salt and pepper. Freshly cracked is best!
Crack the egg in a small bowl and remove any shell fragments. Set out the ground beef.
Freshly grate the cheese – you can use Pecorino Romano, Parmigiano Reggiano, or another hard-aged Italian cheese. The medium-sized blades on a box grater will be perfect here.
Using a sturdy cutting board and a sharp chef’s knife, slice the eggplant completely in half lengthwise.
Scoop out the interior flesh with a metal spoon, but leave enough lining the skin. You’ll want about a 1/4-inch-thick border of flesh. This ensures the eggplant will hold its shape as it is baking for a beautiful final presentation.
Roughly chop the eggplant flesh. Dice the bell pepper, onion, and tomatoes. Finely mince the garlic, or use a garlic press. Roughly chop the basil and parsley.
Step 2 – Cook the Eggplant Flesh
Heat 1/2 tablespoon oil in a medium skillet over medium heat.
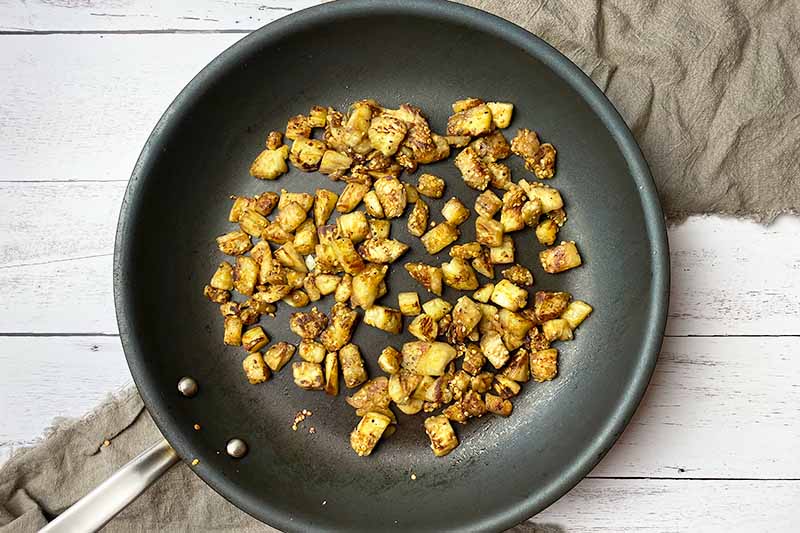
Place the chopped eggplant in the skillet, and season with a light sprinkle of salt and pepper. Cook, stirring occasionally, until the eggplant is browned on the exterior and tender on the inside, about 8 to 10 minutes.
Set the skillet aside.
Step 3 – Cook the Onions, Meat, and Vegetables
While the eggplant is cooking, cook the onions in a large skillet.
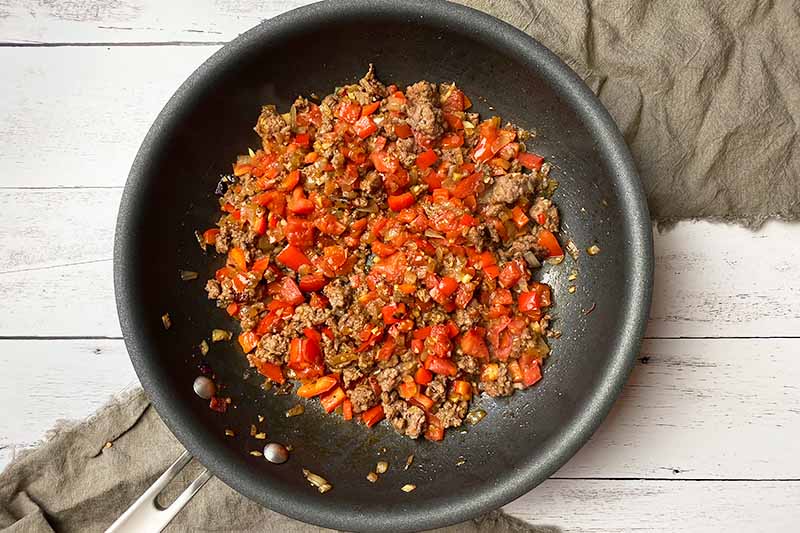
Heat 1/2 tablespoon olive oil in a large skillet over medium-high heat. Add the onions and a light sprinkle of salt and pepper. Cook, stirring occasionally, until very caramelized, about 5 minutes.
In the same skillet, cook the ground beef – the meat will absorb all the flavors remaining in the pan, and you won’t have to clean as many dirty dishes!
Add the beef along with another light sprinkle of salt and cook, stirring occasionally while breaking up the beef.
Continue cooking until the meat is browned and completely cooked through, about 5 to 8 minutes.
Add the garlic, bell peppers, and tomatoes. Continue cooking until everything is tender, another 5 to 8 minutes.
Step 4 – Mix the Filling
Place the cooked eggplant, cooked meat mixture, basil, parsley, 3/4 cup grated cheese, 1/4 cup breadcrumbs, and egg into a large bowl.
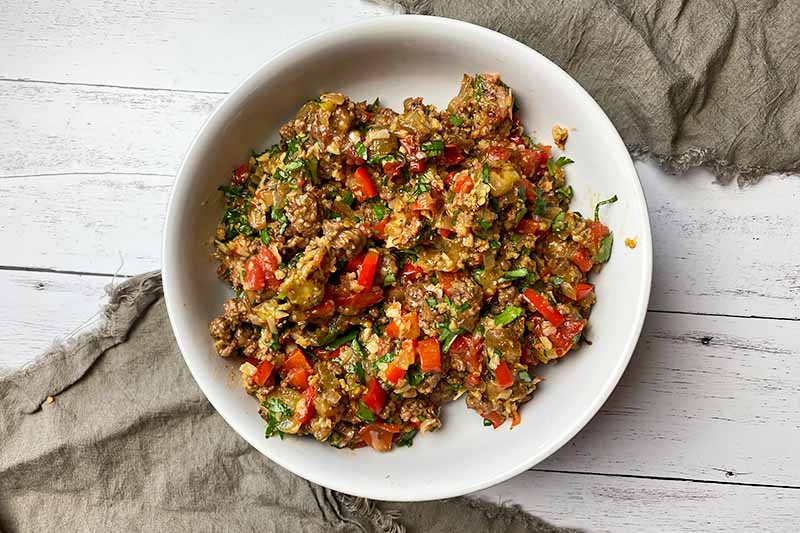
You can check for seasoning before adding the raw egg – mix in additional salt and pepper to your taste.
Mix everything together with a large spoon or spatula until the ingredients are completely and evenly combined.
Mix the remaining 1/4 cup breadcrumbs and 1/4 cup cheese in a small bowl, along with a sprinkle of salt and pepper – this will be used for the topping.
Step 5 – Stuff and Top with Breadcrumbs and Cheese
Place the eggplant halves on the prepared baking sheet. It’s fine if they touch.
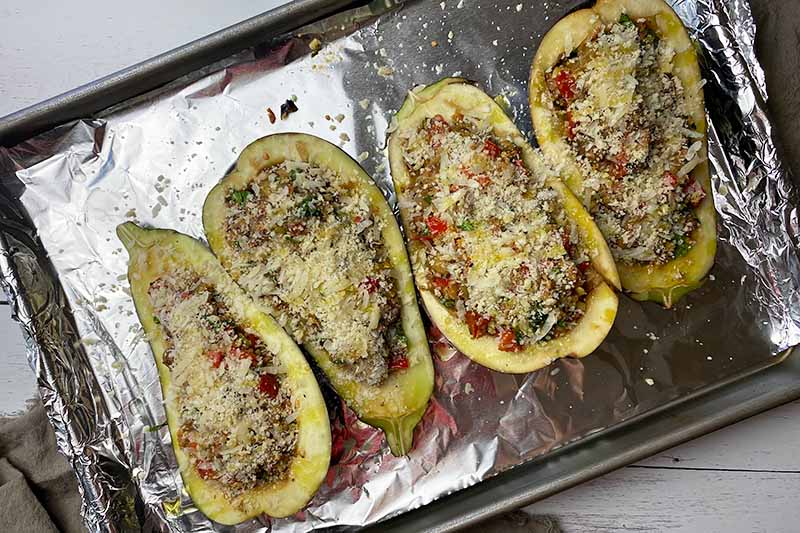
Lightly brush the interior of the eggplant halves with about 1/2 tablespoon olive oil, and sprinkle each half with a little salt and pepper.
Divide the meat mixture and fill the halves, pressing down lightly. Top the meat with an even amount of the breadcrumb and cheese mixture. Drizzle the remaining olive oil over the breadcrumbs.
Step 6 – Bake
Tent the baking sheet with aluminum foil. Do your best to leave some space between the foil and the tops of the eggplant – you don’t want the breadcrumbs to stick to the foil.
Transfer the baking sheet into the oven, and bake covered for about 30 minutes.
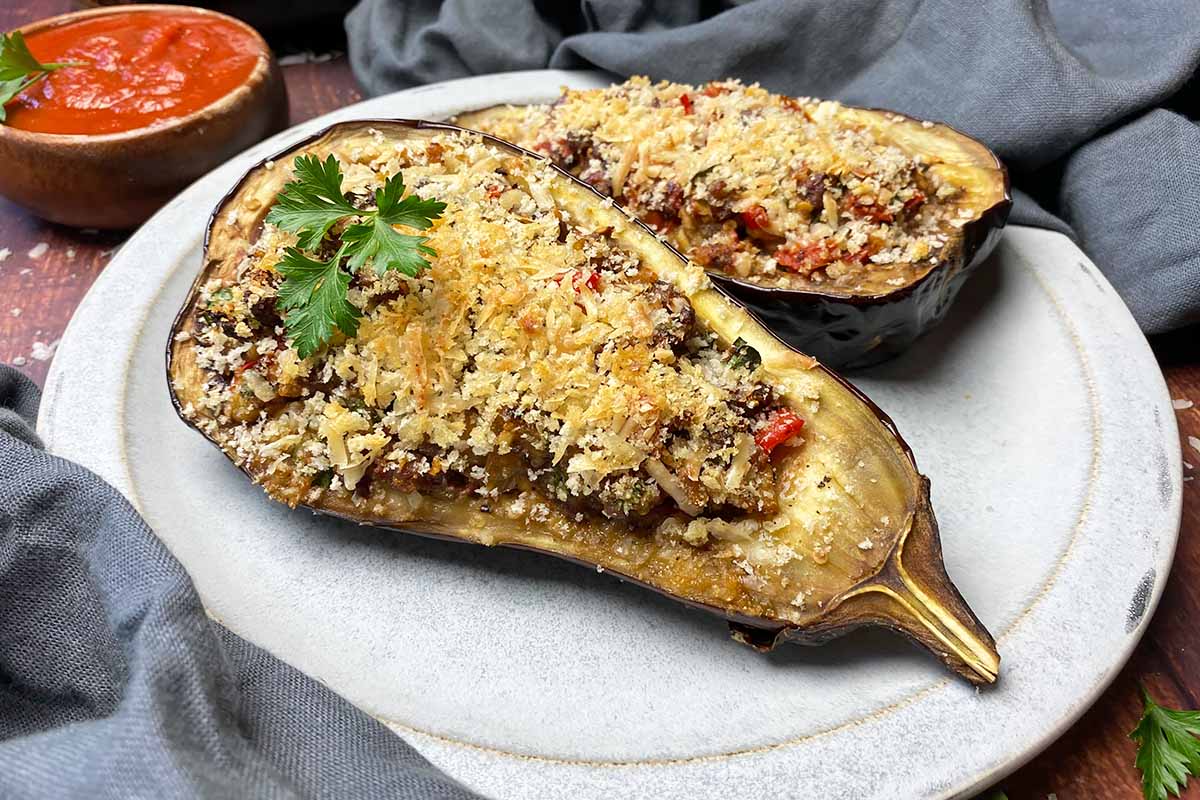
Carefully remove the aluminum foil, and bake for another 20 minutes uncovered to create a crispier crust. Remove the baking sheet from the oven. Carefully transfer each half to a dinner plate.
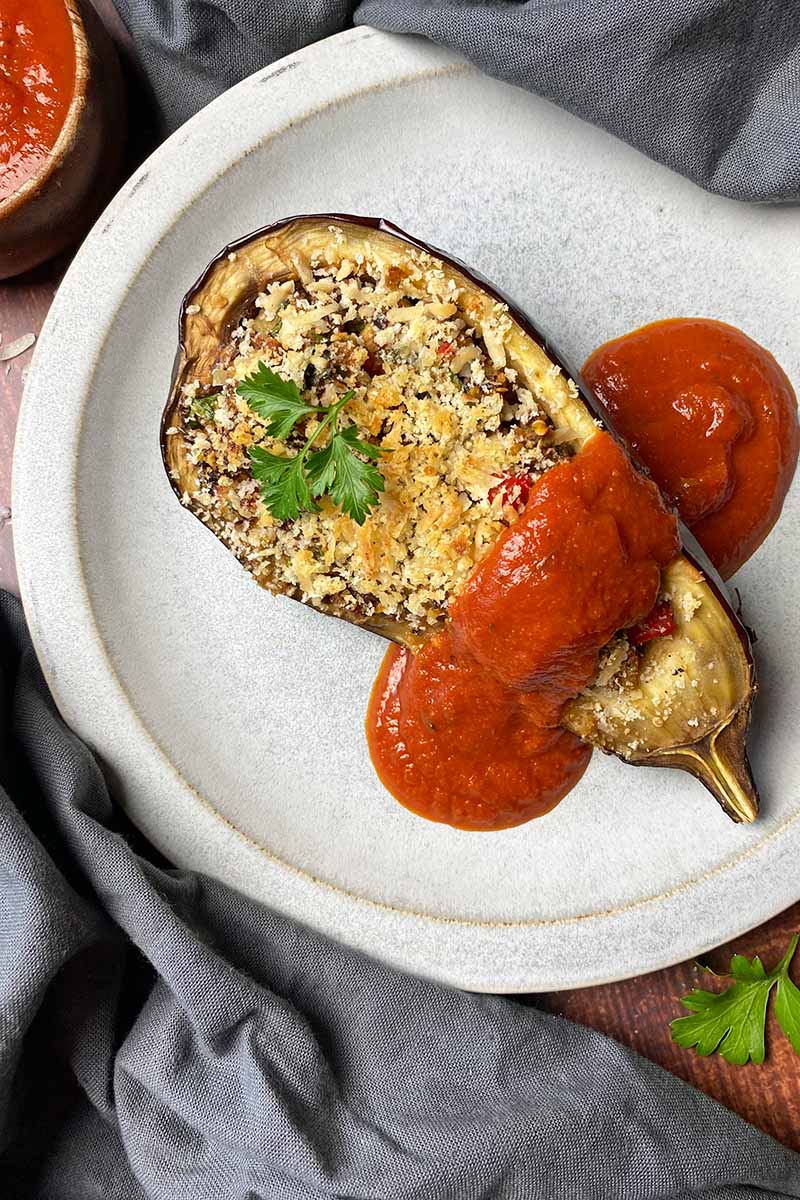
Enjoy this savory creation all on its own, or…
Pour on Some Sauce!
You’ve already worked pretty hard to make this dinner – eating it as is will be perfect and so satisfying. There really is no need to do any more work in the kitchen.
But you might be dreaming about making a sauce to accompany the dish for another layer of flavor, and we might have some pretty tasty suggestions for you.
Your favorite tomato sauce will feel right at home generously poured on top. If you already have a jar or two in your pantry from the last time your family had a big canning party, great!
If you need some new recipe inspiration, make our recipes for golden tomato or oven-roasted tomato sauce.
A classic Italian pesto will also be a fantastic sauce idea, as would something creamy and dreamy, like a homemade mornay sauce.
What sauce sounds the most delicious to you? Leave a comment below!
Let’s keep the meals rolling with more eggplant recipes – here are three more mouthwatering ideas to try next:
About Nikki Cervone
Nikki Cervone is an ACS Certified Cheese Professional and cheesemonger living in Pittsburgh. Nikki holds an AAS in baking/pastry from Westmoreland County Community College, a BA in Communications from Duquesne University, and an MLA in Gastronomy from Boston University. When she's not nibbling on her favorite cheeses or testing a batch of cupcakes, Nikki enjoys a healthy dose of yoga, wine, hiking, singing in the shower, and chocolate. Lots of chocolate.
I have never had egg plant before but would like to give it a try. These recipes and photos look tempting to me. As a matter of fact, I’m not even sure if there is a farmer’s market in my area. I’ll have to look that up.
Eggplant is a favorite of mine. I love eggplant parmigiana, but it is sometimes too much work for the time I have available. Last year, I began grilling it, which is much faster, and delicious, but also time consuming, since I have a charcoal grill. I love the idea of combining the meat and other vegetables with the scooped out eggplant, and stuffing it. This is one recipe I am planning to try, as soon as I’m able to buy the ingredients.
I always have trouble keeping my eggplant in one piece when stuffing it. I guess I’m carving it too think or being too rough when filling it. Most of the time I simply fry sliced up eggplant on a pan and eat it with other veggies, but this would work pretty nicely as a side dish in a party. Or maybe you could combine this with a bit of the bean salad posted earlier to make colorful and healthy full meal.
I bought an eggplant at the local grocery last Sunday and I must confess, I did not know how best to cook it, luckily a good neighbor came to the rescue and asked me to add butternut to the mix with some ripe tomatoes, it was scrumptious…most memorable meal I’ve had in years…back to the topic at hand…I’ll definitely bookmark this page for future reference…I don’t want to have an eggplant in my hand and an absolute blank stare and no idea on what to do with it. 🙂
I don’t have enough eggplant in my life. I used to eat it quite frequently a few years back and you’re right, it’s so delicious and versatile. I’d love to try this recipe with chicken or ground turkey.
I agree, even though I don’t have many recipes for it, I really like it. It’s nice to see another way to make it. I’ve generally gone with the Parmesan, but this looks tasty.
Italian sausage would be delicious for this, but that kind of slams the idea of making this a healthy choice, lol. I think ground turkey would work nicely.
The humble eggplant was a big tradition in my family too. In fact, my grandpappy grew and sold them. They were always the best ones in town. He used to give us the ripest ones. We made soup out of them usually. That’s not the most creative way to cook them, but then my mother wasn’t a very good cook.
I’m very glad I found this recipe. I’m embarking on a healthy diet so I will definitely give it a try soon. It will be nice to have this wonderful legume in my life again. Thanks Jennifer!
I don’t know what it is about foods that are “stuffed”, but i just can’t get enough of them! I have to admit that I have never really experimented with eggplant before. I have made (and LOVE) Eggplant Parmesean, but beyond that I’ve never thought of any other way to use it. This recipe reminds me of Chile Rellenos, which is pretty much my favorite food. I will definitely be cooking this in the next few days. Sounds amazingly delicious. Thanks for sharing!
This looks interesting. Eggplant is so good for you. I love to make pizza out of it and it is so juicy. I never thought about stuffing it. I am going to have to try this. There are so many different things you can stuff it with too. I think I have most of these ingredients. One or two of these would be enough. If it was all vegetables you could eat three or four of them. I need a gluten free bread crumb. I guess I could just take some dried out gluten free bread and make it out of that. I usually have the brown rice or tapioca bread. My friend would go at this with a ground turkey meat or even mix the two meats together.
I’ve only ever used an eggplant (or aubergine as we call them in the UK) when making moussaka. I had never thought to stuff them before and this minced meat filling does look tasty. I’d like to give this one a try as soon as I find some quality veggies for sale – thanks!
Eggplants are one of those vegetables that I always hear about, but have never tried for myself. I didn’t actually know that it was so versatile; that link included in the article was an interesting read to scroll through, who knew it could be used so many ways? The only way to use it that I’ve never heard of before today was parmesan, so seeing all the ideas – especially this one, which sounds amazing – makes me want to give it a try for the first time. I’ll be the first to admit that prefer carnivorous eating rather than sticking to plants, so I love the idea of adding meat to this. Seems like it would be a good mix, getting the best of both worlds in there. I’m for sure giving this a try if I find myself getting my hands on the ingredients one of these days.
Ah aubergine! Such a wonderful vegetable, but absolutely terrible if it’s not prepared well. I really want to try this, but maybe some fish or more veg instead of meat, although, the meat sure does look veeeery tempting!
I’ll probably give this one a go without the beef. When I was younger I hated eggplant, as I always thought of it as a tasteless and bland vegetable. I tried it again a few days ago, and it’s such a great vegetable if it’s made well! I tried a different kind of stuffed eggplant recently – it had just mushrooms, cheese and breadcrumbs (I love mushrooms). This one looks great too, and I think I may add some diced mushrooms in here.
Oh man. I just read the rigatoni bolognese recipe the other day and commented about how I love eggplant but how always run out of ideas for how to cook it…especially once my garden starts pumping them out. This one is definitely going on my list. I didn’t even know this was possible. I actually just ate stuffed peppers the past two nights, which came out awesome, but I think I’d definitely prefer this once I try it.
Thanks for the eggplant (or aubergine, as we call them in the UK) recipe. I really enjoy them but always seem to be stuck for ideas beyond vegetable lasagnas and gratins. New ideas for ground beef are always welcome to people on a budget too.
Argh! I was just at the grocery earlier and I eyed some good looking eggplants. Unfortunately, I decided against putting some on my cart as I was thinking that I’ll be doing a lot of errands in the couple of days and will be out of town next week. I thought, no veggies as I might not have time to cook, and it would be a waste if they rot. Now, looking at this recipe just made me regret not getting those eggplants. I love eggplants and I believe this is something that I can do. Darn. Maybe next time. Definitely when I return from the trip.
You’re so right, eggplant is very versatile and certainly is yummy. About 8 years ago, a lady in the grocery store saw me picking up some eggplant, and she came over and wanted to know how to cook it. I smiled and told her, that she could fry it, bake it, grill it, and etc. She was amazed that it could be cooked so many ways, and because I shared that info with her, she wasn’t afraid to try it out.
This recipe is absolutely delicious. I have been trying to find ways to serve it for my family, but eggplant pizza was the only thing they seemed to like. I tried making this for them and they loved it. I hope you will put up more recipes for this vegetable because I personally love it but no one else here seems to like it.
I have to agree about the versatility of this vegetable, I’ve tried it in almost every way and I loved every version. They taste good even if you simply boil them and put some oil, vinegar and oregano on them. I need to try your recipe, it sounds and looks delicious and I’ve never thought about stuffing regular eggplants, in my country we use to stuff the smaller variety and cook them in a tomato based sauce. Thank you, your recipe will make my husband happy!
These look phenomenal! I am a huge fan of studding veggies with ground meat, but the usual stuffed pepper, zucchini, and tomatoes get old. Honestly, I am kind of surprised that I never considered stuffing an eggplant considering that it is one of my favorite veggies. Gonna grab an eggplant next grocery trip. Looks like a keeper recipe!
Mmm. Tasty. I agree about eggplant being really versatile. I love its mild creamy flavour and it does go with most things. I’d not thought of stuffing one – it’s a nice take on a ratatouille. Makes it sort of inside out! One of my favourites is to lay a whole eggplant on its side in a dish, then slice into 3/4 inch slices almost down to the skin at the bottom. Take a mozzarella, slice it and place the slices in between the eggplant slices – kind of like putting toast in a toast rack. Then bake it, and it’s yummy.