Kitchen dilemmas sometimes happen, even to the best and most experienced cooks!
Preparing a dish that turns out too spicy is an easy mistake to make, for several reasons.
For example, accidentally adding even a 1/4 teaspoon more of a hot spice than the original amount can turn the heat up higher than what you anticipated.
And substituting fresh chili peppers for dried in a recipe can also stoke the flames.
For dishes that are simmered slowly, adding the full measure of spices at the beginning of the cooking process can concentrate and intensify flavors – including heat – above and beyond what’s bearable for you and your doomed dining companions.
Whatever the reason, it doesn’t necessarily mean your dinner needs to be scrapped completely. With our help, you don’t need to start over.
While we can’t undo what’s been added, there are a few ways to mellow out the flavor so your meal can be salvaged without needing to call the fire department.
Here’s our take on some of the best ways to tame the heat:
How to Turn Down the Heat
5 Cooling Tips
Going overboard on spiciness happens. But just because you created a fiery-hot disaster doesn’t mean you should start from scratch!
Review these 5 quick fixes now to lower the heat levels:
1. Tone Down with Acids
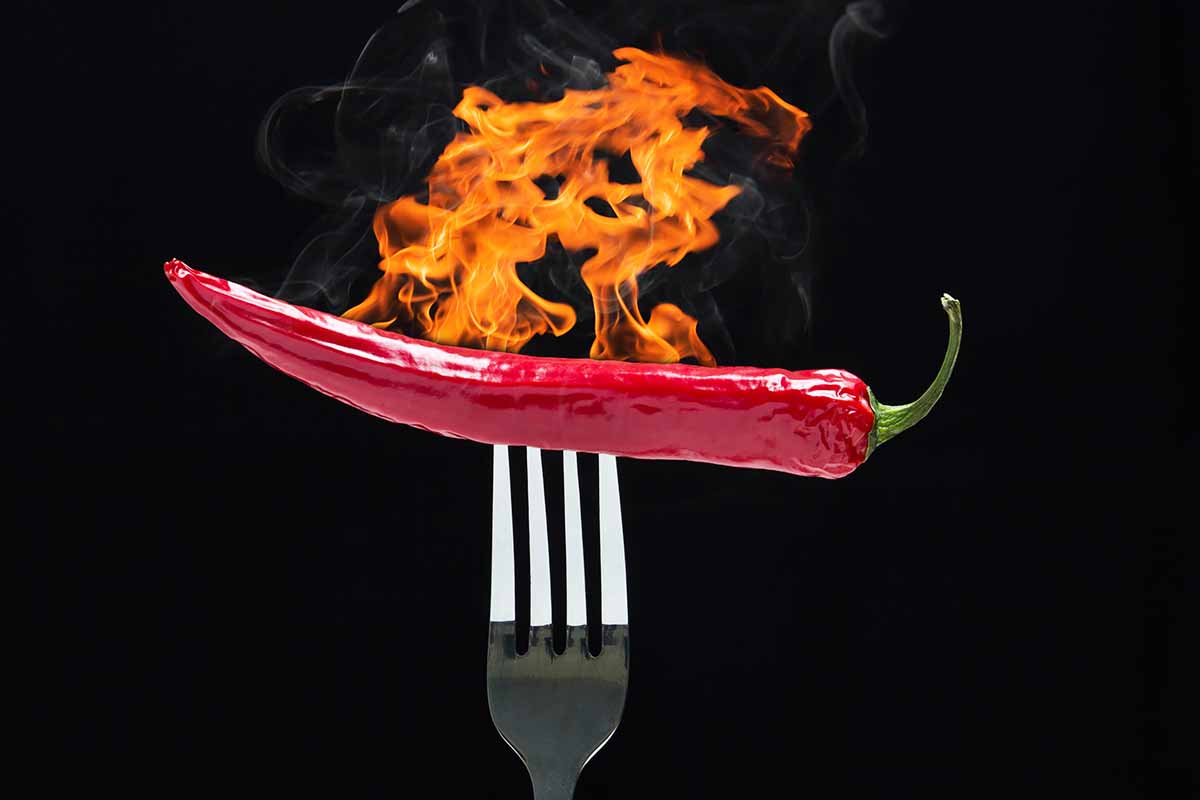
Hot peppers like chili and cayenne contain a chemical compound called capsaicin, whether they’re fresh or dried.
Capsaicin is responsible for most of the heat that you experience, especially that burning sensation when it contacts mucous membranes, like those inside your mouth.
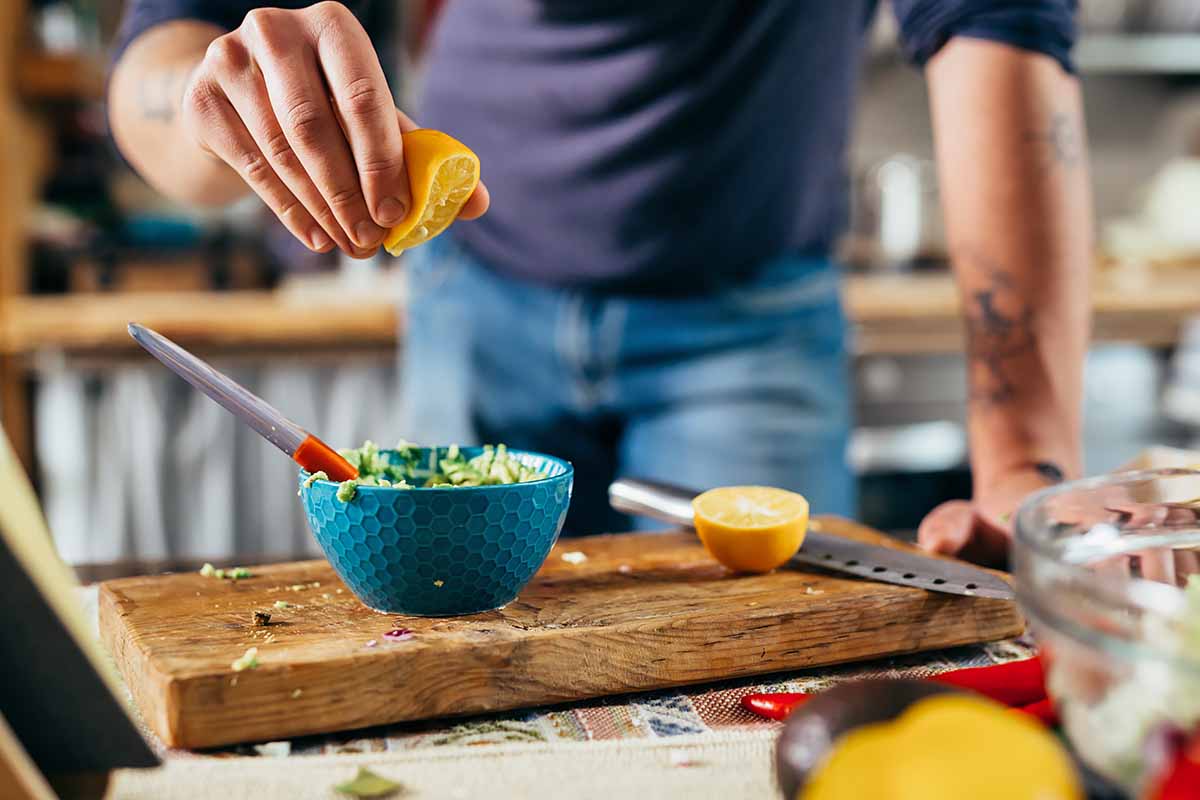
Since capsaicin is an alkaline, oil-based compound, its intensity may be offset with acids.
Acidic ingredients such as lemon or lime juice, vinegar, wine, tomatoes, and even pineapple will all help to neutralize the pH levels of a spicy oil, and reduce some of that flaming-hot flavor.
Add the freshly squeezed juice of half a lemon or lime, or a tablespoon or two of wine, vinegar, or tomato sauce, to your over-spiced dish.
Think strategically here, using an ingredient that will complement your dish without clashing too strongly.
For example, determine if white or red wine will be the better option – if cooking a meaty main like beef, a small splash of a robust red wine will do. For chicken, pork, fish, or vegetables, a white wine may be a better choice.
If you don’t want to introduce alcohol into the mix, chop up some fresh tomato or pineapple and add no more than 1/4 cup at a time.
Stir your choice of ingredient thoroughly into what you are making, and allow the flavors to cook and mingle for at least 10 minutes. Then taste and adjust further if necessary.
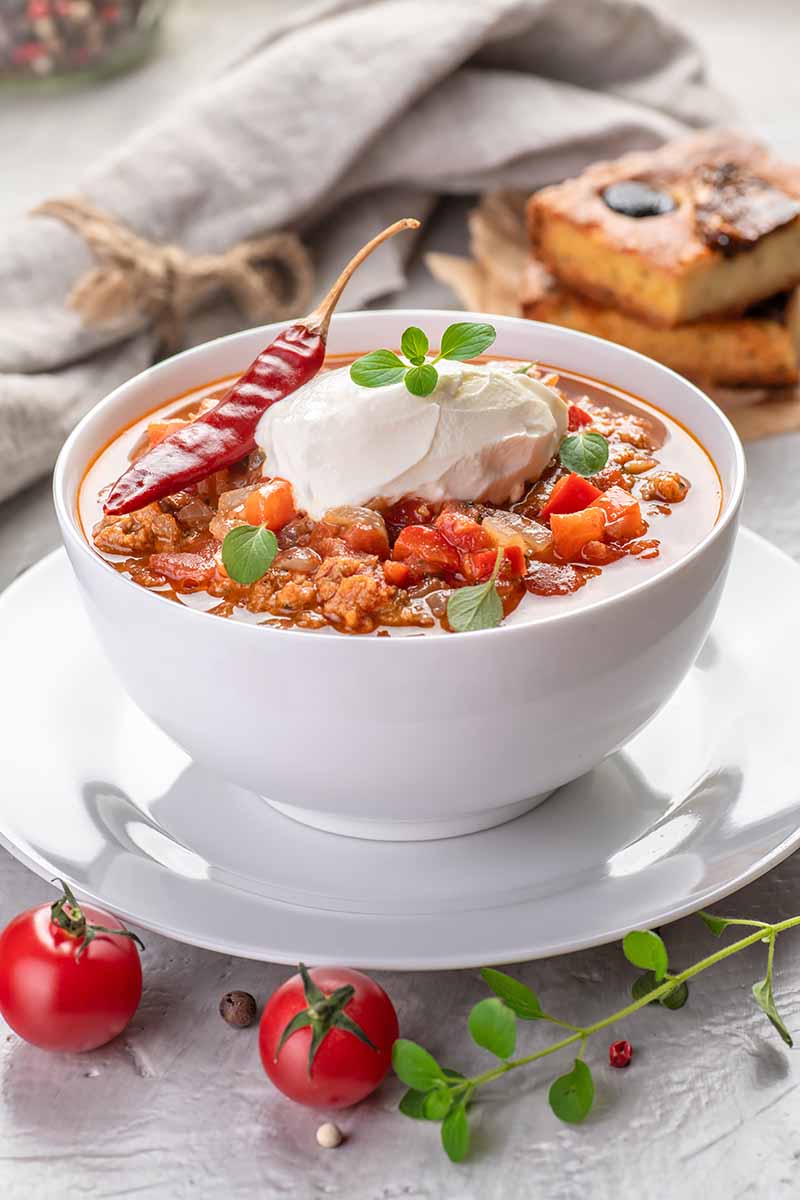
2. Stay Cool with Oil or Dairy
The intense heat of capsaicin can also be counteracted with a bit of vegetable oil, or various dairy products.
Dairy is actually another acidic option, with a few additional attributes not offered by the previously mentioned ingredients in Tip #1.
As capsaicin is oil soluble, the addition of a healthy oil like grapeseed, olive, or coconut will help to dissolve and dilute it.
Make sure to choose a neutral-tasting oil, or one with a flavor that will blend well with your dish. Then add just one teaspoon at a time very slowly, to retain the dish’s texture and consistency.
The oil in nut butters like peanut, almond, cashew, and sesame will also help to diffuse some of the heat, and these can be used instead of vegetable oil if the flavor of your dish will support the additional taste and texture of the nut butter.
Dishes such as pad Thai, spicy spring rolls, and stir fries are all good candidates for cooling down with a nut butter. Add small amounts while cooking, or use it to create a cooling dipping sauce served on the side.
Dairy products also help to counteract the burn of capsaicin. One reason is because of the presence of casein, a fat-loving protein that’s unique to dairy. It surrounds and binds with the heat-generating oil particles, and then disperses them.
Full-fat products are also the most effective, especially when served cold, as the fattiness and colder temperature helps to coat the mouth and provide a small yet immediate relief against the burning sensation.
Again, add these in small amounts until you notice some brief respite.
Butter, ghee, mayonnaise, cow’s milk, plain yogurt, cheese – particularly a soft, fresh cheese with a high fat content – and sour cream will all help to ease intense spiciness.
Take note that this will also make your sauce creamier, if you are choosing to directly whisk in one of these products! If this isn’t what you’re going for, try adding some grated cheese or a dollop of yogurt on top instead.
You can also offer yogurt or sour cream as a condiment or dip presented separately, allowing your dinner guests to adjust the flavors to their personal tastes.
A creamy Bavarian cheese dip or a bright and zippy garlic aioli are two flavorful options that may save the suffering mouths of many.
Serving shredded cheese and sour cream on the side of a big pot of spicy chili is always a great idea for feeding a crowd – even if you went a little crazy with the hot pepper.
3. Save the Day with Something Sweet
Sugars can also help to neutralize spicy heat, as they absorb oils and will change the flavor somewhat.
Add a little granulated sugar, agave nectar, maple syrup, freshly grated palm sugar, or honey to balance out flavors in a dish producing too much heat.

Only start with a teaspoon, and increase the sweetness level from that point to carefully monitor the flavor adjustments.
Stir well, then allow flavors to blend; after each addition, take a little taste to ensure your main course doesn’t end up tasting like dessert!
For certain dishes, it even makes sense to serve a sweetener as its own condiment – hot fried chicken or our crispy Jamaican jerk wings would taste fantastic with a generous drizzle of honey over them!
4. Double Up and Thin It Out
If you have enough time, and your pot is large enough, you can diffuse the flames by adding more of the main ingredients of the dish.
Minus the spices, of course!

Depending on what you’re cooking, this could mean adding more sauce, stock, vegetables, or meat.
If you don’t have more of the main ingredients on hand, adding a basic mirepoix will usually work – carrots, celery, and onions all make good additions for stretching and evening out flavors, as will grated potatoes or winter squash.
A final tip: if your sauce is no longer too spicy, but it’s become too thin with the addition of more water or another suitable liquid, boil and reduce the sauce again until the desired consistency is reached.
But be careful for how long you boil everything – the process of reducing liquids can again concentrate flavors if you go too far, ruining all of your repair work!
5. Negate Heat with Neutral Grains
Serving a side dish of neutral-flavored grains can also help to temper over-spiciness.
This will be the most effective if you choose a side that does not include any additional flavors, other than some salt.
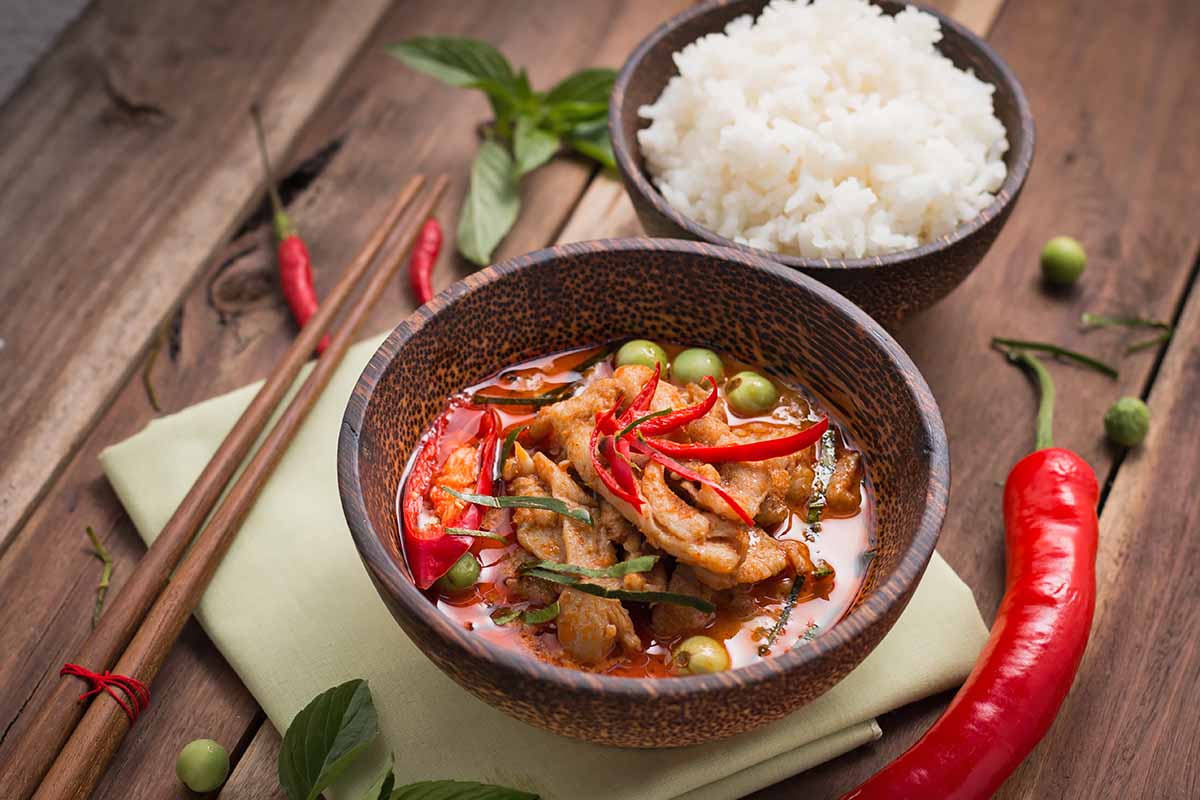
Serve your main course over a bed of rice, pasta, couscous, or quinoa to nullify spicy flavors. You can also offer a selection of breads to absorb the burn.
If you’re an avid baker, serve dinner with slices from a freshly baked homemade loaf, such as our soft and fluffy old-fashioned white bread or a heartier sourdough bread. The acidic sourdough will also be a helpful flame tamer!
For a quick fix, we have plenty of tutorials for cooking various ingredients in the electric pressure cooker. As a start, review our tutorials for cooking rice and pasta.
A Pinch of Prevention
For future dishes, what’s one of the most successful techniques to avoid the predicament of a dish that’s too spicy to serve?
Add spices only in small portions, and taste as you go.
This is particularly true for recipes that are simmered low and slow.
The longer a dish is cooked, the more liquid will evaporate, and – this really cannot be emphasized enough – it will concentrate flavors and their intensity.
Forgetting to taste as you cook is one of the most common cooking mistakes. Treat hot spices as you would salt, and remember to continually taste throughout the process.
If you’re nervous, the safest method is to use only half the recipe’s amount at the start. Then, judiciously add the remaining quantity in small portions as time and flavors progress, until it’s just right.
The Heat Is Off
There’s a solution to every cooking dilemma, and it’s good to know you can back away from the fiery inferno of a too-spicy dish with any of the above cooking hacks.
Of course, the best method is to try not go overboard in the first place!
Remember: add your spices slowly, and taste as you go for the best results.
If you have any favorite tricks for taming the intensity of hot spices, share your secrets in the comment section below – it’s good cooking karma!
And make sure to check out all of our culinary advice, tips, and techniques. Here are three other articles that will surely help you when you need to solve more common kitchen problems:
- Too Much Salt in the Stew: What to Do?
- Out of Oil? Bake Anyway with Creative Substitutes
- 7 Sweet Sensations to Make with a Cake That Didn’t Rise
© Ask the Experts, LLC. ALL RIGHTS RESERVED. See our TOS for more details. Uncredited photos via Shutterstock. Originally published October 3, 2016. Last updated on January 7, 2024.
About Lorna Kring
Recently retired as a costume specialist in the TV and film industry, Lorna now enjoys blogging on contemporary lifestyle themes. A bit daft about the garden, she’s particularly obsessed with organic tomatoes and herbs, and delights in breaking bread with family and friends.
Well, these are good ideas. I have tried drinking some milk after eating something too hot, but adding some to the dish is certainly a wise choice. I’ll have to give that a try next time.
I didn’t know about any of these other tricks, but I will certainly keep them in mind. I especially like the idea of adding some citrus. That usually adds a nice flavor anyway. These idea kills two birds with one stone. I’ll have to give the others some thought as well.
Very good advice. It took me a while to learn about how things cook down and how that changes the flavor.
So true Zyni, learning how to gauge how foods concentrate does take a bit of experience… thanks for your thoughts!
Thank you for these dish saving tips! I was ready to throw it out. I love your set up of this web page. Normally, I have to forge thru a long story about the “producer” b4 the actual recipe or tip. Very nicely done & considerate of the reader!!
Some of my best curries have been made by adding lime, honey, butter beans, cream/ coconut cream and peas to chicken (thigh) and chickpea curry that was too spicy!
Yea I saved my fiery hot jambalaya ! Added GHEE, coconut milk and chicken broth to taste. And now it’s perfect. Thanks for these great tip ????????????????????
I always used sugar to wash my hands after cutting up hot peppers. It would be smart to wear gloves but I don’t do well working with them.
THE Sesame OIL was perfect to reduce the heat in the Steak Chili!!! You don’t much, about a 1\2 A Teaspoon at a time helped a lot. Thank you.
Tomato or lemon juice? That’s a good idea, especially for Indian foods, which already use these. That’s also a good idea for turning down the spiciness of salsa. I often add yogurt or ghee to help with the spiciness, or sometimes I serve the meal with a drink with milk in it, like Thai iced tea or a lassi. I didn’t know about using nut butters, but that would explain why Thai dishes often use peanut sauce. A lot of people think that bread can help, but I’ve found that it really doesn’t, unless it’s something like naan that is already coated with butter, and then it’s mostly that.
I do have a funny spice story. When I was first learning to make Thai food, I bought one of those little glass jars of green curry paste. I thought you were supposed to add the entire thing to the curry, which I did with one can of coconut milk, and served that and vegetables over rice. It was so spicy that no one could eat it, not even with a glass of milk. I learned my lesson after that time, and I make sure to add curry paste a teaspoon at a time (or less) and taste it often.
Oh yes, you are going to want to read your directions before portioning things out, and that is a good one, but sorry to hear that it was a little bit at your expense. I am pretty sure I have caught myself a couple of times about to do something like this….you gotta be careful.
Ooh, that would have been one hot dish HK – thanks for sharing a tough lesson!
Thanks for the funny story.
My dinner tonight was so
Spicy ???? i was on fire ???? after one bite glad I didn’t have
Company ????
My grandmother used to add a couple of potatoes to anything that was way too hot, allow them to cook and then take them out. She reckoned they absorbed the spiciness. I’m not sure whether it worked for her – I’ve always liked spicy food, so the original dish usually tasted just fine to me.
I’ve seen some other people use potatoes this way too. I’ve personally never felt any change in the dish from before the addition of the potatoes. It’s likely a placebo for them.
As far as I can tell Sue, starches like potatoes and bread don’t absorb or disperse hot oils – but they do thin out a recipe, and may provide a bit of relief that way.
My grandmother used potatoes in over salted dishes, to absorb some of the salt!
I will try this. P.S. Are you by any chance from Holgate, Ohio?
This article is definitely a good guide for any cook. I used to love eating spicy food but I became sick a few months ago and ever since then whenever I eat anything spicy, my nose begins running. Most of the recipes I use have tons of spices and I forget to change them so I end up having to sit through the meal with my nose running.
Some spices certainly loosen up the sinuses Wheezybz – you might try switching them up to see if that will help to check your runny nose in check!
Great options, as long as people are not dumb enough to use water. 😛
Water’s kind of instinctive for heat, but not very effective at toning it down… thanks Ole!
Wow my Butternut Squash soup was way too spicy. I came here from a google search.
How to cool a spicy soup:
You said cheese, so I had some shredded Colby and Monterey Jack. I added half the bag (4 oz.) and the heat came down. Added the rest, and it was just right- but now it’s too thick. So I added a second cup of lactose-free milk. The soup turned out GREAT. Thanks for the cheese hint.
Eating a banana after eating tooo spicy chili will help people who cannot take the heat ????
Great suggestion, Kerry- I’ll have to try this!
Chili too hot? Stir in a tin of baked beans.
I made chilli tonight and it’s blown my head off! I like hot food, but this was off the scale. I actually make my chilli with baked beans anyway, so don’t want to add more as it may become too ‘beany’
If you’re making an Indian or Thai dish, I notice that coconut milk tones the heat down while adding a smooth creamy texture. Also, brown/palm sugar is a great substitute to white sugar if you’re thinking of reducing spiciness without a striking sweet taste.
Not sure Lorna, “where” my previous comment will be posted, because I inadvertently posted it as a “reply” to someone else’s comments about their experience with over seasoning. Just wanted you to know that I appreciate you posting your “tips” first, then your personal info, (which was quite interesting). Normally, I have to forge thru the “producer’s” cooking history, a boring drawn out story, or their blog, before getting to the actual recipe!
Very nice set up of your page & considerate of the reader.
Thank you for your suggestions. How I could cool down my chili that I actually made too spicy?
A common problem that I’ve faced myself! Rather than cooling down the chili itself, one option would be to serve with with dairy such as sour cream or yogurt to tone down the spice factor. Serving it on top of rice or another starch like pasta or potatoes can also help.
Your suggestions have saved our dinner! The recipe called for ras el hanout and harissa and obviously eyeballing the amounts was a huge mistake!! I added 1/2 cup pineapple juice, then a can of coconut milk and finally cashew butter. It now tastes wonderful. I think it’s even better with the additions than the original recipe! Thank you for saving the day.
I came here after buying a jar of kim chi for the first time hoping it would be mild. It wasn’t. I drizzled some lime and lemon juice into it and it worked! Toned it down enough for me to eat and enjoy. I’m also going to add a bit of brown sugar to the jar.
How is adding acidic things to already acidic spicy food going to ‘neutralise’ it? Neutralising means adding alkalis to acids or adding acids to alkalis in order to achieve a pH closer to 7.
Thanks for your comment – this is true! The term is used more loosely here to refer to the experience of flavor rather than a chemical change regarding pH value.
The article states, “ Since capsaicin is an alkaline oil, its intensity may be offset with cooking acids.”
At the price of food today we can not waste!! Thanks for all the tips, they will go in the recipe book I am making for myself of my favorite meals, sweets, and tips I find.
The can of tomatoes I chose from my pantry said tomatoes with green chilis – I thought it meant those mild green chilis we put in guacamole so I put them in my soup. Too hot. I then read the label on the can – jalapeño peppers. So people, read the ingredients on the label.
Thanks for all the tips we get from all the cooks and we can’t forget google to get us through all the mistakes we make in our cooking!!
I just google put in my question and there it was my answer on this site,
chop some cabbage and dash it over the spicy rice to add a space to spice.
I recently discovered the amazing flavor of Chipotles in Adobo sauce. As soon as I open the package and smell that aroma, I go nuts. Twice, now, however, I have chopped up two chilis and used a little of the sauce in a large batch of chili, and it’s been too much. I want to taste the flavor, but the spice is over the top.
Well, after reading the article, I decided to try a little red wine vinegar. Maybe 2 teaspoons, and it cut down the spice beautifully. Lemon juice might have been too bright, but the principle of using acid definitely worked!
We’re so glad the article was helpful! You might like to try experimenting with different types of peppers as well. Dried ground ancho chili peppers are a nice option to add to chili for that hint of smoky pepper flavor without the heat.
Thanks so much for the tips. I made a potful of black-eyed peas today and I only used one regular jalapeño, (normally I use 2-3 for a big pot), and I could not believe the heat! Maybe I am becoming a weenie. Lol.
Heat levels can actually vary quite a bit from one jalapeno to the next, and this depends on a lot of factors – like age when it was picked, thickness of the spicy interior where the capsaicin is produced (aka the placenta), amount of water and temperatures while it was growing, etc. Jalapenos can range from a mild 2,500 Scoville units up to a spicy 8,000 or so. So it may not be you! Hope we were able to help you to turn down the heat a bit. Enjoy the black-eyed peas!
For chili or red beans and rice, try molasses, starting with a teaspoon. Apple cider vinegar seems to go with these two dishes’ flavor notes, too.
All delicious ideas! Thanks, Julie!
I do add a sprinkle of baking soda til it is easy to eat without burning my mouth!