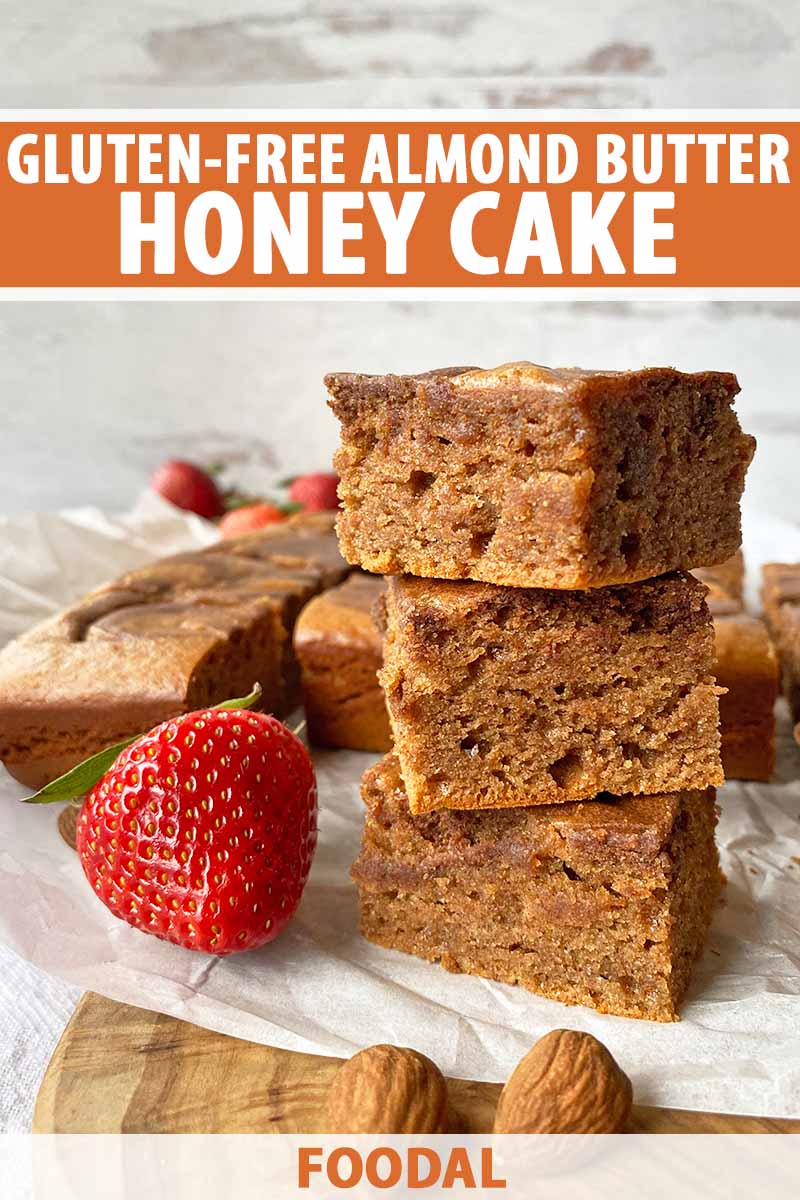
If you ever need an excuse to buy the BIG jar of almond butter, here it is: our gluten-free honey almond butter cake!
Do any of you have this weird internal struggle when you’re grocery shopping and trying to decide what size product to buy?
Like a low-key sense of silent dread when you’re figuring out if you should go for the gallon-size milk versus the quart size? Or the big bag of baby carrots instead of the little bag?
It’s not a life-changing decision to go for the 18-count carton of eggs instead of the usual dozen. Of course it’s not that important. It’s just your weekly trip to do the grocery shopping, right?
But still…
In your mind, you develop a bizarre sense of drama and doom in those final few seconds of making the choice:
Your hand hovers over Product #1, then Product #2, then back to Product #1. Then finally you reach the decision, and resolutely put Product #1 in your cart.
But then go back eight minutes later and grab Product #2 instead.
And I don’t even have to mention the inner dialogue you have with yourself in the checkout lane, second-guessing everything, but knowing it’s too late. You know it’s far too late to do anything now, looking on as the cashier starts bagging everything.
Anxiety is real, my friends. So real.
But here is at least one product that you can confidently have 100% certainty to go big on: almond butter!
While I love it thickly spread on my toast with apple slices and hemp seeds in the mornings, I am currently using it as the base for my gluten-free honey almond butter cake!
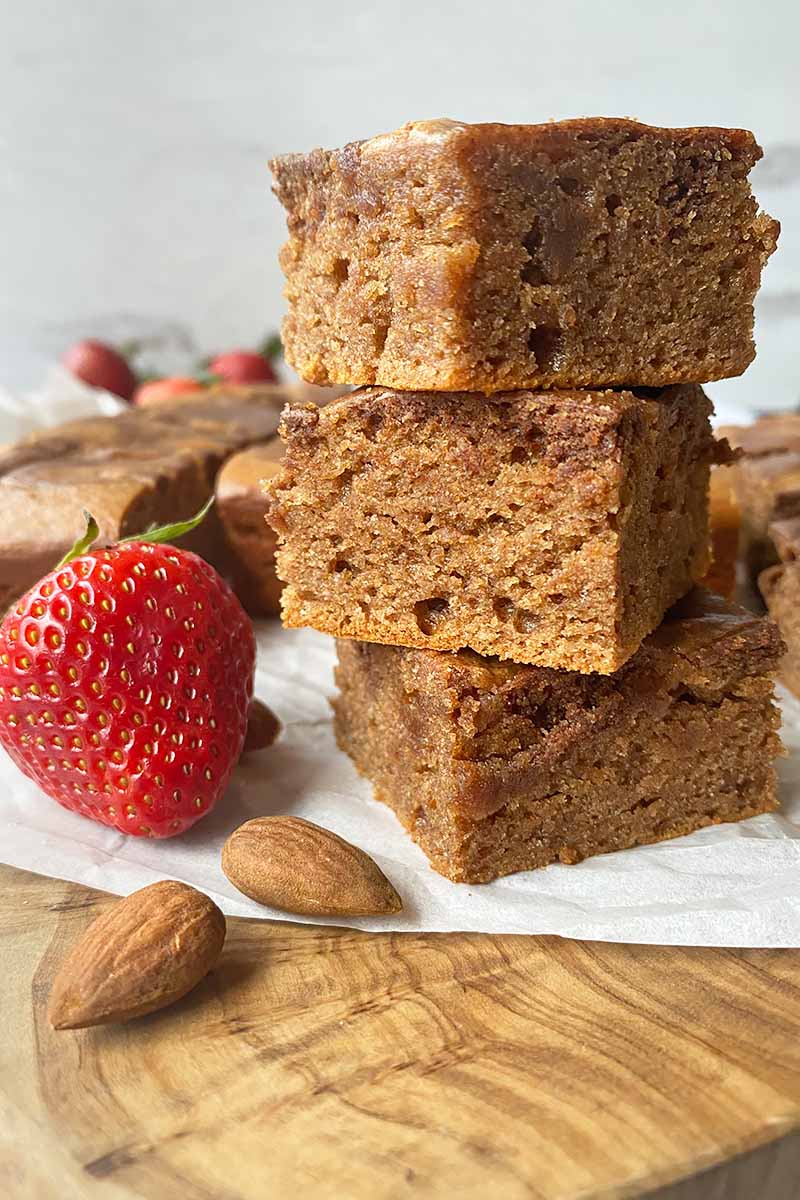
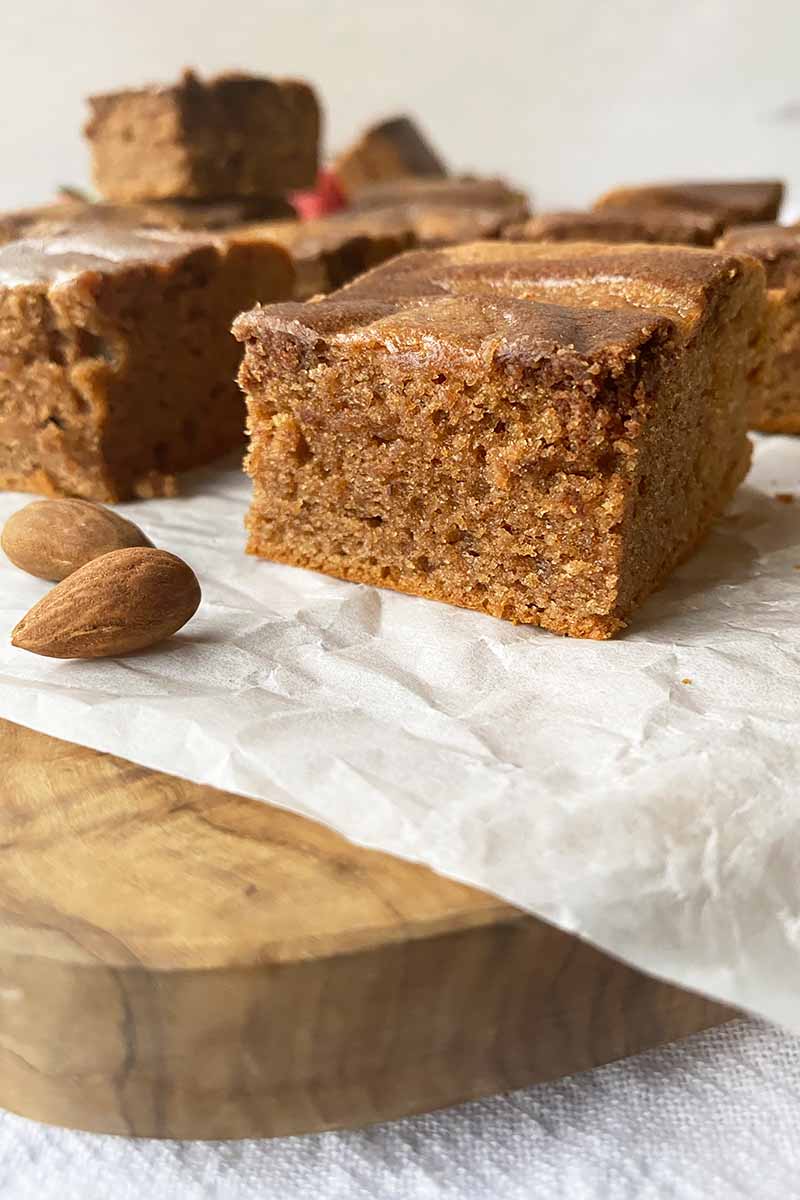
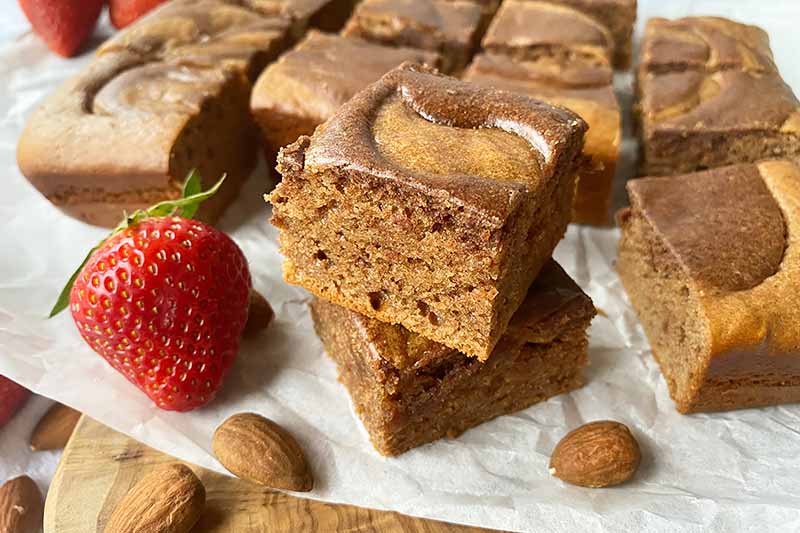
I like to refer to this wholesome sweet treat as a “snack cake,” since it does not have to be confined to dessert territory only.
It’s delicious as a sweet breakfast, a hearty snack, and as a healthier dessert.
I’ll take any chance I get to enjoy it whenever I can!
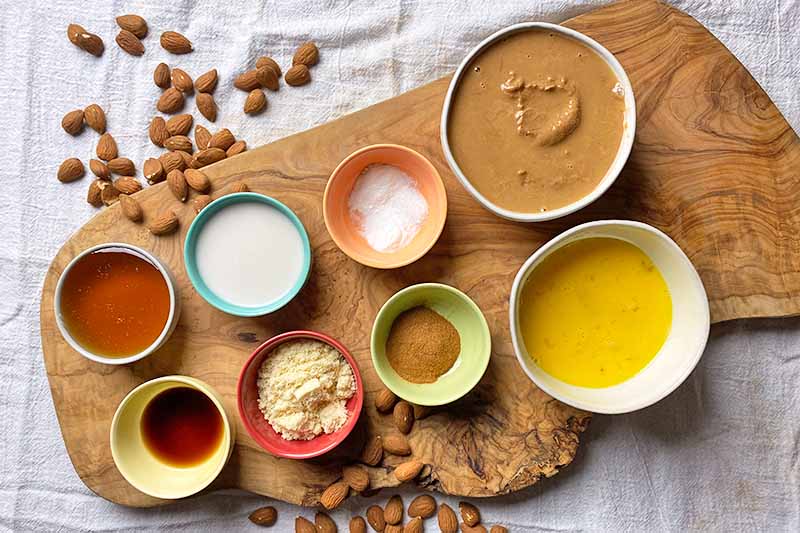
I make the gluten-free batter with a simple mix of creamy almond butter, almond flour, honey, vanilla, salt, and eggs. A little bit of chemical leaveners help to give it some fluffy rise.
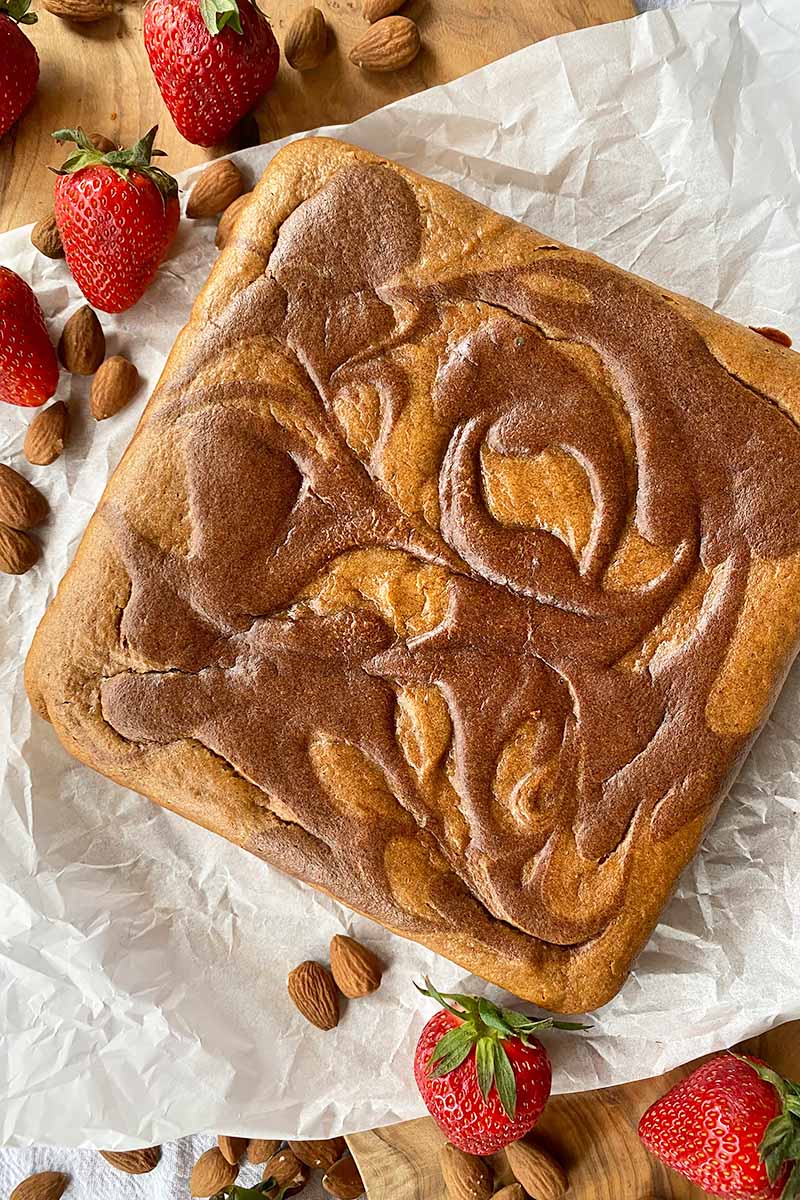
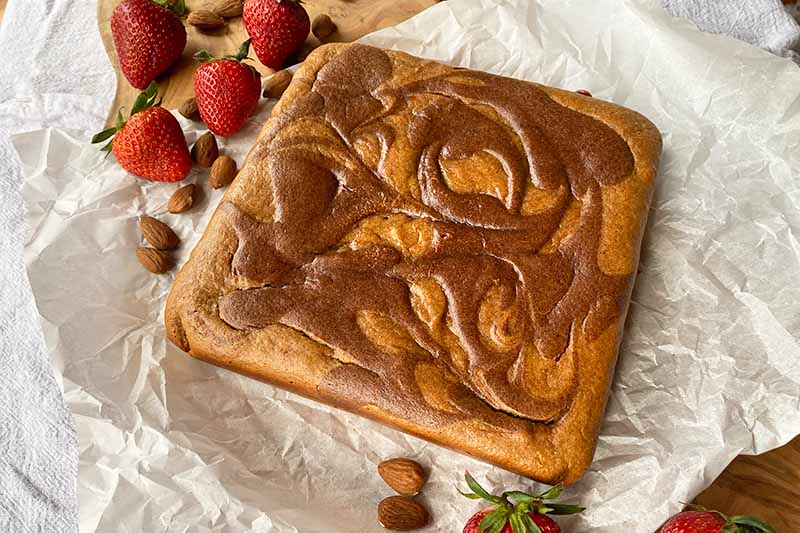
I like to swirl dollops of some reserved batter mixed with cinnamon for a small touch of warming aromas and flavors.
You’ll love these sweet and moist morsels so much, you might even consider buying TWO large jars of almond butter the next time you’re at the grocery store.
Away with you, anxiety – go big, or go home!
Print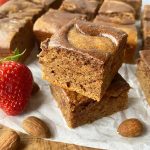
Gluten-Free Almond Butter Honey Cake
- Total Time: 35 minutes
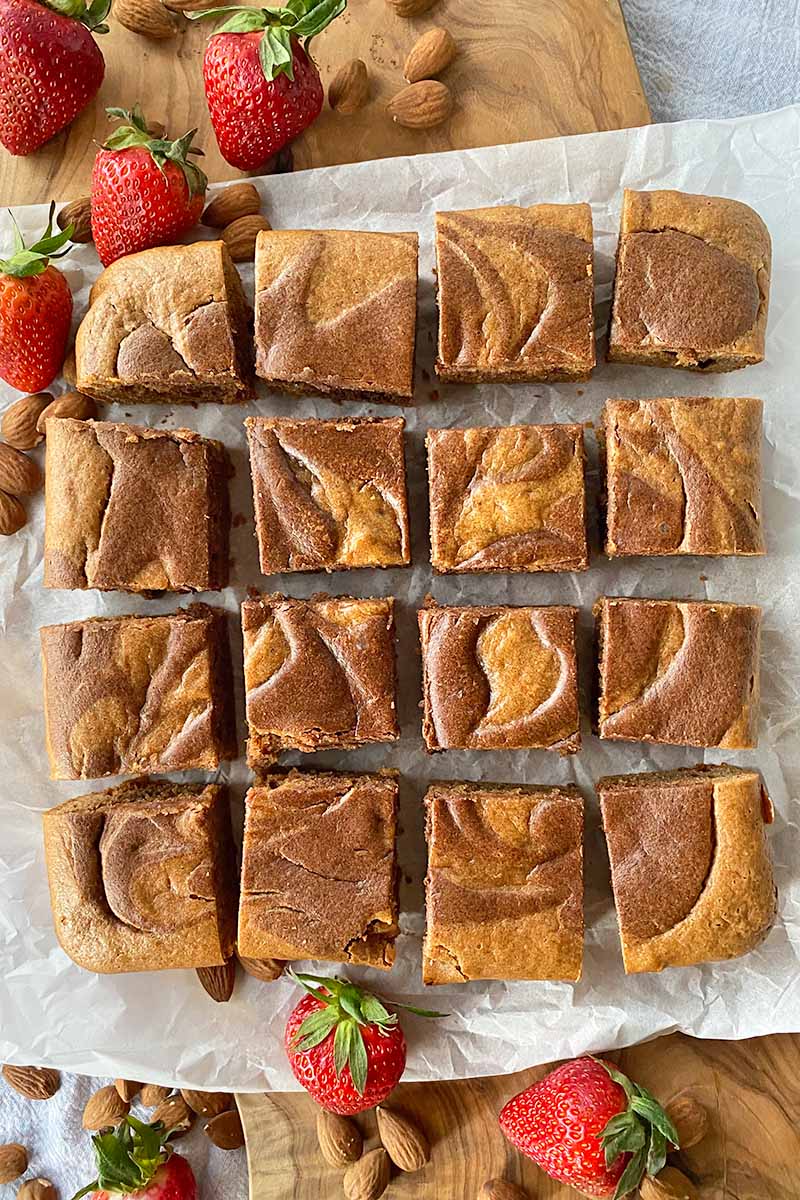
- Yield: 16 small squares (16 servings) 1x
Description
A cake you can eat as a snack? Perfect. Our moist gluten-free honey almond butter cake is a healthier option for those sweet snack cravings. Read more now.
Ingredients
- 2 tablespoons almond flour
- 1/2 teaspoon baking soda
- 1/2 teaspoon baking powder
- 1/4 teaspoon salt
- 1 1/4 cups (about 12 ounces) creamy plain almond butter
- 1/3 cup honey
- 1/4 cup plus 1 tablespoon almond milk, divided
- 2 large eggs, lightly beaten
- 1 teaspoon vanilla
- 1/2 tablespoon cinnamon (optional)
Instructions
- Preheat the oven to 325°F. Line an 8-by-8-inch square baking pan with parchment paper, leaving an overhang on two sides. Lightly coat the bottom and sides with nonstick cooking spray.
- In the bowl of a stand mixer, whisk together the almond flour, baking soda, baking powder, and salt by hand.
- Add the almond butter, honey, 1/4 cup almond milk, eggs, and vanilla to the bowl. Attach the bowl to the stand mixer, fitted with the paddle attachment. Mix on medium speed until a smooth and thick batter forms, about 5 minutes. Scrape down the sides and bottom of the bowl with a spatula and mix again for 30 seconds.
- If you want to add a cinnamon swirl, set aside 1/4 cup of batter in a small bowl. Pour the remaining cake batter into the prepared pan.
- Using a spatula, mix the reserved cake batter with 1 tablespoon almond milk and cinnamon. Randomly dollop the cinnamon batter on top of the batter in the pan. Use a butter knife to lightly swirl the dollops throughout the batter.
- Bake for 20-25 minutes, until the cake is firm and a toothpick inserted into the center comes out clean, or with a few moist crumbs clinging to it.
- Remove from the oven and let cool in the pan for 20 minutes before lifting the paper and removing from the pan to cool completely on a cooking rack.
- Prep Time: 10 minutes
- Cook Time: 25 minutes
- Category: Gluten Free
- Method: Baking
- Cuisine: Cake
Cooking by the Numbers…
Step 1 – Prep
Preheat the oven to 325°F. Line an 8-by-8-inch square baking pan with parchment paper, leaving an overhang on two sides. The overhang helps to lift the cake cleanly out of the pan.
Spray the bottom and sides with nonstick cooking spray.
Measure out all of the ingredients for the cake. Divide the milk into measurements of 1/4 cup and 1 tablespoon. Lightly beat the eggs in a small bowl.
Step 2 – Mix Dry Ingredients
In the bowl of a stand mixer, whisk together the almond flour, baking soda, baking powder, and salt by hand.
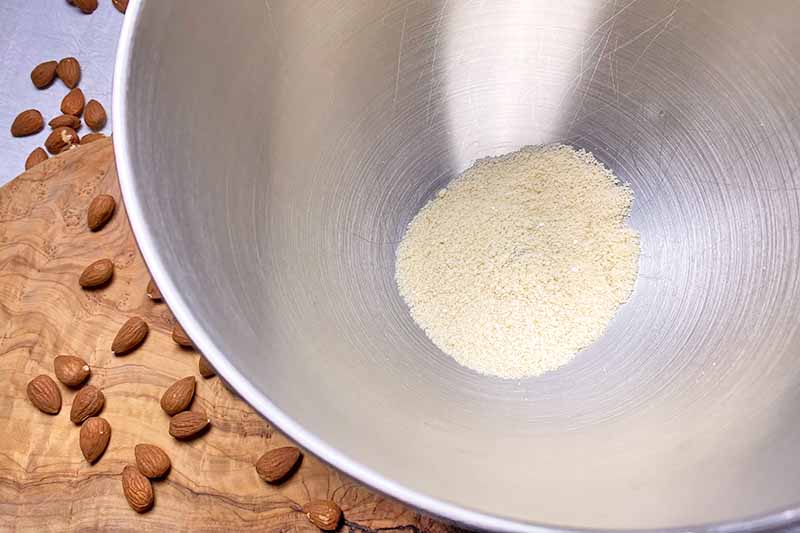
You can also mix the batter completely by hand. However, because almond butter may vary in thickness, it will be easier to mix the ingredients together in an electric mixer.
Step 3 – Add Wet Ingredients
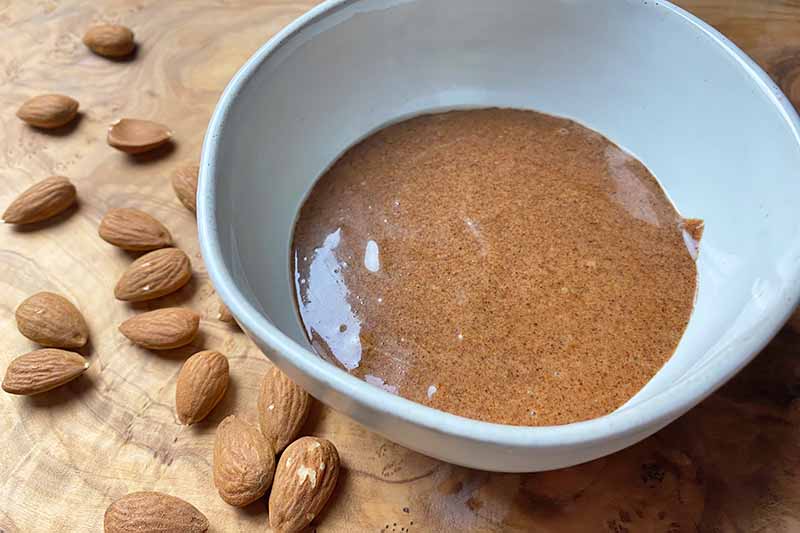
Add the almond butter, honey, 1/4 cup almond milk, beaten eggs, and vanilla extract to the bowl.
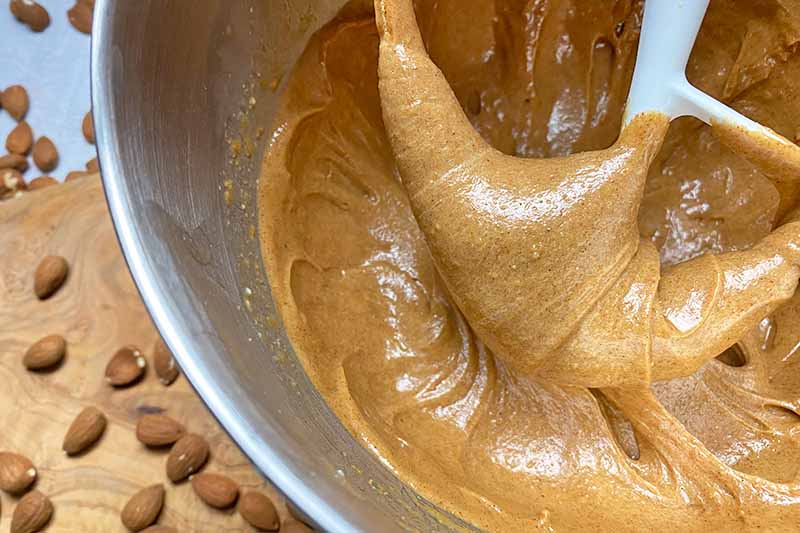
Attach the bowl to the stand mixer, fitted with the paddle attachment. Mix on medium speed until a smooth batter forms, for about 5 minutes.
The mixture will be very thick and sticky, similar to a brownie batter.
To ensure that all of the ingredients are fully incorporated, scrape down the sides and bottom of the bowl with a spatula and mix the batter again for 30 seconds.
Avoiding honey, or maybe you just ran out? You can substitute the honey with an equal amount of other liquid sweeteners like maple syrup or agave nectar.
Step 4 – Make Cinnamon Swirl
This step is completely optional. If you don’t want a cinnamon swirl, simply pour all of the batter into the pan and skip this step.
Before pouring the batter into the pan, measure out 1/4 cup and place it in a small bowl. Stir the cinnamon and 1 tablespoon milk into the reserved batter until completely incorporated.
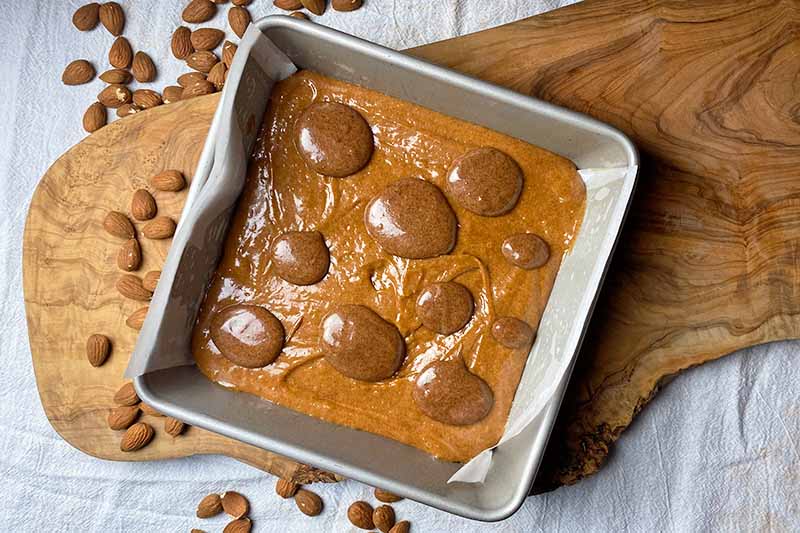
Add the remaining batter into the prepared pan.
Place dollops of the reserved cinnamon batter on top of the batter in the pan using a spoon or small cookie scoop. The dollops don’t have to be evenly sized or spaced.
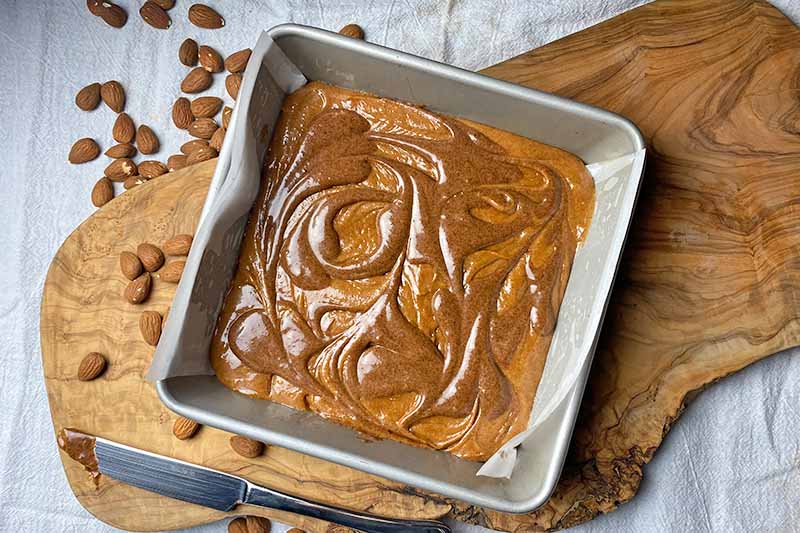
Use a butter knife to lightly drag the dollops through the batter. Swirl as much or as little as you like to create beautiful waves and swirls in the batter.
Step 5 – Bake
Transfer the pan to the oven. Bake for 25 to 30 minutes, until the cake is firm and a toothpick inserted into the center comes out clean, or with a few moist crumbs clinging to it.
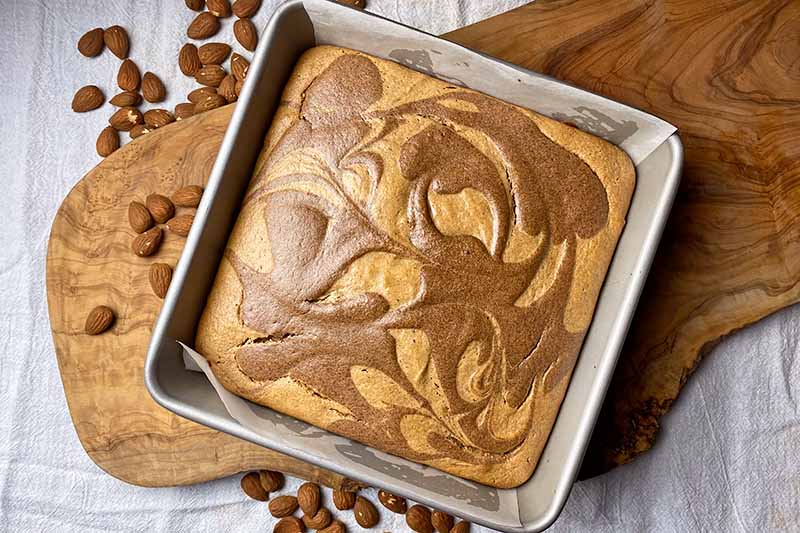
The cake will be golden brown in color, and will have risen slightly.
Step 6 – Cool and Serve
Remove from the oven and let cool in the pan for 20 minutes before lifting it from the pan by the paper sling that you created, and removing it to cool completely on a wire rack.
You can serve while it’s still slightly warm, or at room temperature.
Add Chocolate for a Taste of Decadence
Did someone say… chocolate?!
Me. It was totally me.
Instead of using cinnamon, try this recipe with delicious chocolate swirls instead! Substitute 1/2 tablespoon cocoa powder for the cinnamon in the reserved batter.
Oh, and I’ll give you a huge air-five if you want to mix a few handfuls of homemade chocolate chunks into the batter, too!
With chocolate or cinnamon (or maybe even both?!), this recipe is a wheat-free winner.
Do you have any fun recipes to share that use almond butter? It’s so much more than a simple spread! How do you like to use this creamy ingredient? Give us all the details in the comment section below.
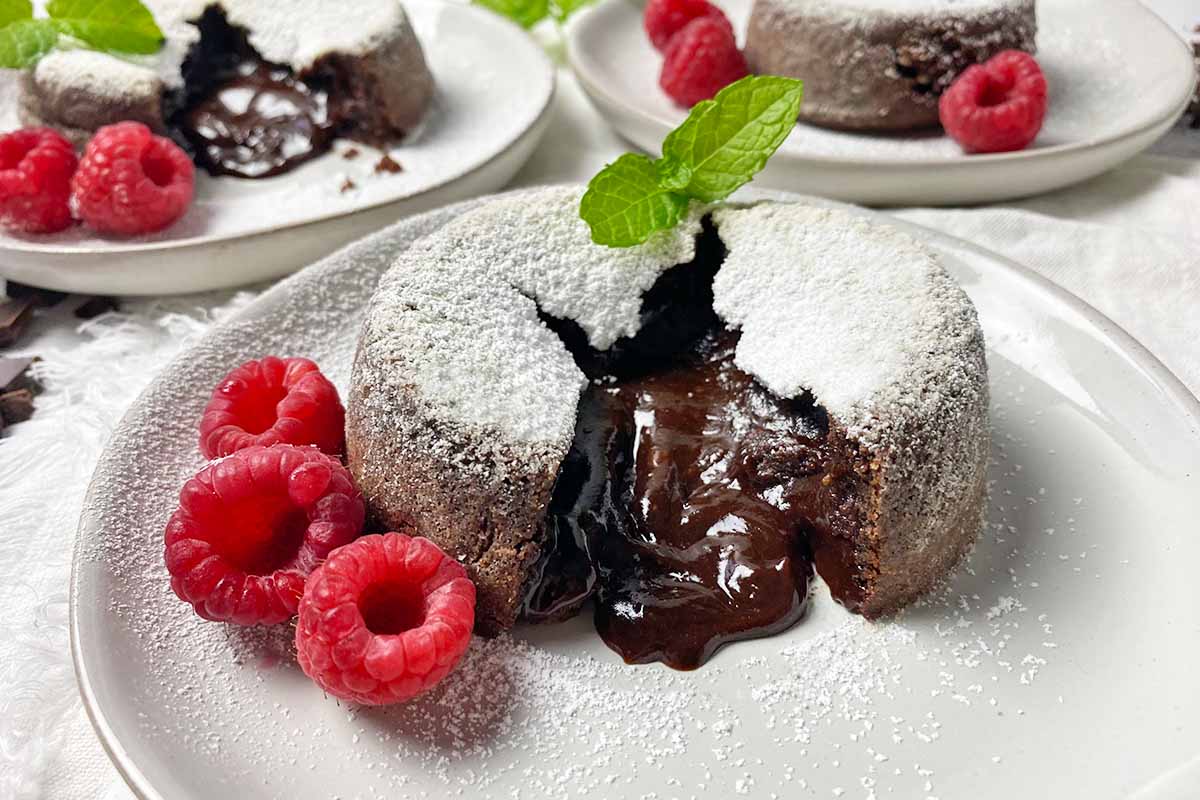
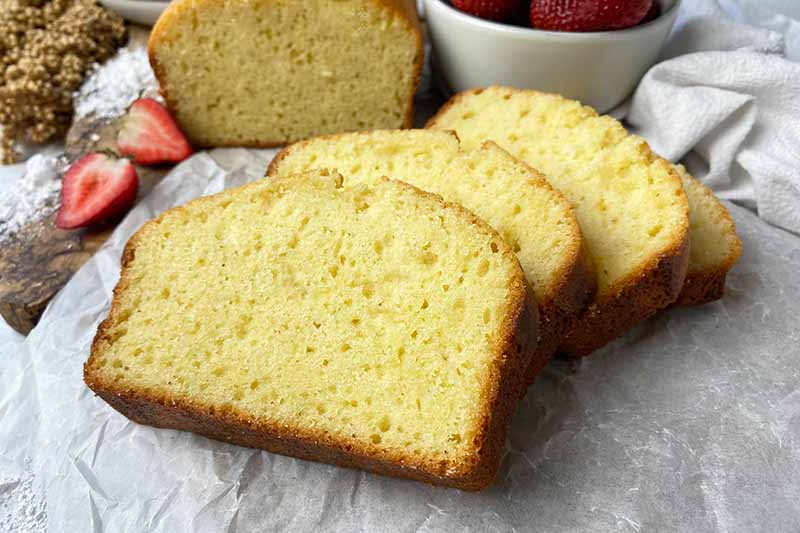
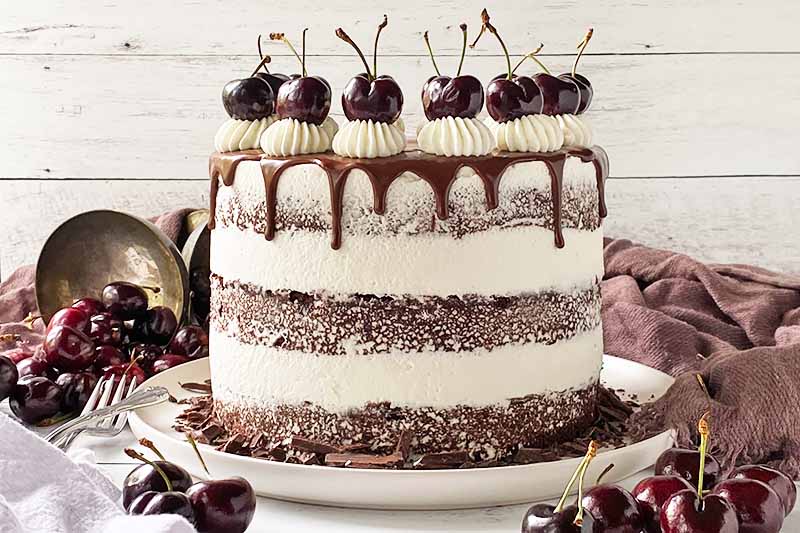
For more gluten-free recipes that will satisfy a sweet tooth, let these three favorites inspire you to get right back in the kitchen:
Photos by Nikki Cervone, © Ask the Experts, LLC. ALL RIGHTS RESERVED. See our TOS for more details. Originally published by Shanna Mallon on June 9, 2013. Last updated on April 3, 2022.
Nutritional information derived from a database of known generic and branded foods and ingredients and was not compiled by a registered dietitian or submitted for lab testing. It should be viewed as an approximation.
About Nikki Cervone
Nikki Cervone is an ACS Certified Cheese Professional and cheesemonger living in Pittsburgh. Nikki holds an AAS in baking/pastry from Westmoreland County Community College, a BA in Communications from Duquesne University, and an MLA in Gastronomy from Boston University. When she's not nibbling on her favorite cheeses or testing a batch of cupcakes, Nikki enjoys a healthy dose of yoga, wine, hiking, singing in the shower, and chocolate. Lots of chocolate.