Summary
Beaver Builder and Divi are two of the best drag-and-drop page builder plugins for WordPress sites. It is easy to recommend both solutions, however an Elegant Themes membership that comes with Divi generally gives more value for money due to the other premium WordPress products that are included in the package.
Pros and Cons
Beaver Builder Pros
- A simple, user-friendly interface.
- Layouts, rows, and modules all load quickly.
- The quality of landing and content page templates is high.
- Every part of your layout can be saved for use later.
Beaver Builder Cons
- It costs significantly more to gain access to Beaver Builder Theme.
- Content modules are not as stylish as Divi Builder’s.
- Premade layouts look great, but there are not as many to choose from.
Divi Pros
- Includes a versatile frontend and backend page editor.
- A massive library of premade layouts and layout packs.
- Thousands of customization options are available within Divi Builder.
- An Elegant Themes membership offers great value for money.
Divi Cons
- Takes a little longer to learn how Divi Builder works.
- Divi requires more resources to run efficiently.
- Not quite as fast as Beaver Builder.
What You See Is What You Get (WYSIWYG) editors have been a staple in computing software since the 1970s, but in the WordPress world, we are seeing more and more website owners switch to drag-and-drop page builders to help them create stylish blog posts and professional pages.
This adoption has intensified since WordPress introduced the new block editor called Gutenberg in WordPress 5.0 in 2018. Of course, the Classic Editor is still available for those that prefer the old visual editor.
The block editor is free to use, boasts a user-friendly interface and has many useful content blocks available for selection.
I do love the simplicity of the WordPress block editor, but there is no denying that it is a basic solution. Its content blocks have few customization options and there is no built-in templating system. This greatly restricts what you can create.
If you are looking to take your website to the next level, I recommend using an advanced drag-and-drop page building solution such as Beaver Builder or Divi.
These responsive WordPress plugins give you greater control over how you style your blog posts, pages, and custom post types.
In this article, I would like to show you how these page building plugins compare to help you see which one is best for you and your projects.
A lite version of Beaver Builder is available on WordPress.org, but since the free version is missing many features, this article will instead focus on the complete version of Beaver Builder.
The Beaver Builder Interface
Beaver Builder is a frontend editor that can be launched from a few different areas in WordPress.
When you create a new blog post, page, or custom post type within the WordPress block editor, you will see an option to “Launch Beaver Builder” or “Use Standard Editor”.
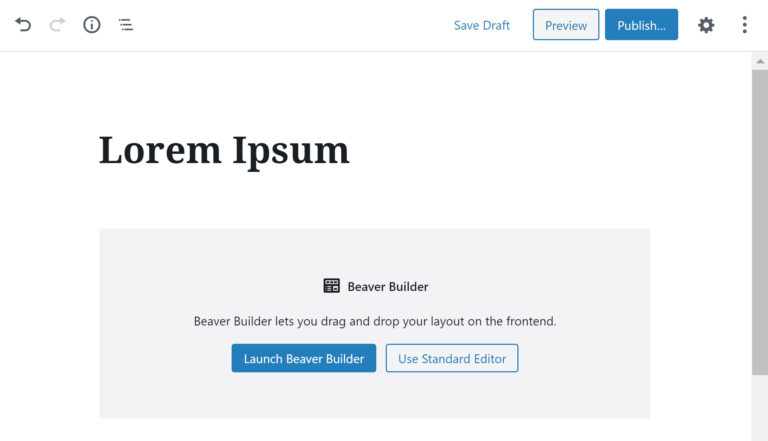
The ‘Launch Beaver Builder’ button is not automatically displayed in the Gutenberg editor. It only appears when you add a Beaver Builder block to your page.
If the Beaver Builder block is not available, check the Beaver Builder settings page to ensure that the corresponding post type is enabled.
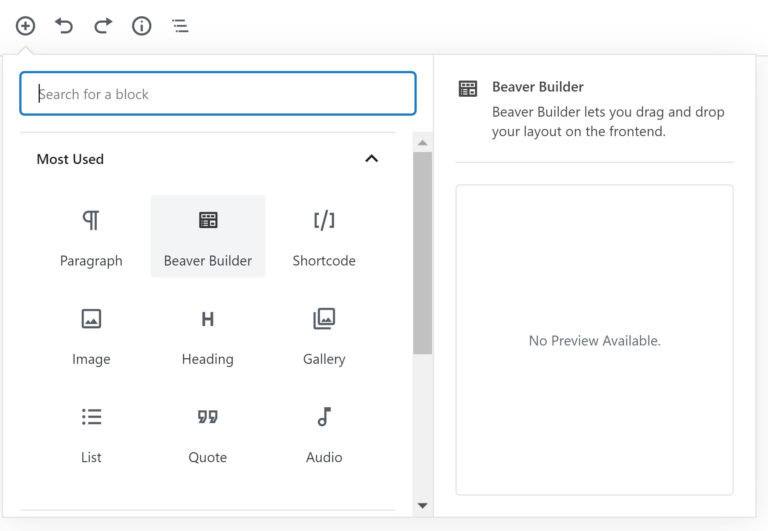
Beaver Builder can also be launched from the Classic Editor and the main listing page of posts, pages, and custom post types.
When logged in, you will see an option to modify a page in the WordPress admin bar too.

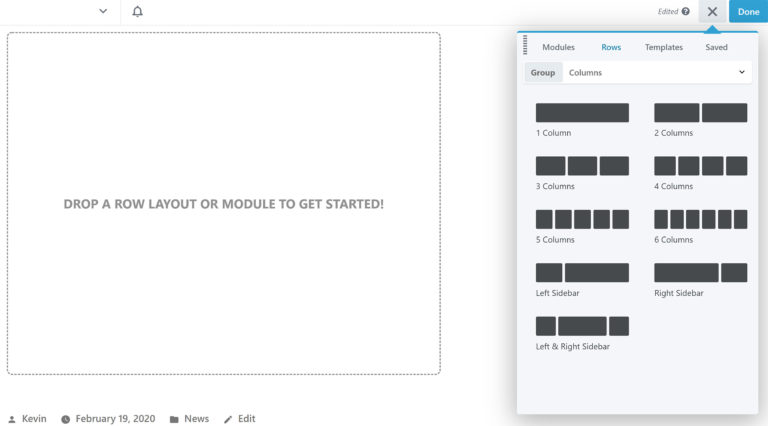
When Beaver Builder loads up, you will see a menu at the right-hand side that displays available modules. Tabs for rows, templates, and saved layouts are also displayed here.
Clicking on the X symbol above closes the menu, but you can reload the menu by clicking on the + symbol that now is displayed.
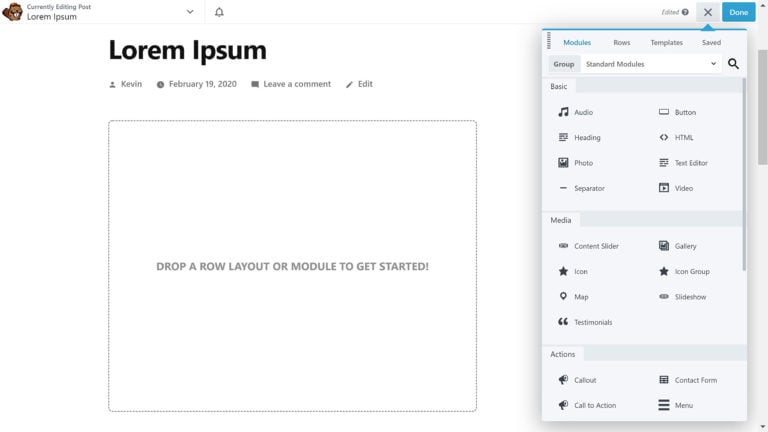
At the top-right hand side of the page, you will see a reminder that your page has been edited and has unpublished changes. If you click on the Done button, options will be displayed to let you discard your layout, save draft, or publish your layout.

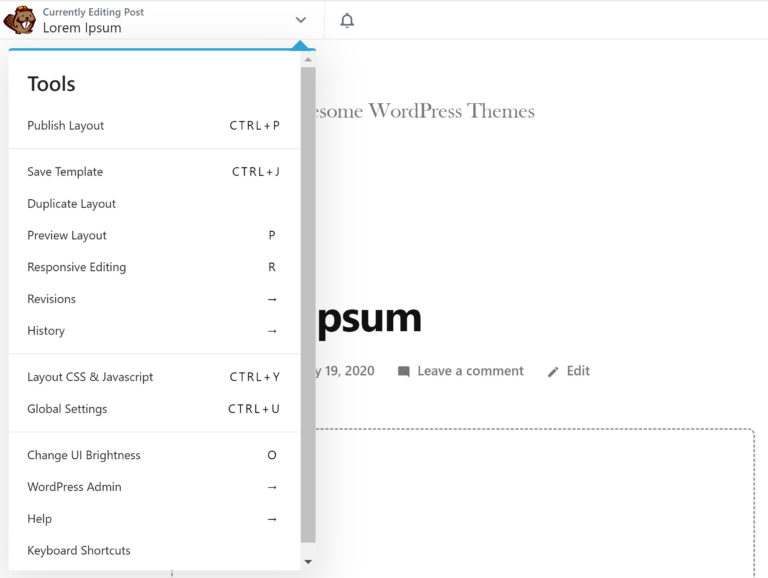
The top-left hand side of the page shows the post, page, or custom post type you are editing. Clicking on it will load the Beaver Builder tools menu.
There are a lot of settings and features tucked away into this menu.
From here, you can publish your layout, save the layout as a template, duplicate the layout, see all your revisions, check your edit history, and more.
Global settings and Javascript and CSS settings can be accessed from this menu too, and the bottom of the menu displays shortcuts to the WordPress admin area and support pages.
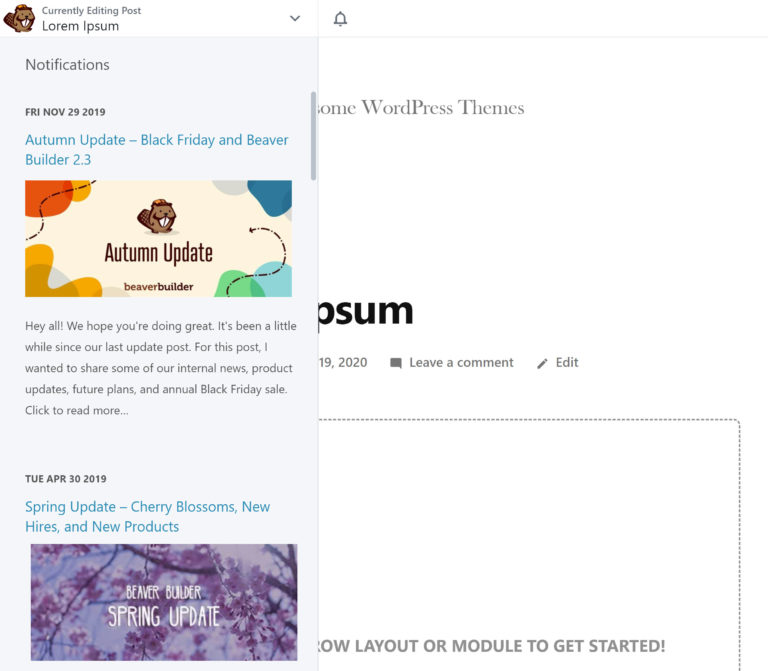
To the right of the tools menu is a notification bell which displays plugin updates and the latest posts from the Beaver Builder blog.
To add a new module or row into your layout, you simply drag and drop it into the main canvas area.
Several pre-configured column setups are available for rows together with saved column layouts, saved rows, and pre-built rows.
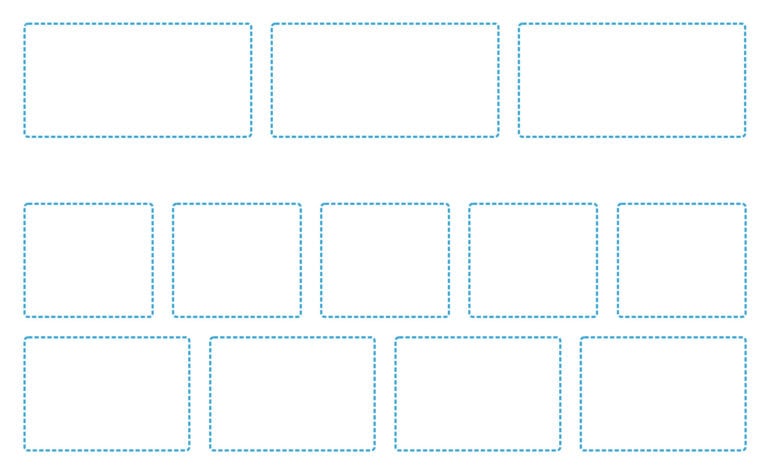
Once you have added new rows, an outline of the structure is displayed on your page. You can drag and drop a content module into any of these boxes.
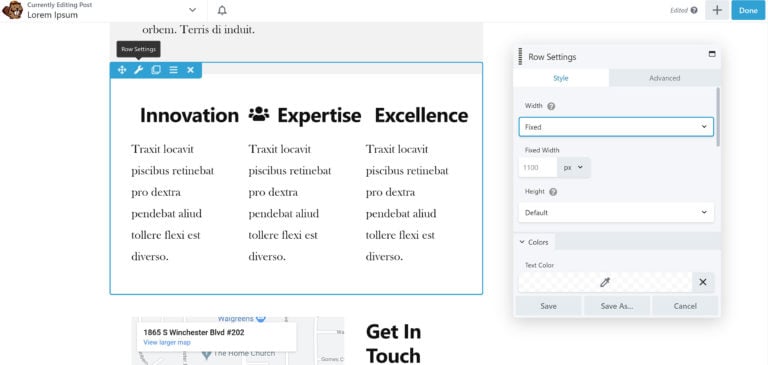
At the top-left hand side of rows and modules, you will see options for moving the element to another part of your layout. The row or module in question can also be duplicated or deleted from here.
Rows and columns have a settings button and an actions button that allows you to reset row and column widths.
Widths, colors, backgrounds, borders, and more, can be adjusted in the style tab of the settings box. In addition to margins and padding, the advanced tab allows you to restrict visibility to logged-in users and adjust the breakpoint for mobile users.
It takes a little time to familiarize yourself with any WordPress page builder, however Beaver Builder is undoubtedly one of the easiest solutions to pick up. It is also one of the fastest, with the changes you make loading almost instantly.
Beaver Builder allows you to style every aspect of your layout, but as you will see, Divi offers many more customization options when creating layouts.
The Divi Builder Interface
Elegant Themes use the word Divi to describe both their popular WordPress theme and drag-and-drop page builder.
This causes a little confusion among those who are new to Elegant Themes, which is why they sometimes distinguish the products by calling the design “Divi Theme” and the page builder “Divi Builder”.
For now, I would like to focus on Divi Builder. This page builder is incorporated into Divi Theme but is also available as a standalone WordPress plugin for those that want to use it with other WordPress themes.
Once Divi Builder is activated, you will see an option to “Use Divi Builder” when you add a new post, page, or custom post type.
This will launch the frontend visual builder, but a backend editor called Legacy Builder will be also available.
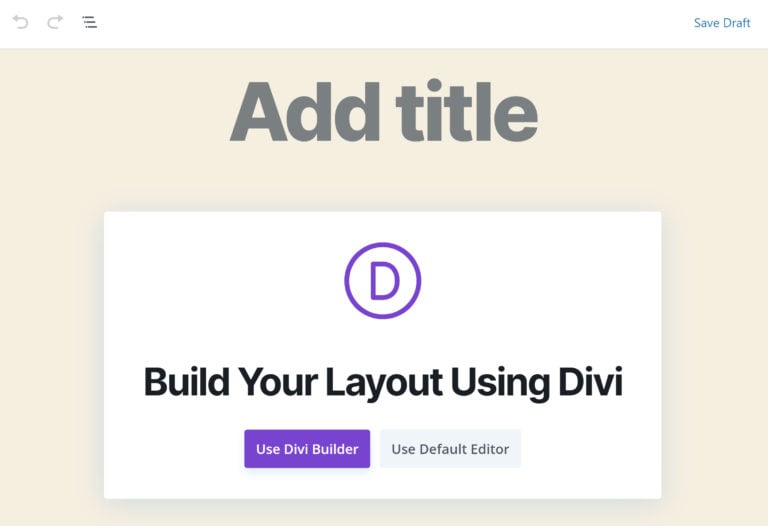
You can switch to Divi Builder at any time from the default WordPress block editor.
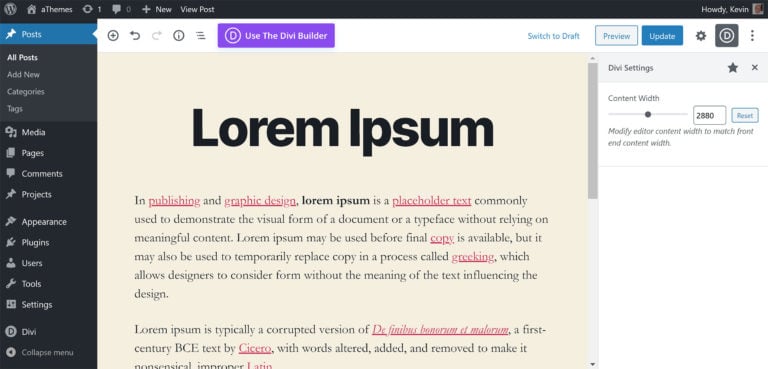
Divi Builder can also be launched from the main listing pages of posts, pages, and custom post types.
Like Beaver Builder, if you are logged in, you will see an option to enable Divi Builder from the WordPress admin bar.

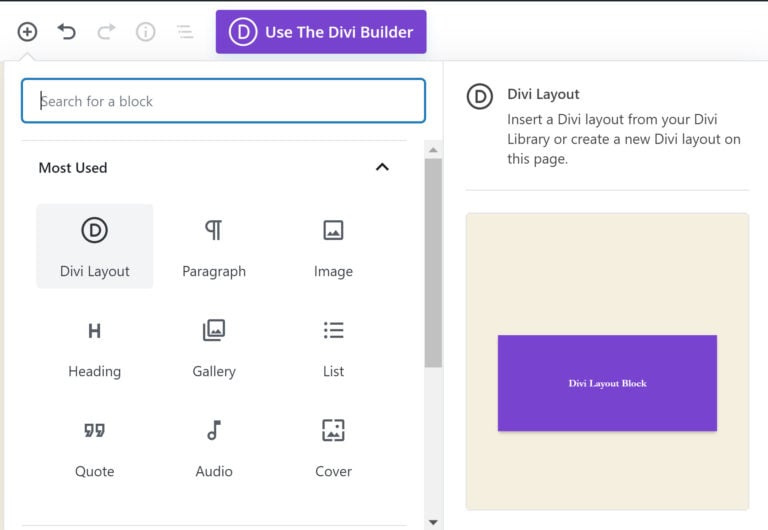
Elegant Themes also have a Divi Layout Block.
This block allows you to insert any Divi layout directly into a layout you have created with the default WordPress block editor.
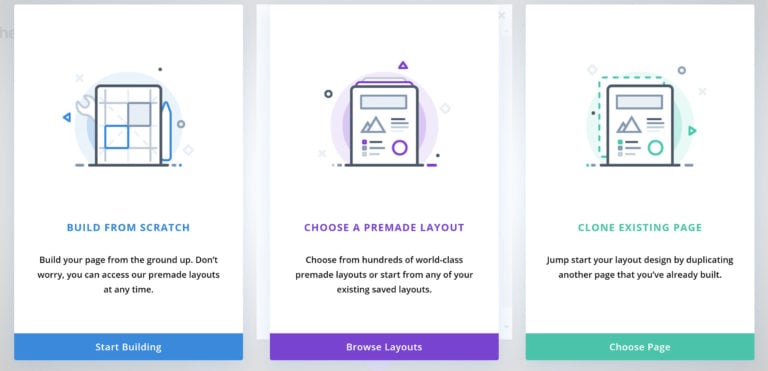
When you first launch Divi Builder, you will be asked whether you want to build a layout from scratch, choose a premade layout, or clone another page you have already created.
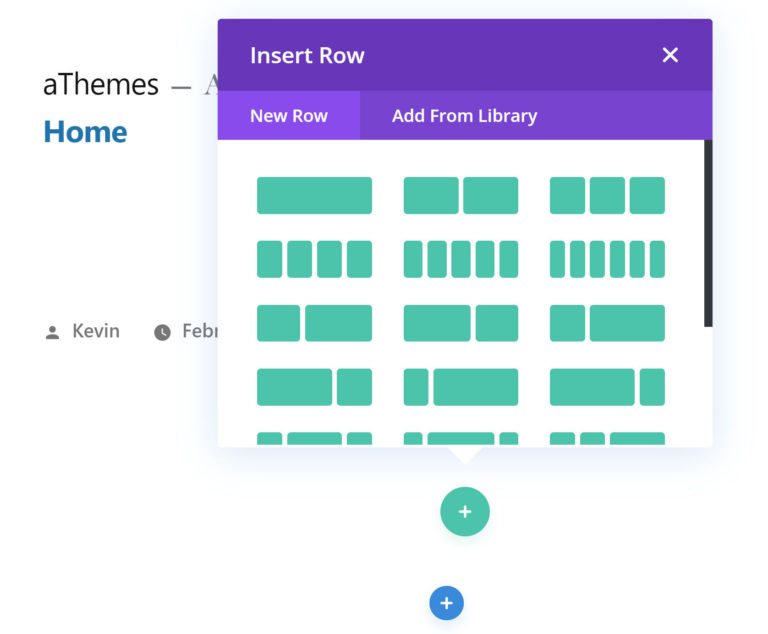
If you start from scratch, Divi Builder will load your blank canvas and display a box to insert a new row.
There are 20 rows available for selection, and each one has a different column structure.
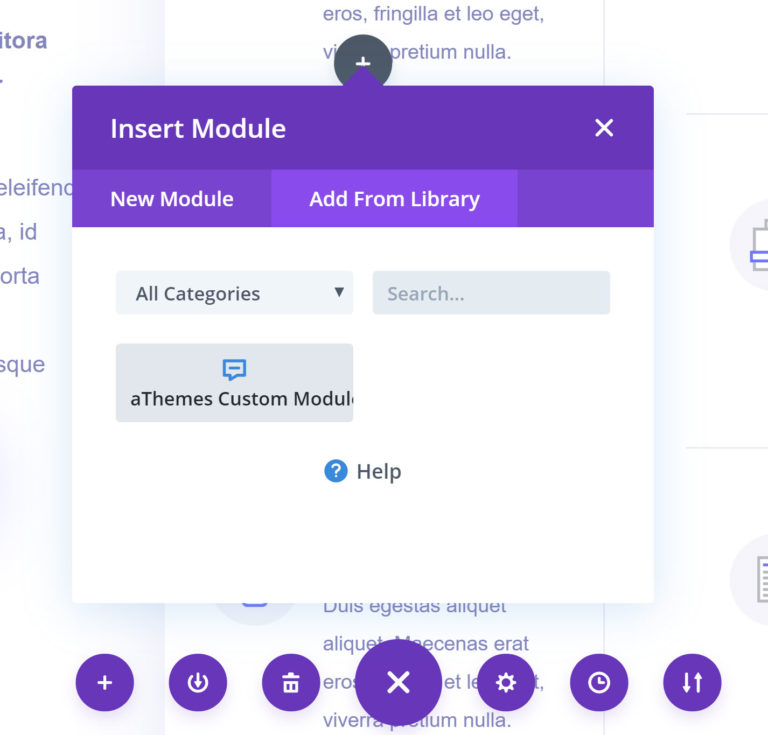
Once you have inserted a row, Divi Builder asks you to select a module to add to your page.
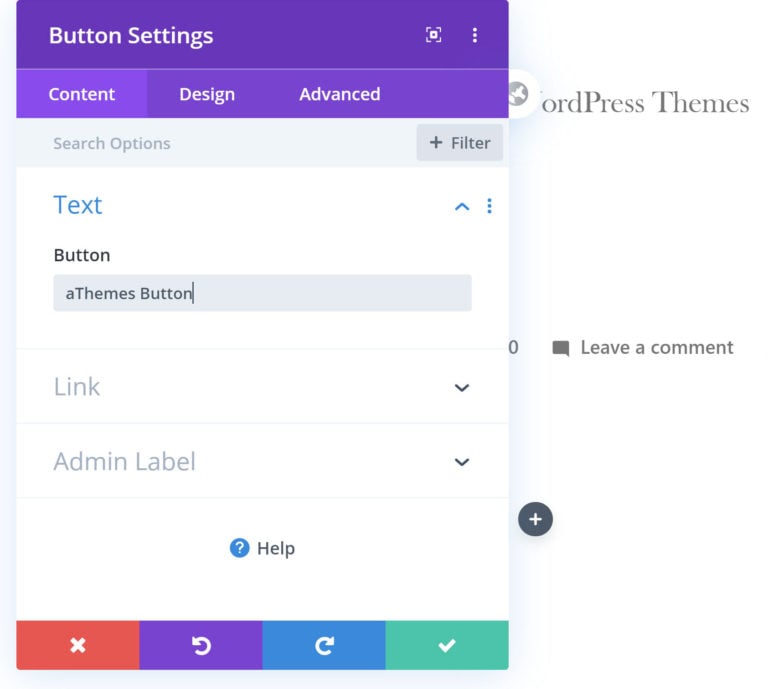
Divi Builder then loads the settings box for the module you selected.
If you are new to Divi Builder, I recommend familiarizing yourself with how the editor works by selecting a premade layout, as it gives you something to play around with.
Experienced users may prefer to start with a blank canvas, but be aware that the main menu does not automatically load when you select this option.
To load the main menu, click on the button with the three horizontal dots at the bottom of the page.

The main menu options are divided into three columns.
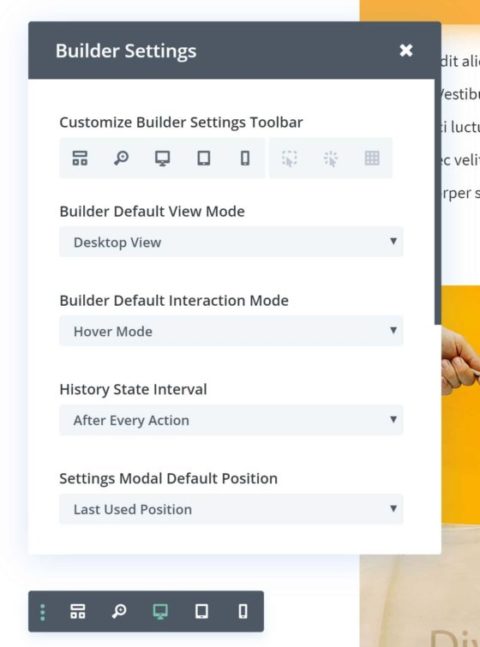
You can load builder settings via the three vertical dots icon at the left-hand side of the menu.
Three different viewing modes can be added to your menu from here: hover mode, click mode, and grid mode. These modes change how you interact with your layout and make changes. For example, in hover mode, simply hovering over a part of your page will highlight modules, columns, rows, and sections, and you can then make modifications.
Other settings in the builder settings box include the default viewing mode, history state interval, and page creation flow.
If you have created a complex layout, there may be situations where the wrong part of the page is highlighted. For example, you may want to move a column, but you accidentally select the row that it belongs to.
One way to resolve this is to use the wireframe view mode. This removes unnecessary design elements from your view to help you see the structure of your page more easily. It’s incredibly useful when moving things around within a complex layout.
The left-hand side of the menu also has options to let you see your design in desktop, tablet, and mobile view.
There are seven options in the middle menu. The X button in the middle closes the menu down.
On the left, you can load a layout from library, save your current layout, and clear your layout. On the right, you can view page settings, editing history, and portability.
The post/page settings box allows you to change the title, excerpt, featured image, and categories. A host of design settings are available here too, such as spacing, color palette, custom CSS, and visibility.
The editing history box lets you easily undo and redo recent changes and view a full history of all the changes you have made.
Layouts can be exported and imported in JSON format via the portability settings box. This is useful for transferring layouts to other websites.
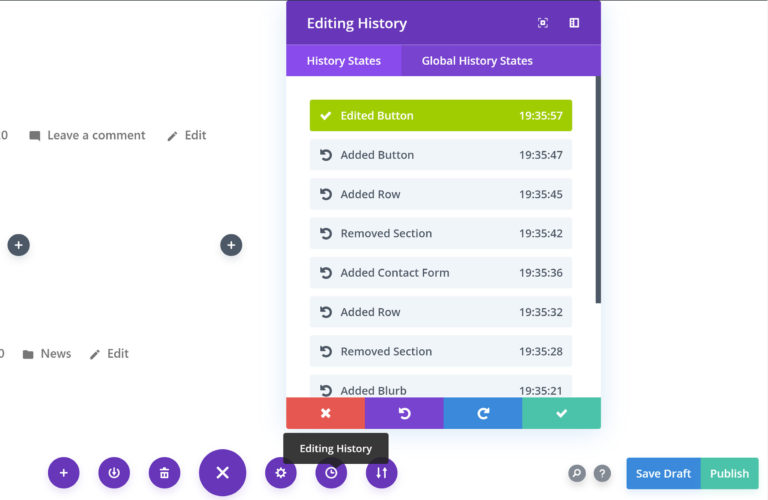
Your layout can be saved and published on the right-hand side of the page.
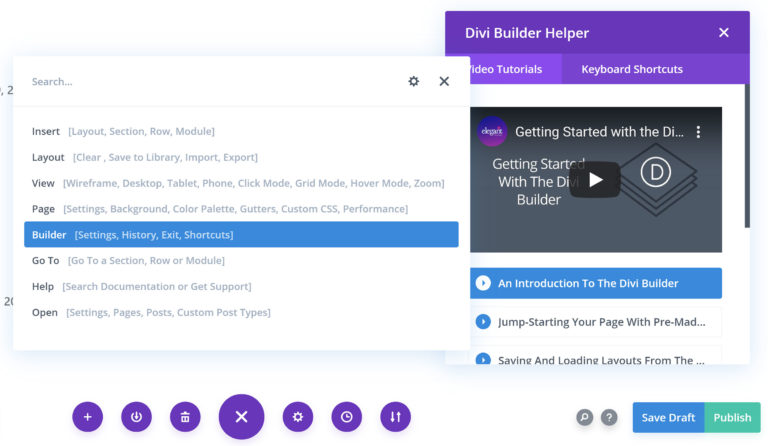
Video tutorials and keyboard shortcuts can also be displayed via the Divi Helper box in this area. There is a search feature, too, that helps you find features and documentation.
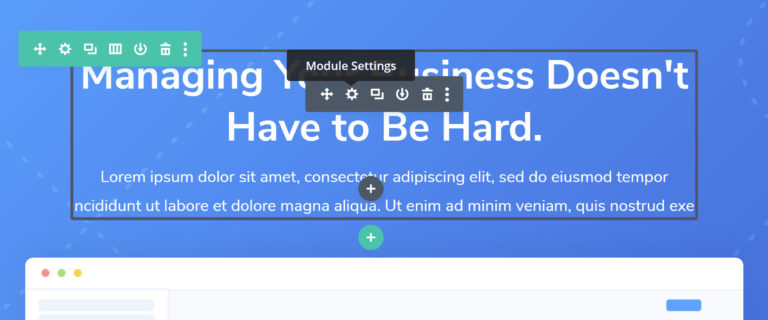
The user interfaces for Beaver Builder and Divi Builder work differently, however when it comes to adjusting rows and columns, they actually work in a similar way.
Both solutions display settings at the top left-hand corner and let you move, duplicate, and adjust rows and columns. Divi does, however, have more customization options.
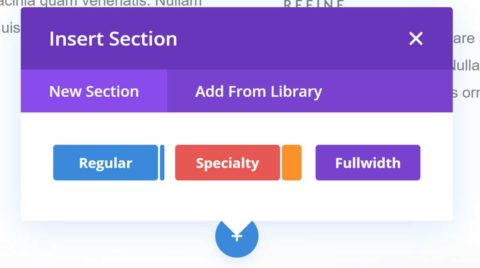
Divi Builder has an element above rows, called sections.
Sections can contain multiple rows, and each row can contain multiple columns. It gives you a little extra flexibility with how you construct pages.
In the earlier versions of Divi Builder, layouts were created directly from the WordPress editor, however the frontend visual builder is now the standard way of creating layouts with Divi.
Thankfully, the old editor is still available in Divi Builder.
To activate the Legacy Builder, you first need to go to the advanced section of the Divi plugin options area, disable the latest Divi Builder experience and enable the Classic Editor.

The user interface of the Legacy Builder looks similar to the wireframe view mode that is available in the visual editor.
Whilst it does not allow you to preview the changes you make in real-time, I do love how fast and efficient it is. Everything loads a little quicker than in the frontend editor, and it is easier to see the structure of your page.
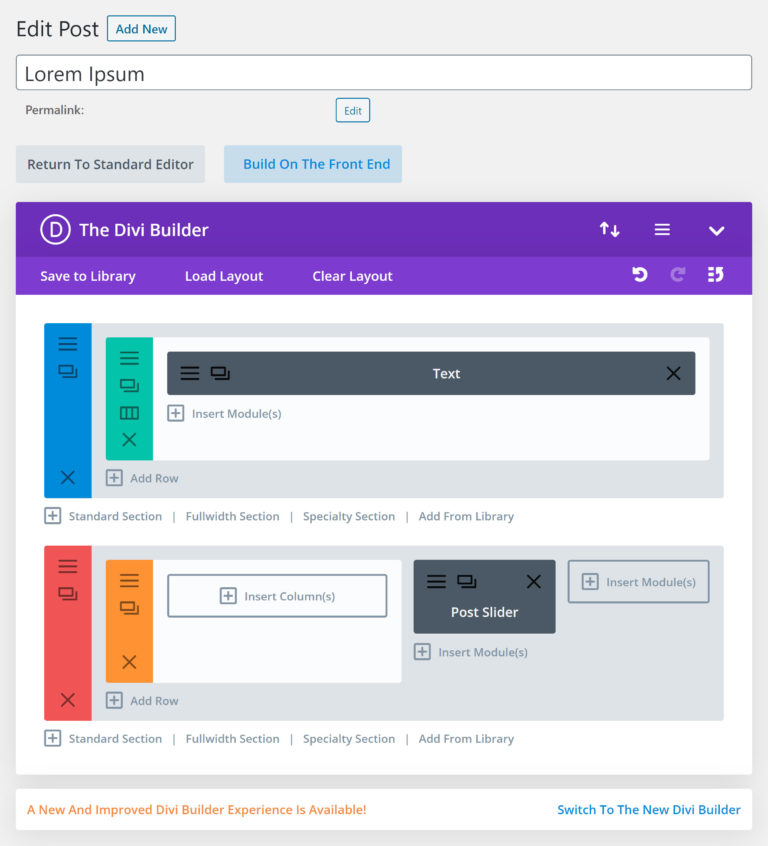
Beaver Builder loads everything a little faster than Divi Builder, and its user interface is easier to pick up, however Divi Builder offers many more customization settings and additional features that are missing in Beaver Builder.
The inclusion of the wireframe mode and Legacy Builder arguably makes Divi Builder a more flexible solution too.
For a more comprehensive look at how Divi Builder works, please check out our full review of Divi Builder.
Beaver Builder Premade Layouts
I am a huge fan of premade layouts as they greatly reduce the time it takes to create stylish content. They also help you understand how to create advanced layouts.
Beaver Builder does not offer as many premade layouts as Divi, but the quality of each template is just as high.
Landing page templates and content page templates are available in the templates tab of the main content menu alongside any saved templates you have.
Landing page templates are complete full-page templates. A total of 15 landing page templates are available together with a blank canvas page template.
There are templates for small businesses, gyms, lawyers, musicians, photographers, restaurants, eBooks, and more.
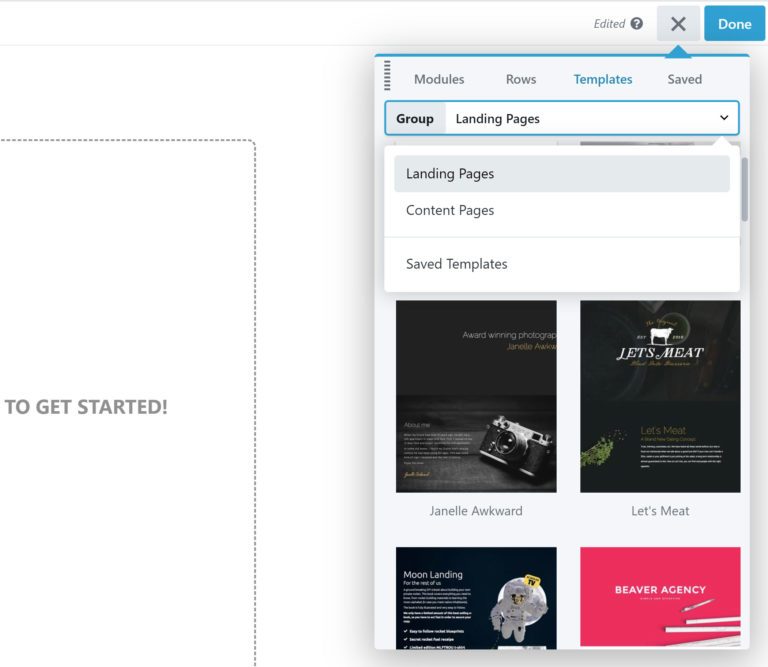
When you select a landing page template, you are asked whether you want to replace your existing layout or append it to the one you already have.
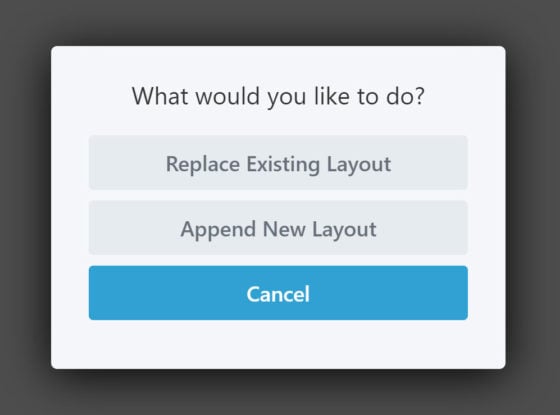
Premade layouts are inserted into your layout in seconds.
Once they have been added, you can adjust them as you see fit and save them as custom templates.
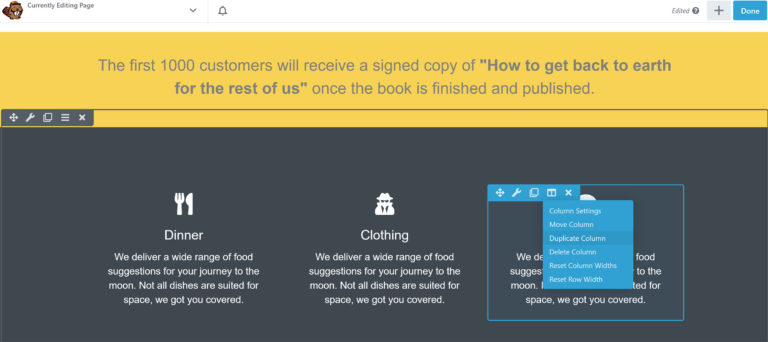
Content page templates are universal templates for part of a page that are suitable for any type of website.
25 content page templates are available. There are layouts to help you insert an about area, team info, services, contact form, pricing tables, signup form, and more.
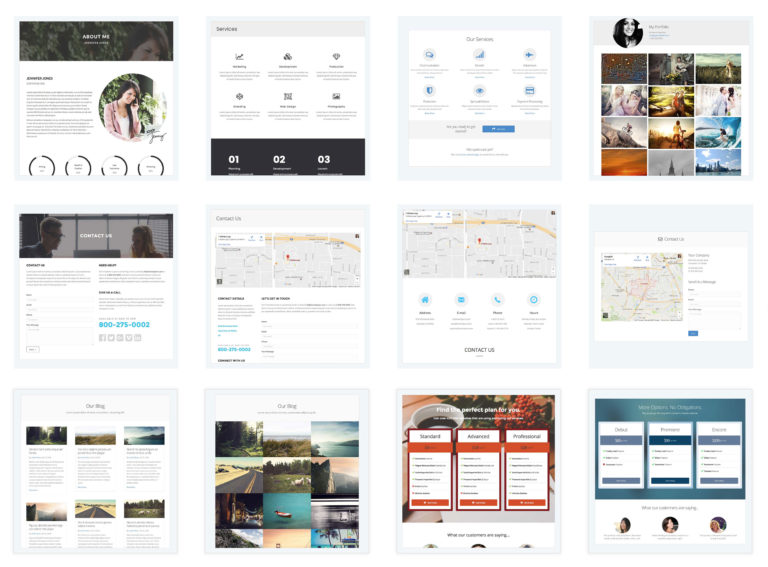
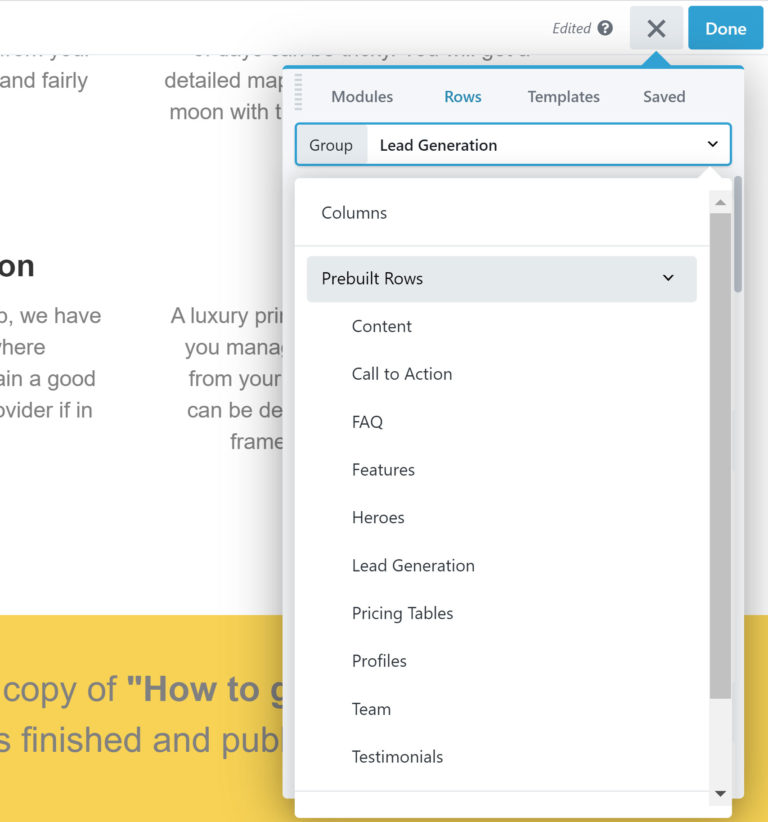
Beaver Builder also offers dozens of pre-built rows. These layouts can be easily inserted into any part of your page.
You will find them under the rows tabs of the main content menu.
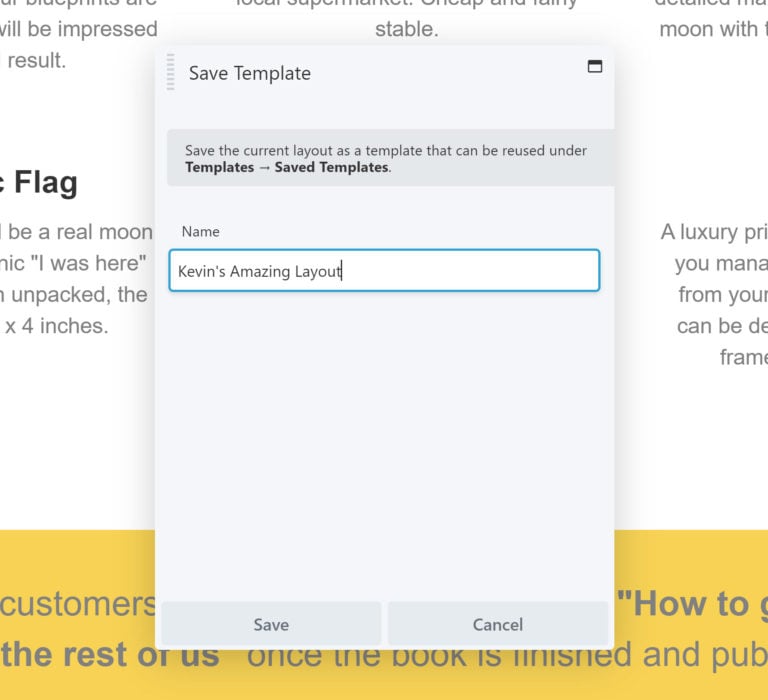
If you utilize Beaver Builder’s templating system, you can greatly reduce the time it takes to create new layouts.
Layouts can be saved at any time and reused as many times as you wish.
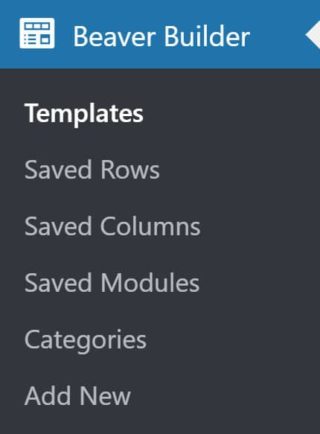
All saved templates can be managed from the main Beaver Builder admin menu and edited later if required.
You can save templates, rows, columns, and modules, and every saved layout can be assigned to categories.
Beaver Builder did a fantastic job integrating premade layouts into their user interface. Layouts can be inserted in seconds and customizations can be saved and used time and time again.
Divi Premade Layouts
Like Beaver Builder, Divi offers users a wide variety of premade layouts.
Over 1,100 layout packs are available for selection.
150 of these layouts are layout packs which include designs for a number of areas on your website such as your about page, blog, landing page, and gallery.
As noted earlier, when you launch Divi Builder on a new page, one of the available options is to choose a premade layout.

The Divi Library can also be loaded from the main menu.

Divi Library lets you insert premade layouts, saved layouts, and whole pages.
You can narrow down your search for a suitable layout by using the search box or selecting one of the 13 categories that layouts are assigned to.
Be sure to save your current layout before inserting a premade layout, as Divi Builder will overwrite it.
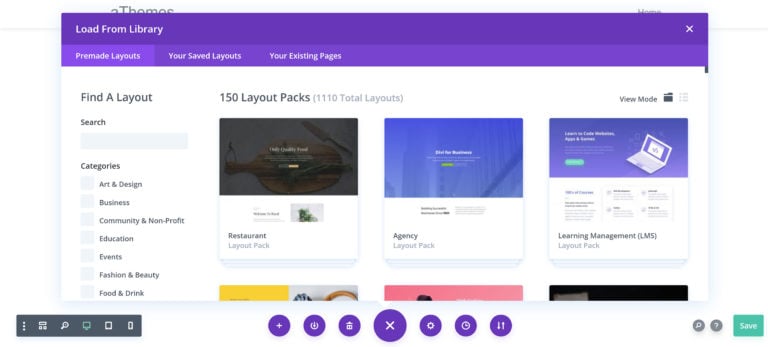
Layout packs highlight all of the layouts that are included in the pack, however I strongly recommend clicking on the “View Live Demo” button to see exactly how your website will look if you select a design.
To help illustrate this point, take a look at the demo area for the Divi Web Freelancer design that is shown in the screenshot below.
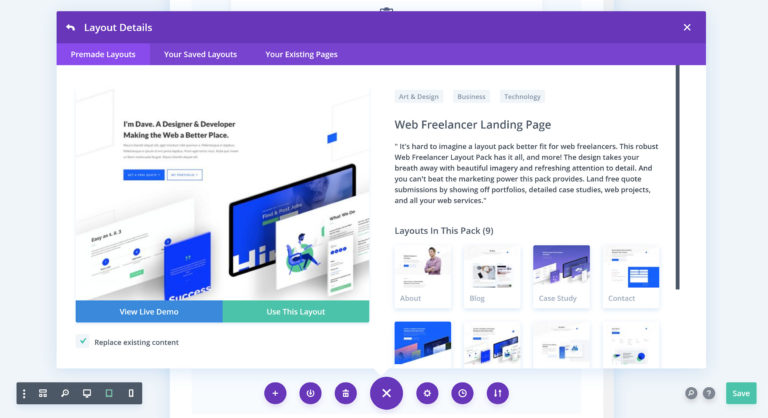
Depending on your hosting setup, Divi Builder can take up to a minute to import all of the layouts in a layout pack.
Once you have inserted a layout into your page, you can customize it and make it your own by changing colors, adding modules, and removing sections that are not relevant to you.
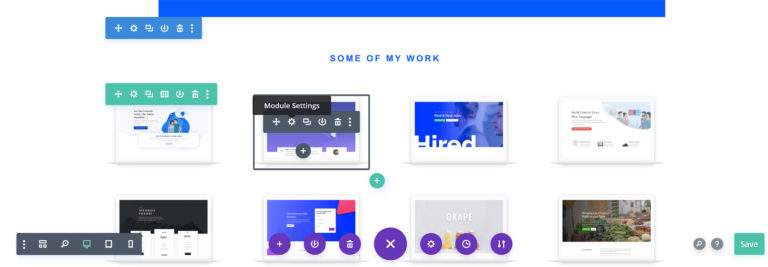
Layouts can be saved to the Divi Library at any time from the main Divi menu.
You can name each layout and group them into categories.
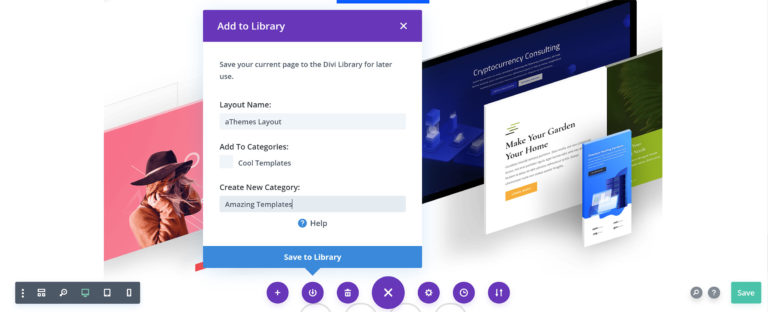
The Divi admin menu links to the main plugin options page, the Divi Theme Builder, the Divi Library, and a few other settings pages (which we will discuss later).
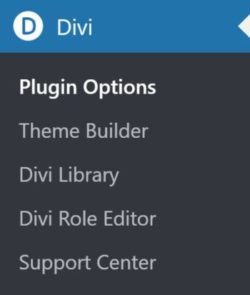
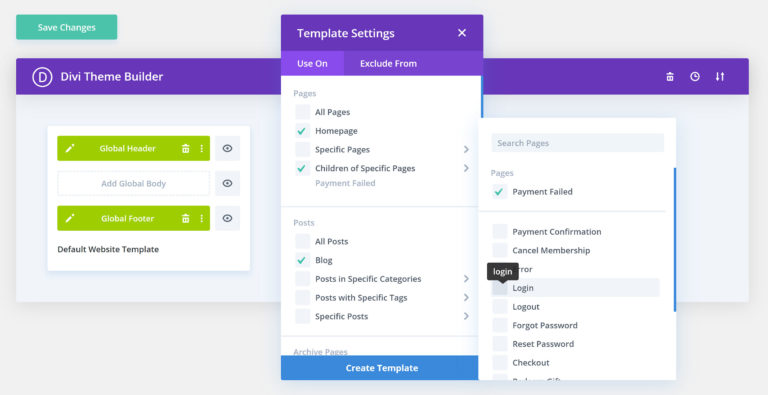
Divi Theme Builder is a fantastic tool that allows you to build custom page templates. You can then assign the templates to posts, pages, and custom post types.
For each template, you can assign a layout to the header, body, and footer. You can then specify exactly which areas of your website these templates should be used.
For example, you could create a unique design for your blog, but exclude it from certain post categories. You could also create unique templates for your search results page, 404 page, archives, home page, and more.
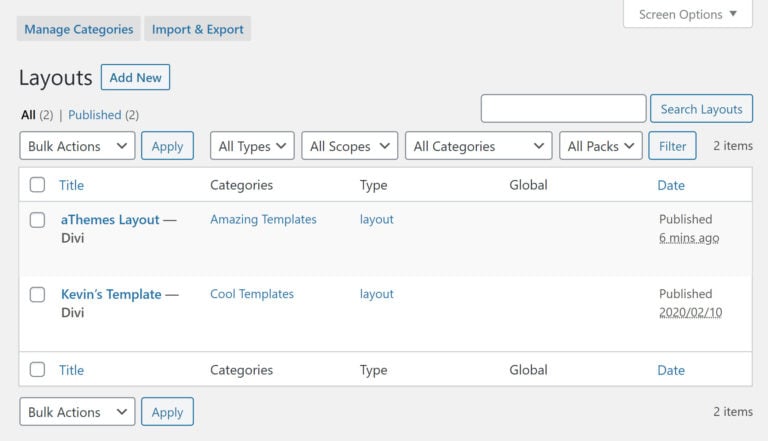
All saved layouts can be viewed from the “Divi Library” page which is linked in the main Divi admin menu.
Layouts can be imported and exported from this page. You can also manage your layout categories from here.
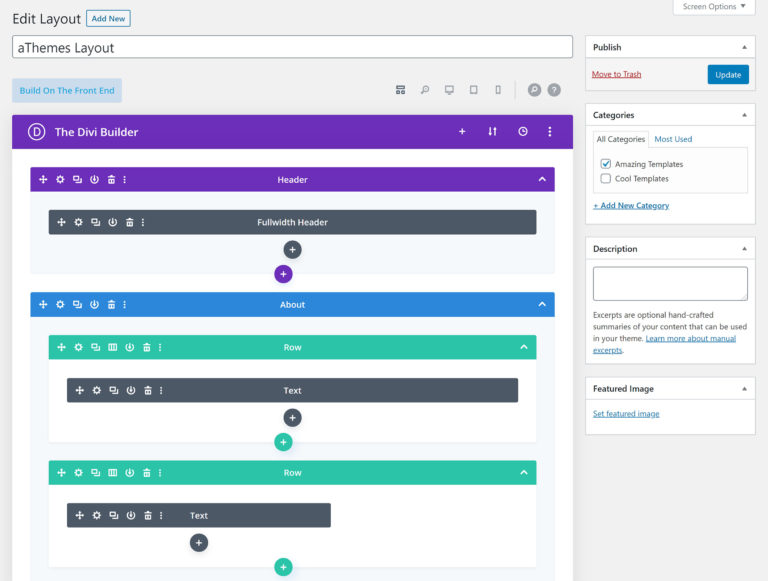
When you click to edit a layout from the main Divi Library page, you will be taken to an overview of your design in wireframe view mode.
This mode is useful for adjusting the structure of your layout, but if you want to make more specific changes, you can switch to desktop view, tablet view, or phone view. Doing this lets you modify your saved layout using the visual editor.
If you prefer, you can launch the regular frontend visual editor and make customizations on the page itself.
Side by side, I do not believe the quality of Divi Builder’s premade layouts is any better than the designs that are available in Beaver Builder, however the whole setup in Divi Builder is significantly better.
Divi Builder’s layout packs give you up to a dozen templates to help you build a complete website, whilst Beaver Builder only offers single-page layouts and layouts for specific sections of your page.
There is so much more choice in Divi Builder too, with the plugin offering 950 landing page templates against Beaver Builder’s 15. A large selection of third-party layouts is available for Divi too.
It is important to note, however, that Beaver Builder tends to insert layouts into your page a little quicker than Divi Builder.
Check out the Divi Layouts page to see what premade layouts are available with Divi Builder.
Beaver Builder Content Modules
A total of 29 modules are available in Beaver Builder. The modules are divided into six categories: Basic, Media, Actions, Layout, Info, and Posts.
There’s a good variety of modules for adding rich content, adjusting your layout, and pulling content from your blog.
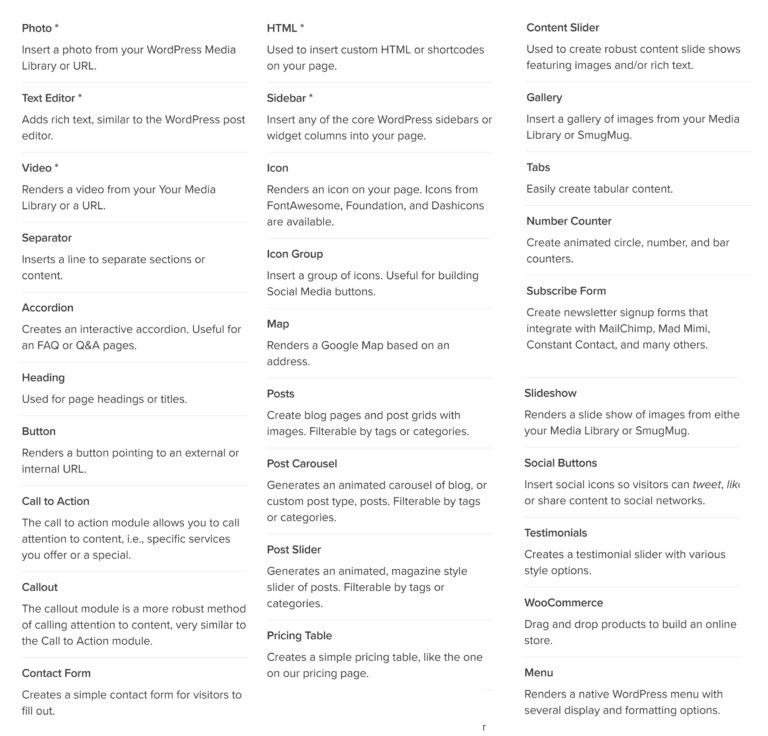
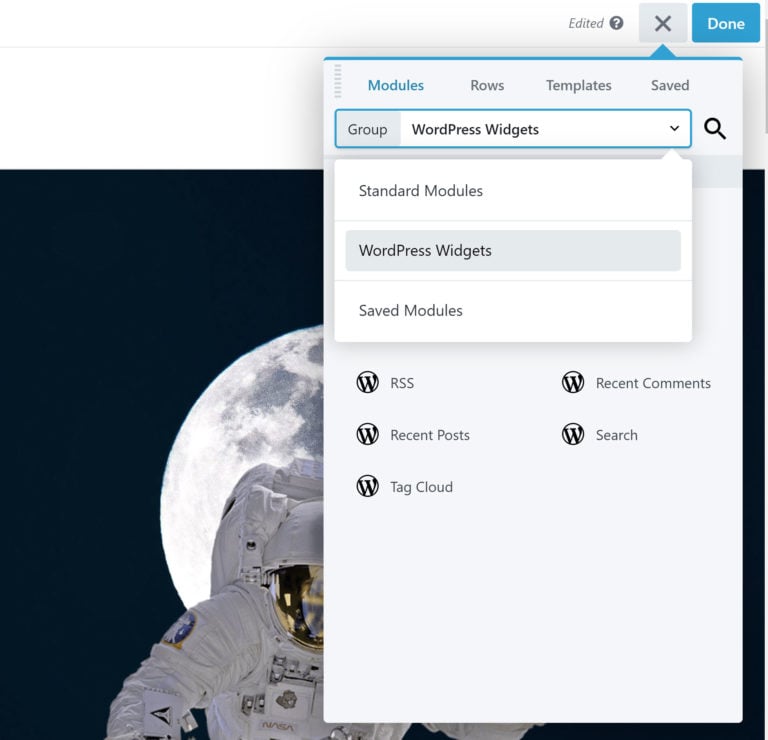
One of the modules in the layout category is the sidebar module, which allows you to insert WordPress widgets. This opens up many possibilities to integrate functionality into your layouts from other WordPress plugins.
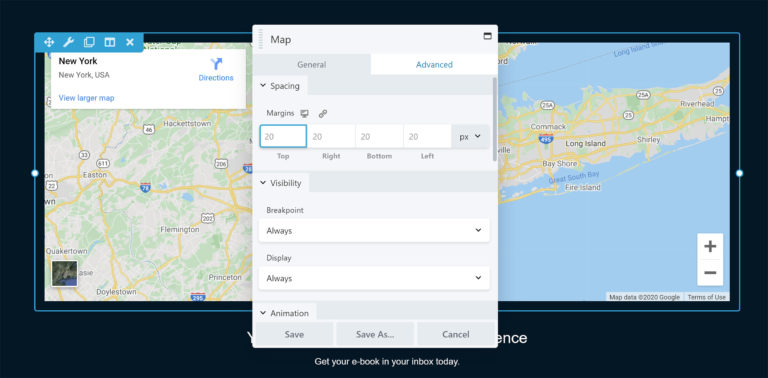
When a module has been dragged and dropped into your canvas area, its settings box will appear.
You will find common settings in all modules for styling, spacing, visibility, animations, and more, however each module has unique settings to allow you to change what is displayed.
For example, in the map module, there are fields for entering the map address, map height, and map title attribute.
Beaver Builder does not have the largest collection of content modules, and it doesn’t offer as many customization options as Divi.
I do believe, however, that Beaver Builder has everything you need to create beautiful layouts, as missing functionality can be inserted into layouts via WordPress widgets.
Divi Builder Content Modules
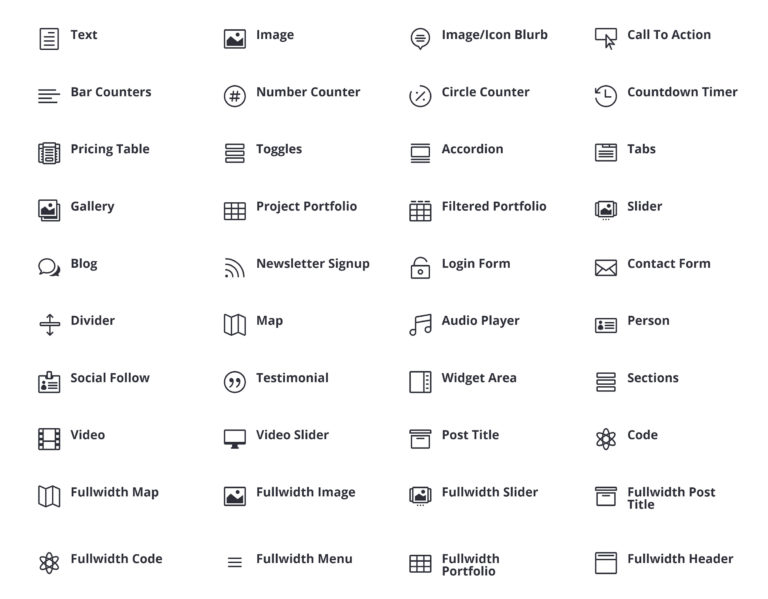
38 content modules are available for selection in Divi Builder.
Alongside essential modules such as image, video, portfolio, and testimonial, there are useful modules for adding bar counters, blurbs, sliders, and call to actions.
Divi Builder also adds a new custom post type for projects.
Like Beaver Builder, Divi has a sidebar module so that you can integrate WordPress widgets into your layouts.
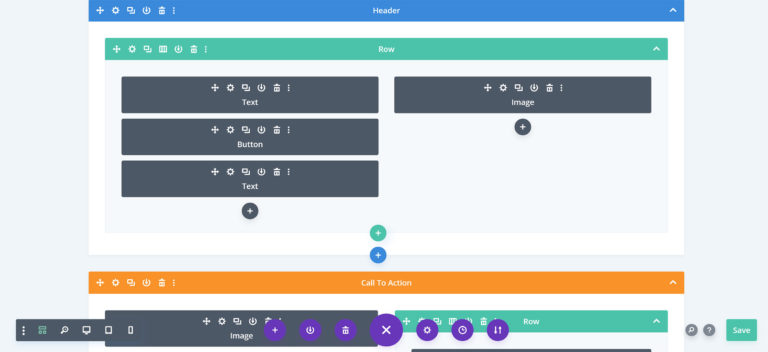
Divi Builder uses a color-coded system to help you create stylish layouts.
Sections are blue, rows are green, and modules are dark grey (almost black).
You can add a new module by hovering over a column and clicking on the “Add New Module” button.

As I showed earlier, when you select a module, the module settings box will automatically appear so that you can enter values and adjust styling.
Any customizations you make can be saved to the Divi Library. This can save you a lot of time when creating pages.
For example, you could modify the map module so that it displays a map of your company address. You can then easily save the map and insert it into your about page, contact form, blog posts, and more.
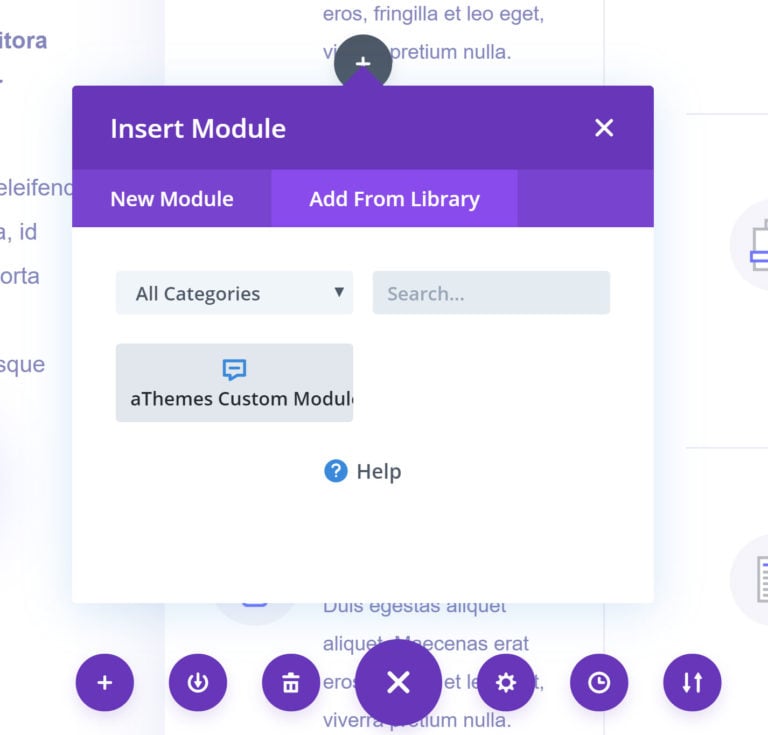
Divi Builder offers more styling and customization options than Beaver Builder and has nine additional content modules, but I do not believe anyone will feel restricted with what is available in either WordPress plugin, particularly as WordPress widgets can be inserted into layouts using the sidebar module.
Configuring Beaver Builder
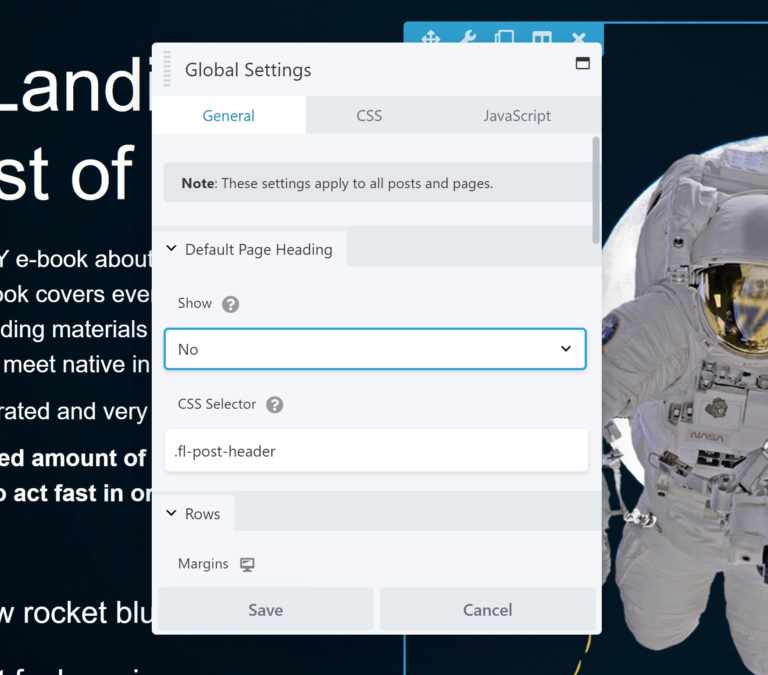
The global settings box can be loaded from the tools menu within the Beaver Builder user interface.
It allows you to enable and disable the page heading and the margins and padding of rows, columns, and modules. Responsive layouts can also be adjusted from this area, and there are boxes to insert CSS and Javascript code.
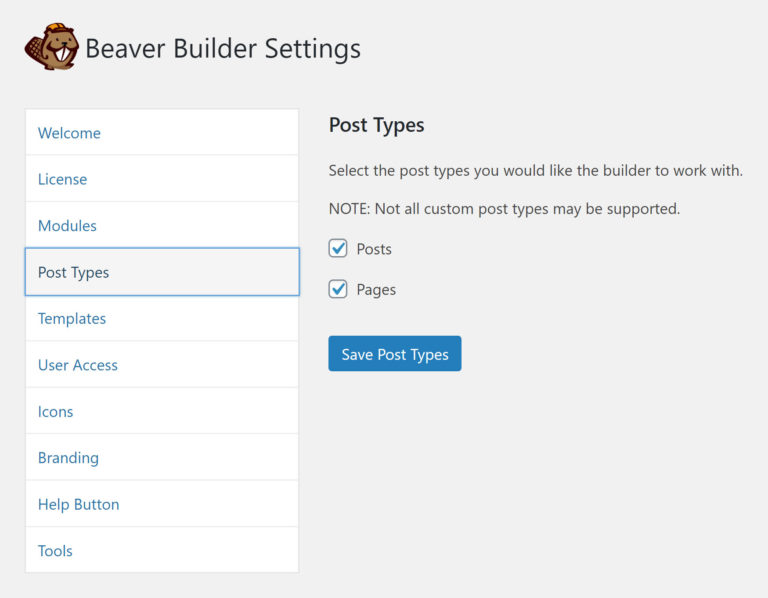
The main Beaver Builder settings page is divided into several sections.
To receive automatic plugin updates, you need to enter your license key in the license section. Modules and post types can be enabled and disabled in the next section.
Access to the template system can be adjusted in the next section. You can enable core templates, user templates, or all templates. Templates can also be disabled.
The user access settings area lets you define what WordPress user groups can use Beaver Builder. Permissions are split into five different areas such as access to the builder and to the Beaver Builder admin menu.
The general settings page also lets you enable and disable icon sets, plugin branding, theme branding, and help settings. Caching and debugging is available in the tools section.
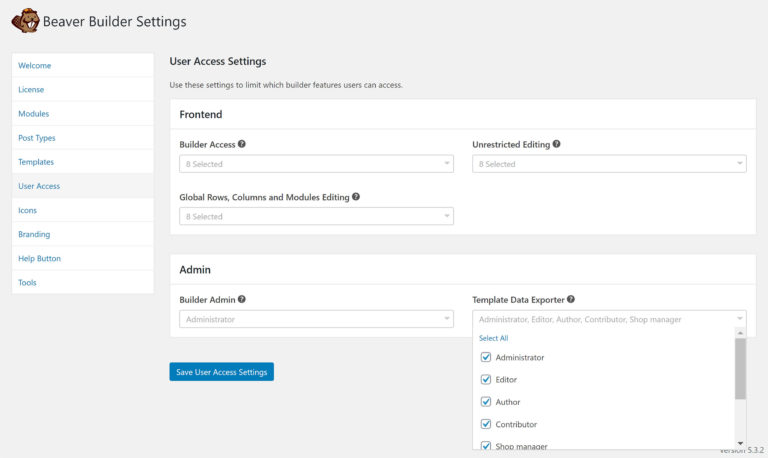
I recommend checking the Beaver Builder settings page after installing Beaver Builder, but most of the customization you will do takes place within the main Beaver Builder interface.
Configuring Divi Builder
Like Beaver Builder, most of your time will be spent customizing layouts within the Divi Builder editor itself, but there are a few important settings that can be found from the main Divi admin menu.
The main plugin options page has a tab for entering your Elegant Themes username and API key. You need to complete this in order to receive automatic plugin updates.
In the next tab, you can enter your Google API key. This is necessary if you want to use the map module. Google Fonts can be disabled from this page too.
The next tab allows you to enable and disable Divi Builder for specific WordPress post types. This is useful if you want to restrict access to Divi Builder for certain post types such as your gallery.

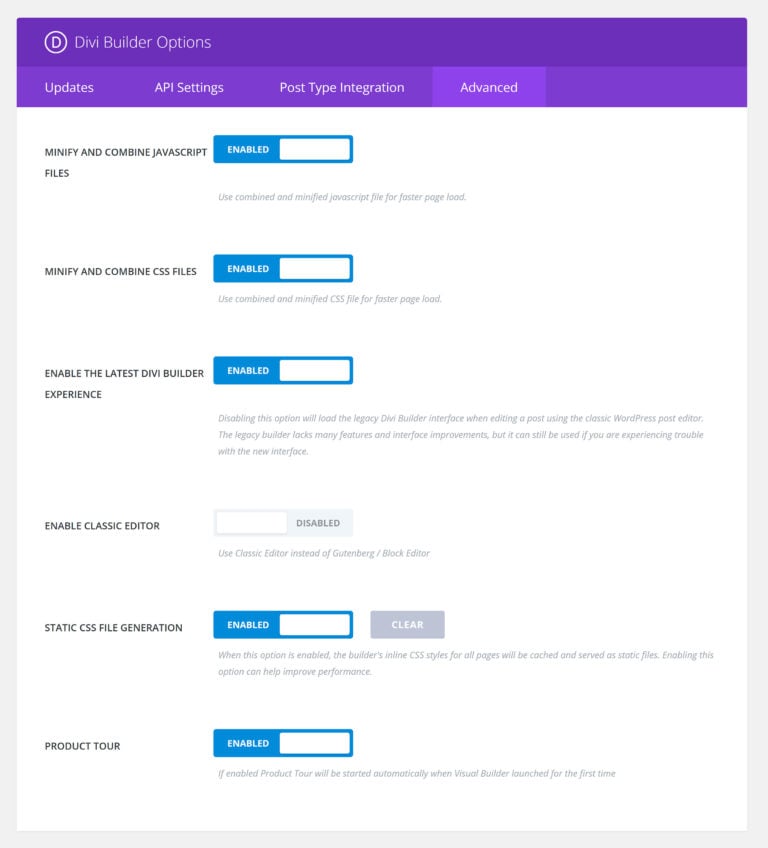
In the advanced tab, you can enable and disable CSS and Javascript minification. This is also where you can enable the Legacy Builder editor.
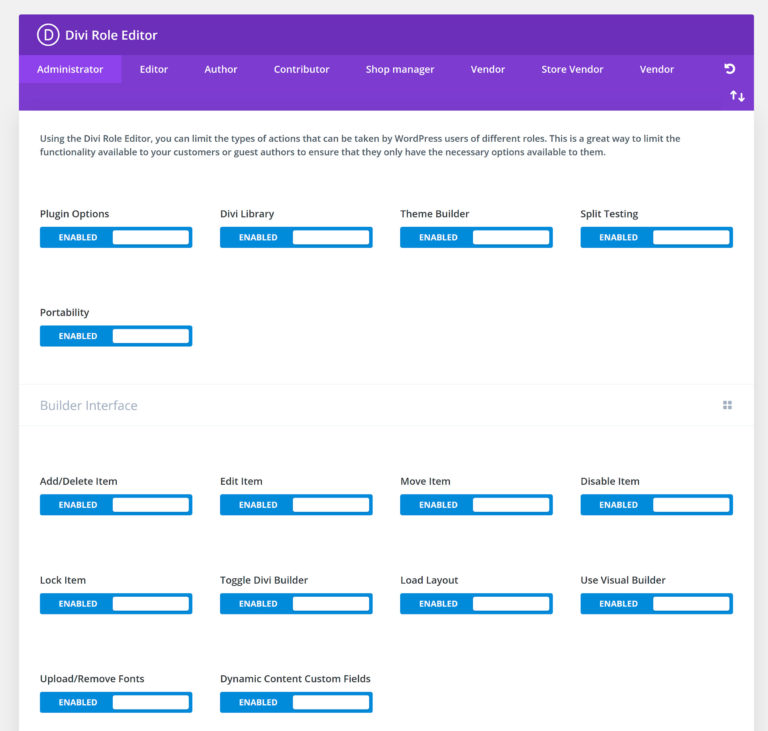
Divi Builder gives you complete control over what every user group on your website can and cannot do.
Whilst Beaver Builder allows you to restrict access to a few key areas, Divi Builder lets you define exactly what features users can access.
For example, you can stop users from loading layouts or disabling features inside Divi Builder.
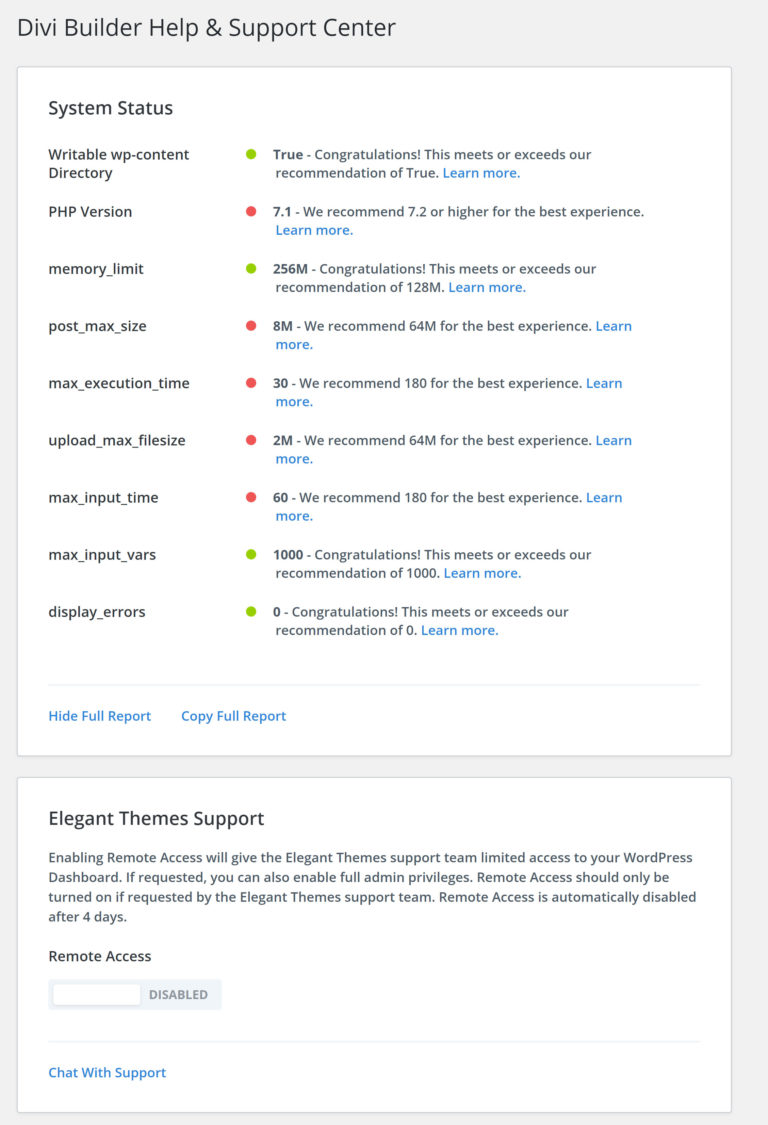
Divi’s support center provides a report about your system. This can help you diagnose any issues with your hosting setup.
For instance, for my test WordPress website, the report showed that my WordPress installation had a limited amount of resources.
Remote access is also available on this page. This can help the Elegant Themes support team resolve any problems you have with Divi Builder.
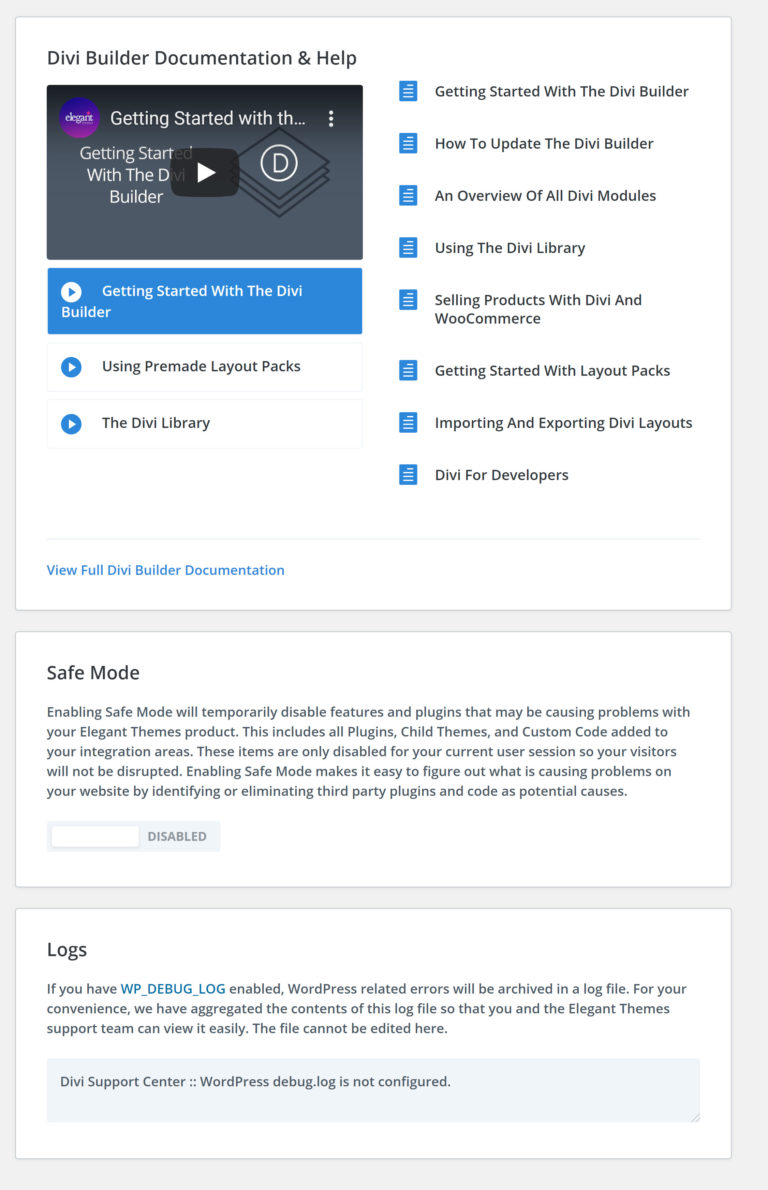
The support center also has links to useful video tutorials, and there is a safe mode that disables features that could cause problems with other WordPress plugins and themes.
Errors are displayed on this page, too, if WP_DEBUG_LOG is enabled.
Divi Builder is a simple WordPress plugin to set up, with only a few settings to check after installation.
The standout feature in the settings area is the Divi Role Editor. It is something that owners of large WordPress websites with multiple staff will appreciate.
The Beaver Builder Theme
Beaver Builder Theme is an HTML5 and Bootstrap WordPress framework that is included in the Beaver Builder Pro and Agency plans.
It is a minimal WordPress design that acts as a blank canvas for creating designs with Beaver Builder. Hooks and filters are available within the theme to help developers modify website design, and it has great support for WooCommerce.
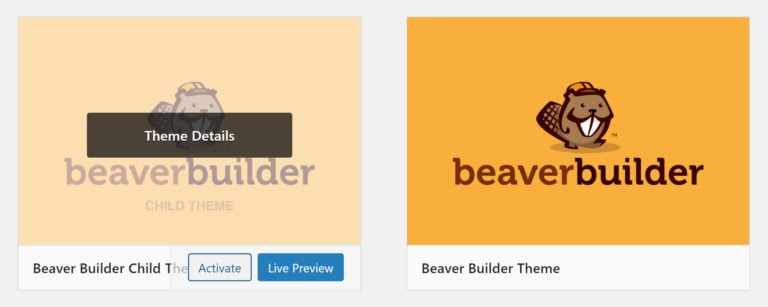
All settings for Beaver Builder Theme are contained within the WordPress Customizer.
Styling and position can be adjusted for dozens of areas of your page. There are also layouts for your header, navigation menu, blog, archives, blog posts, WooCommerce pages, and footer.
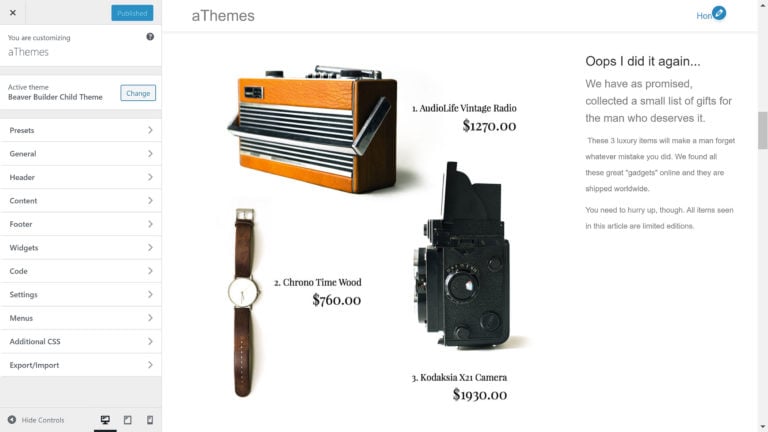
Whilst at its core, Beaver Builder remains a minimal WordPress theme, the developers have gone the extra mile to add many extra customization options.
Take your website’s logo, for example. You can upload a regular logo image, one for retina devices, fade-in logos for regular devices and retina devices, and another logo for mobile devices.

In many other WordPress themes, different parts of the design such as the header, sidebar, and footer can stop Beaver Builder from displaying layouts correctly. This is why many Beaver Builder users have switched to Beaver Builder Theme.
It’s a great choice if you are looking to use Beaver Builder layouts on your website.
The Divi Theme
Beaver Builder market their design as a framework theme for Beaver Builder, whilst Elegant Themes market Divi Theme as a versatile all-in-one WordPress theme.
This highlights how influential marketing can be as there are more similarities between Beaver Builder Theme and Divi Theme than people think.
In the beginning, Divi was an all-in-one WordPress theme, however most of the versatility that everyone associated with Divi Theme was later migrated to Divi Builder. This was unquestionably the right thing to do.
So with most functionality being incorporated into Divi Builder, Divi Theme can be considered a framework like Beaver Builder Theme. Therefore, if you happen to own both products, you could use Divi Theme with Beaver Builder or Beaver Builder Theme with Divi Builder.
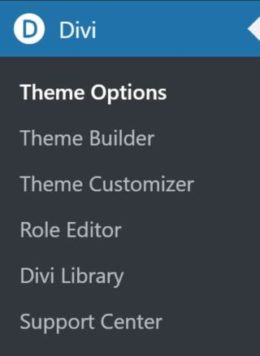
Once Divi Theme has been activated, you will see a few subtle changes in the Divi admin menu.
This includes the plugin options page being replaced with a theme options page and a link to the WordPress Customizer.
Apart from the settings area being expanded, everything else remains the same.
Interestingly, if Divi Theme is activated, the Divi Builder plugin will automatically be deactivated. This is necessary since the functionality of Divi Builder is built directly into Divi Theme (and Elegant Themes’ Extra WordPress theme).
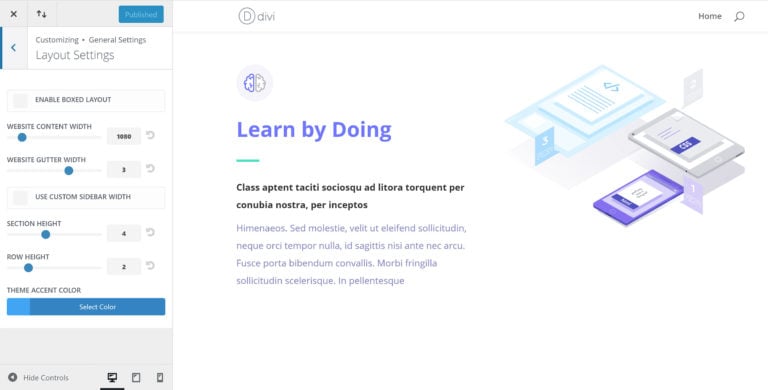
You will find hundreds of useful options within the WordPress Customizer, spread across a dozen or so sections. These can be used to control areas such as your header, footer, and sidebars.
The main content area for posts, pages, and custom post types, is still controlled by Divi Builder.
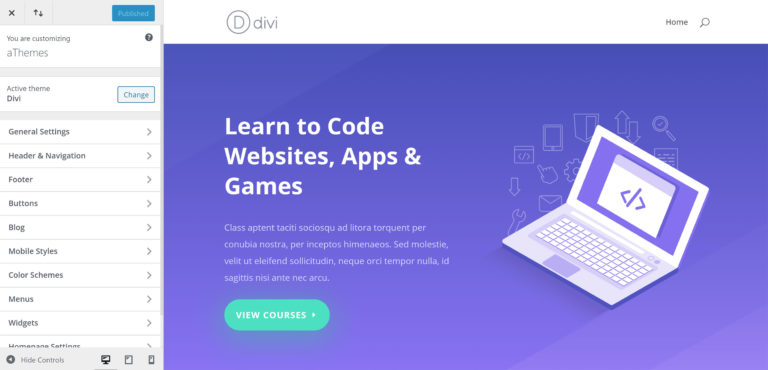
When it comes to customizing your website design, I do not believe Divi Theme is any better or worse than Beaver Builder Theme. There are a few areas in which Divi Theme gives you more options and a few areas where Beaver Builder Theme gives more.
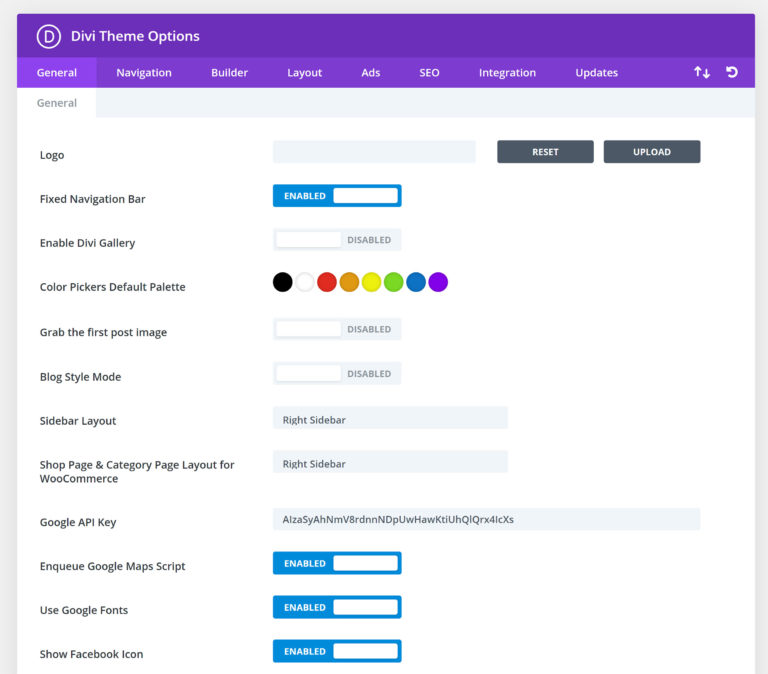
All of Divi Builder’s plugin options have been integrated into Divi Theme’s more extensive options area.
For example, the post type settings are now available in the builder tab, and the options from the advanced settings page are now located in the general options page.
The general settings page also has fields for social media icons, scrolling, custom CSS code, and more.
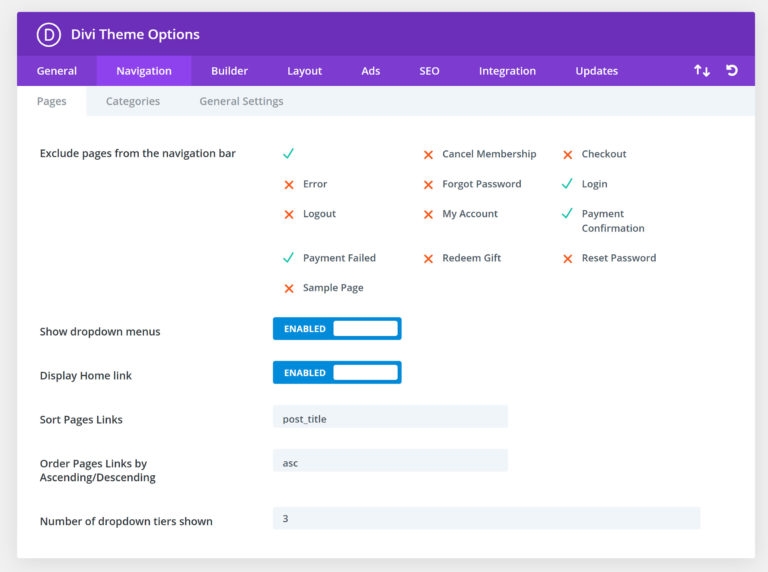
Additional options are also available for Divi Theme users.
There is a dedicated options area for your website’s navigation menu and a layout page where you can state which features should be enabled on posts and pages.
There are also pages for adding a 468×60 pixel banner and general SEO details about your website.
Like Beaver Builder Theme, Divi Theme is a minimal WordPress theme that has been optimized for use with Divi Builder.
I highly recommend using this design if you want to take advantage of Divi’s huge range of premade layouts.
The Cost of Beaver Builder
Features and functionality are two factors you need to consider when reviewing Beaver Builder and Divi, however you also need to consider the cost of these products and the budget you have available for your projects.
Many premium WordPress companies charge more for using their products on additional websites. For example, the entry-level plan may support one website, the intermediate plan may support three websites, and the advanced plan may support ten websites.
Beaver Builder and Elegant Themes are more generous, offering support and updates for an unlimited number of websites.
Whilst this article has focused primarily on the premium version of Beaver Builder, I would still recommend checking out Beaver Builder Lite.
It is a good solution for simple websites and it also helps you see how the Beaver Builder interface works.
Please note, however, that the free version of Beaver Builder lacks useful modules such as the contact form, pricing table, and map. There is no access to the Beaver Builder templating system or premade layouts either.
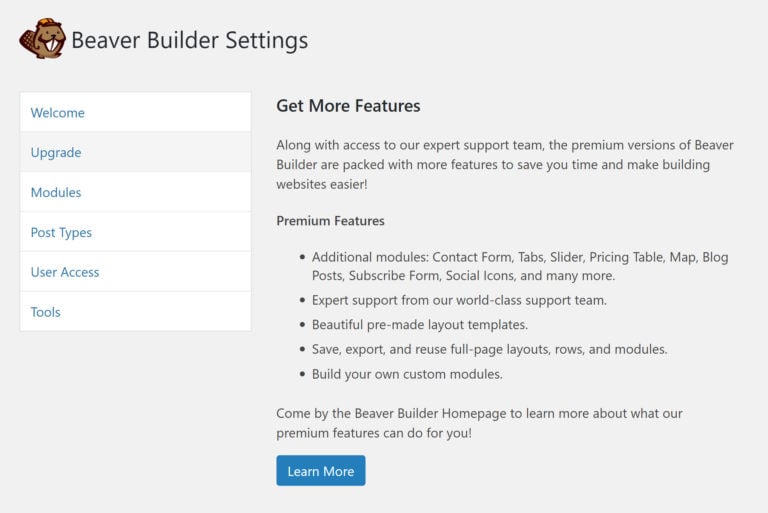
For the vast majority of projects, the full version of Beaver Builder is a better fit than the lite version.
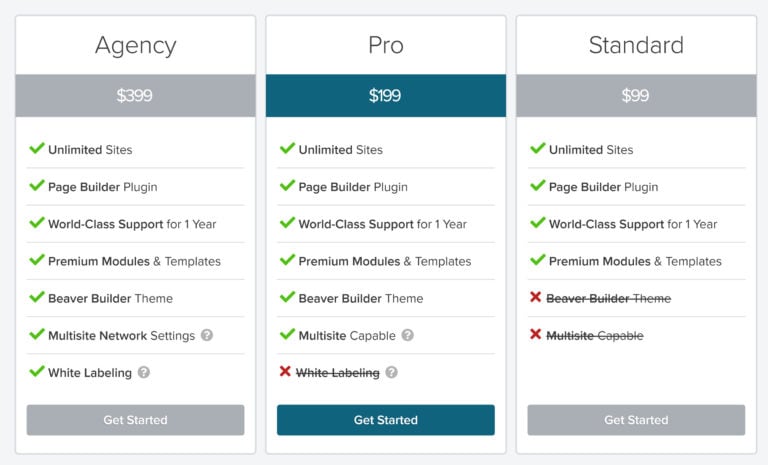
Three different premium plans are available: Standard, Pro, and Agency. All plans come with one year of premium support and access to premium modules and templates.
The standard plan retails at $99 per year. To get WordPress multisite support and access to the Beaver Builder Theme, you need to upgrade to the $199 per year Pro plan.
The $399 per year Agency plan adds white labeling. Web design companies may be interested in this plan as it allows you to rebrand the plugin as your own and change all references to Beaver Builder in templates and the admin area.
Beaver Builder offers a 30-day money-back guarantee.
All Beaver Builder members also receive a 40% discount after one year. This drops the price of Beaver Builder’s plans in subsequent years to $59.40 per year, $119.40 per year, and $239.40 per year.
If you are unsure about any aspect of using Beaver Builder, I highly recommend checking out their detailed knowledge base. You can also ask for help via ticket support, and in the Beaver Builder community forum, the Beaver Builder Facebook group, and the Beaver Builder Slack room.

The Cost of Divi
The pricing policy of an Elegant Themes membership is more straightforward.
There are two plans available, and both plans give you full access to all Elegant Themes products.
The annual Elegant Themes membership costs $89 per year.
Like Beaver Builder, you can continue to use products such as Divi Builder once your membership has expired, however you will not receive support and updates if you do not renew.
If you think you will be renewing your membership for a few years, you may want to consider getting the lifetime access plan. For a one-time fee of $249, you will receive lifetime access, support, and updates, for all Elegant Themes products.

Elegant Themes also offers a 30-day money-back guarantee to all new customers.
To help you understand their products better, Elegant Themes have created one of the most extensive documentation areas I have ever seen. There are hundreds of written tutorials and video tutorials that explain how Elegant Themes WordPress themes and plugins work.
Members can also request help via ticket support, and there is a large community forum, Meetup network, and popular Facebook group too.

Comparing the cost of Beaver Builder and Divi is difficult as they have slightly different pricing models.
Despite it being more limited, I appreciate the fact a free version of Beaver Builder is available, as Beaver Builder Lite is sufficient for basic blogs and simple website projects.
I do believe, however, that the full version of Beaver Builder is the best option for the majority of WordPress users.
At $99, a standard license for Beaver Builder costs $10 more than Elegant Themes, however subsequent renewals are charged at only $59.40 per year.
This is a generous discount for loyal members, however an Elegant Themes lifetime plan may still end up being cheaper for many website owners.
An Elegant Themes membership also includes Divi Theme, whist you will have to pay $199 to gain access to Beaver Builder Theme.
More importantly, an Elegant Themes membership includes five high-quality products: Divi Theme, Divi Builder, the WordPress magazine theme Extra, the email opt-in WordPress plugin Bloom, and the social media WordPress plugin Monarch.
Due to this, I believe an Elegant Themes membership offers better value for money for most WordPress users.
Final Thoughts
Drag-and-drop page builders can help WordPress users create beautiful website layouts in minutes via a user-friendly interface.
In a comparison article such as this, it is my responsibility to show the strengths and weaknesses of both Beaver Builder and Divi, however it is important to remember that both of these solutions are refined products and there are many similarities between them.
The process of creating new rows and columns is similar in both products, but I do feel that Beaver Builder’s interface is easier to learn and a little faster too.
Divi offers many more customization options and more premade layouts. With five products being included in an Elegant Themes membership, I would argue it offers better value for money too.
I hope you have enjoyed our in-depth look at Beaver Builder and Divi.
To learn more about Beaver Builder, check out the official sales page or read our full review of Beaver Builder. You can also get a better understanding of how Beaver Builder works by visiting the Beaver Builder demo page or by testing the free version of the plugin.
You can learn about how Divi on the Elegant Themes website and in our full review of Divi Builder. Whilst no free version of Divi Builder is available, you can test the plugin on the Divi Builder demo page. This will help you see what Divi Builder can do.
Thanks for reading.
Kevin
