
We occasionally link to goods offered by vendors to help the reader find relevant products. Some of these may be affiliate based, meaning we earn small commissions (at no additional cost to you) if items are purchased. Here is more about what we do.
Are you a barbecue purist? Do you still yearn for the old classic, the charcoal briquette grill?

Well, you’re not alone!
Many folks prefer the taste and aroma of food prepared over charcoal, and find these models easier to transport over the newer portable gas grills.
Some folks like the convenient cleanup of gas over charcoal, but that is a debate for another article.
The briquette barbecue is a perfect illustration of the old adage, “If it ain’t broke, don’t fix it.” The style lines may have changed a bit from the early days, but the simple design of the old drum grill still works as well today as it did in past decades.
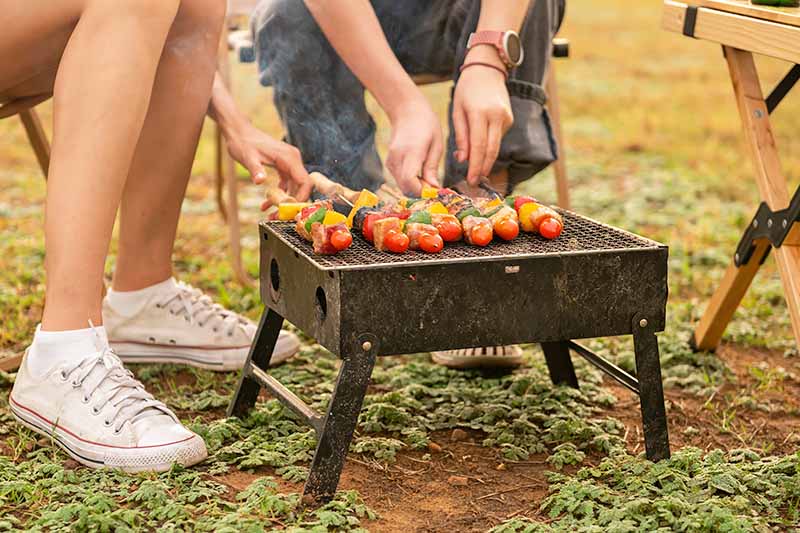
Easy to use and set up, charcoal barbecues were the original home grills. They’re still popular today for home use, and portable versions are great for camping, road trips, traveling, tailgating, beach parties, picnicking, and bringing along on other excursions.
They are perfect to throw in the RV or even in the trunk, allowing you to take that nice smokey taste with you anywhere you go.
Definitely on the low-tech end of the scale, they have the fewest number of movable parts so assembly is minimal, as is needing to replace parts in the future.
We’ll first go over our top 13 recommendations in our lineup of portable grills, and then review all the considerations you should keep at the forefront of your buying decision.
The Best Portable Charcoal Barbecue Grills
-
- American Gourmet 21201715
- Char Griller Akorn Jr. Kamado E06614
- Cuisinart CCG190RB
- Everdure Cube HBCUBEGUS
- Fire Sense Yakatori Cooker 60450
- Junior Charcoal Primo 200 PGCJRH
- Lodge Sportsman’s Pro LSPROG
- Oklahoma Joe’s Rambler 19402088
- Old Smokey #14
- Outsunny 846-023
- Portable Kitchen PK360
- Weber Go-Anywhere 121020
- Weber Smokey Joe Premium 40020
Charcoal Barbecue Grills Reviewed
Based on our criteria for user-friendly design, easy cleanup, durable materials, and clean portability, we have collected our top favorite picks that we know you’ll love.
1. American Gourmet 21201715
The Charcoal Tabletop Grill from American Gourmet, a line of grilling products by the well-known brand Char-Broil, was designed to have big barbecue features in a portable barrel-style model.
The sturdy steel drum has a front-mounted lid and a cool-touch handle for easy access to the heavy-duty cast iron cooking grates.
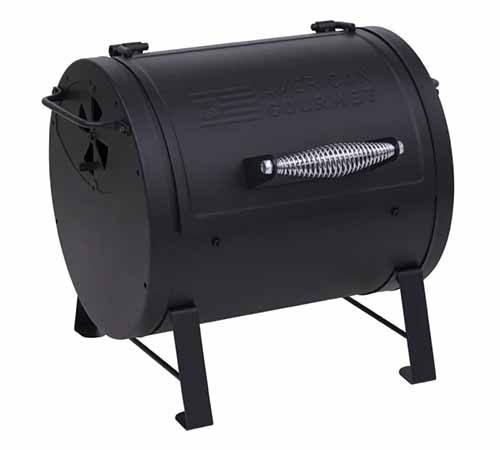
American Gourmet Charcoal Tabletop Grill, available on Wayfair
The American Gourmet tabletop model has the following specs:
- Measures 17.75 by 18.63 by 20.7 inches (HxWxD)
- Weighs 32 pounds
- 260-square-inch cooking surface
Dual disc dampers on either side of the frame ensure efficient airflow.
A slide-out charcoal drawer makes cleanup and access to the charcoal and ash easy and simple, and the coal grate lets you arrange briquettes as desired.
With its sturdy steel frame, four legs, and heavy weight, this grill will undoubtedly stay in place when in use.
Two handles on either side of the frame provide a safe and secure support system for carrying.
Char-Broil provides a 1-year warranty on all parts – meaning the grates, lid, firebox, and all other pieces – to be free of perforation, as well as manufacturing and material defects.
A solid build and smart design make the American Gourmet Tabletop a standout performer at any outdoor cookout, making it an impressive favorite.
Read customer reviews and check prices on Wayfair and Amazon now.
2. Char-Griller AKORN Jr. Kamado E06614
Char-Griller’s Akorn Jr. Kamado Charcoal Grill lets you enjoy the superior insulation and cooking features of a kamado cooker in a portable size – so you can bake pizzas, roast, and grill, all in the same smaller vessel!
The Akorn Jr. gives excellent, even heating and allows for versatile cooking choices, at home on the patio or when you’re traveling.
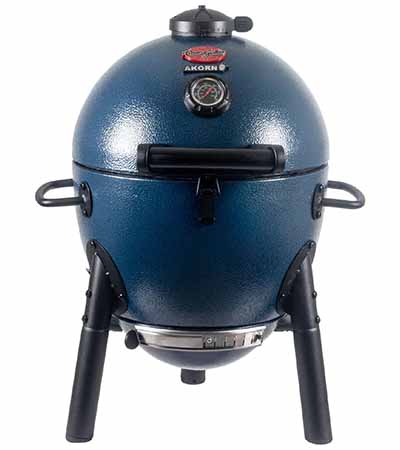
Char-Griller Akorn Jr. Kamado, Sapphire Blue, available on Amazon
And unlike ceramic kamados, the brawny steel construction makes this egg-shaped cooker safe to use at any location.
The Akorn Jr. has the following specs:
- Measures 26 by 20 by 20 inches (HxWxD)
- Weighs 33 pounds
- 153-square-inch total cooking area
According to the company website, the cooking surface has a 14-inch diameter, and is large enough to hold 4 steaks, 6 chicken breasts, 8 burger patties, and 14 hot dogs.
The insulated, triple-wall steel construction gives consistent, even heat throughout the cooker, and provides maximum heat retention. It can maintain temperatures between 200 and 700°F.
The dual dampers regulate airflow for temperature control – varying the adjustments of both will give you a range of temperatures to achieve your desired heat level for whatever you’re cooking, or the cooking technique you wish to use.
From gently smoking large roasts to searing steaks, you will be able to create the barbecue party of your dreams!
The hinged lid conveniently stays in place while tending your food, and you can easily shut and open the lid with a large handle in front. The lid can also be locked to the base, with a hinged lock that’s also located in the front.
The heavy-duty cast iron cooking grate delivers even heat.
Char-Griller Akorn Jr. Kamado, Red, available on Amazon
A separate fire grate at the bottom of the grill provides a flat surface to arrange the coals, and Char-Griller’s Easy Dump removable ash pan makes cleanup a breeze.
You can easily pick up the grill, with two large handles on either side of the base. Plus, three sturdy steel legs provide excellent stability.
A built-in temperature gauge located in the front of the lid provides a clear reading of the internal temperature.
This model is currently available in a few different colors: red, ash, black, orange, and sapphire blue.
There are also multiple options for you to purchase the grill along with various accessories, including a smoking stone, chimney starter, lump charcoal, or a protective cover.
By inserting the smoking stone in between the charcoal and the cooking grate, you are able to create indirect heat that is best for low and slow cooking and smoking techniques.
Char Griller provides a 5-year warranty from the date of purchase for rust-through and burn-through of the hood or bottom of the grill. This does not include surface rust, which is not considered a manufacturing or materials defect.
A 1-year warranty is provided to cover the ash pan and any defective parts.
Assembly is required upon delivery to connect all individual parts together – be sure to thoroughly follow the instructions provided in the owner’s manual.
Review prices, check for available colors and accessories, and read customer comments on Amazon now.
3. Cuisinart CCG190RB
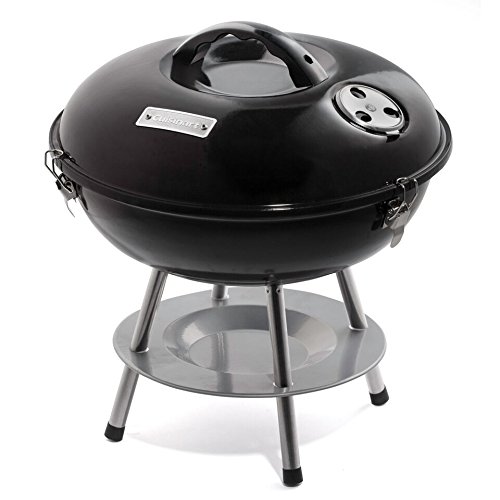
Cuisinart’s Portable 14-Inch Grill is lightweight and easy to transport, making it another ideal cooking vessel for camping, day trips, and tailgating.
The Portable has the following specs:
- Measures 15 by 14 by 14.6 inches (HxWxD)
- Weighs 4 pounds
- 150-square-inch cooking surface
The steel firebox, lid, and lid handle are coated with enamel for long-lasting durability.
The stainless steel wire cooking grate and charcoal grate are chrome plated and easy to clean, and the tripod legs make a sturdy stand.
An ash tray beneath the base catches any loose coals and ashes falling from the charcoal grate.
Cuisinart Portable 14-Inch Grill, red lid and black base, available on Amazon
Two airflow control vents provide precision airflow and temperature control. One damper is located on the bottom of the firebox above the ash collection tray, and the other damper is located on the top of the lid.
Three steel latches lock the lid securely in place for mess-free transport.
Please note that the lid fully detaches from the base, meaning you will need to locate a safe spot to temporarily place the lid, or hold the lid in one hand, every time you open it to tend to the coals or food.
Cuisinart Portable 14-Inch Grill, black lid and black base, available on Amazon
Given the multiple hardware pieces needed to assemble this grill, assembly may be complicated – consult the manual to follow instructions closely.
You can purchase this model with a red lid and black base, or in all black.
A slightly larger 16-inch model is also available.
Cuisinart provides a 3-year warranty to be free of material or workmanship defects.
Compact, efficient, and tidy, the Cuisinart Portable is lightweight but delivers dependable results for clambakes, cookouts, and picnics.
Check customer reviews and prices now at Wayfair and Amazon.
4. Everdure Cube HBCUBEGUS
Cute, colorful, and compact, Everdure’s Cube is a portable charcoal grill that makes impromptu cooking on the go convenient and fashionable.
In addition to the porcelain enameled firebox, it also comes with an integrated food-grade plastic storage tray and a bamboo preparation board to make easy and clean work of bringing your food on the road and preparing it outdoors.
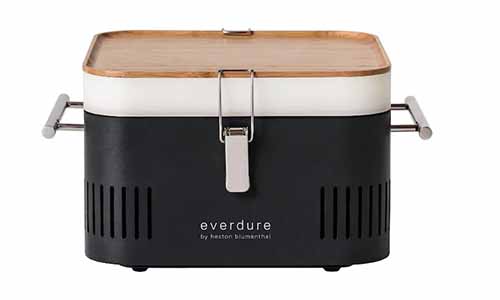
Everdure Cube, Graphite, available on BBQ Guys
You can pack your food in the storage tray with an ice pack, or you can use the storage tray to hold utensils or plateware instead.
When they’re not in use, the board and tray fit on top of the firebox. A front and back latch keep all of the pieces together as you travel.
The Cube has the following specs:
- Measures 9.1 by 16.7 by 13.7 inches (HxWxD)
- Weighs 15.43 pounds
- 103.9-square-inch cooking area
The firebox features a built-in heat protection shield, including multiple vertical vents along all sides of the frame of the firebox.
Stainless steel handles on either side stay cool to the touch even while cooking, which means you can safely move the firebox without injury.
The chrome charcoal grid is slightly raised to fit inside a black enamel-coated steel charcoal chamber. This two-piece system keeps your coals neatly arranged with space to aid airflow below the chrome grill rack. All of these pieces can be removed for easy cleaning.
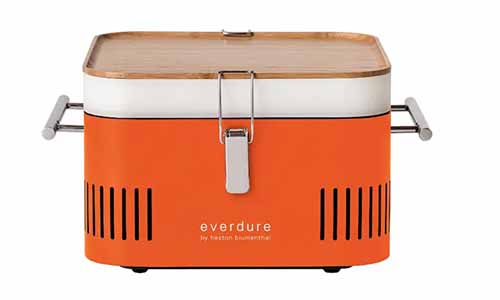
Everdure Cube, Orange, available on BBQ Guys
One of the main disadvantages of this model is that there are no dampers to manually modify the airflow and temperature. And with no actual lid to use during cooking, you will need to be mindful of the whims of Mother Nature when operating the fully exposed grill.
Instructions are provided for controlling the temperature by positioning the coals in different ways in the charcoal chamber, depending on whether you want direct or indirect heat.
You can buy the Everdure Cube in various colors including graphite, khaki, orange, stone, and black.
While it’s easy to carry the Cube by the two handles, you can also purchase a carrier bag specifically designed for the grill, available from BBQ Guys and Amazon.
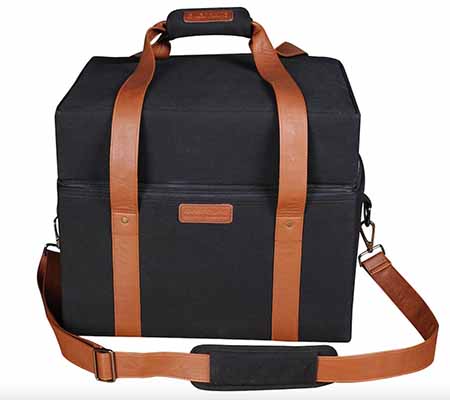
Everdure Cube Carrier Bag, available on BBQ Guys
You can also purchase the carrier bag and grill together, an option available to review on Wayfair.
Some assembly is required upon delivery. Because no tools are needed for this, putting all the parts together is a quick process.
A 10-year warranty is included for the firebox, out body, and cooking grids to protect against all rust or burn-through, as well as a 5-year warranty for the exterior paint and finish against rust-through.
Check all buying options, customer reviews, and prices on Wayfair, BBQ Guys, and Amazon now.
5. Fire Sense Yakatori Cooker 60450
The Fire Sense Yakatori Cooker is the perfect size and design for tabletop use at the park or on the patio.
Even though it is intentionally designed for cooking skewers, the Yakitori Cooker is actually perfect for any type of open grilling.
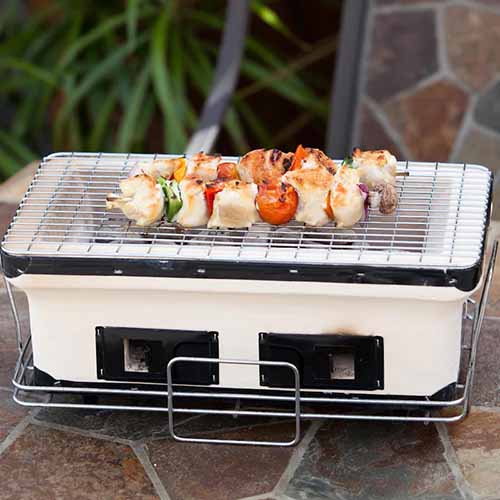
Fire Sense Yakatori Cooker, available on BBQ Guys
Constructed from unfired diatomite clay, this style of a Japanese table barbecue firebox is renowned for excellent heat retention and radiation, and delivers hot, even temperatures across the entire cooking surface.
The Yakatori Cooker has the following specs:
- Measures 7 by 10 by 18 inches (HxWxD)
- Weighs 20 pounds
- 157-square-inch cooking area
The 17-by-10-inch cooking grate is made of chrome-plated steel and clips snugly onto the firebox rim.
The cooking grate also features a unique raised rim, forming shallow walls along the exterior to hold food in place.
The interior of the firebox is divided into two equally-sized sections. A vented brick tile is held in each section, a material that provides extra heat retention. You pile your charcoal on top of these bricks.
Dual dampers provide accurate temperature control, with sliding doors to adjust the amount of ventilation.
The entire firebox rests inside a removable metal stand with handles for easy and safe movement while in operation.
Fire Sense provides a 1-year warranty against any defects in materials and workmanship. Customers can also choose to extend this warranty for an additional year if they write a review on the company website within the first year of ownership, or 365 days from the date of purchase.
Assembly is far simpler than it is for the other models reviewed here – upon delivery, you simply need to place the firebox in the stand, place each brick in the divided section, and secure the cooking grate on top.
Be advised that natural clay may vary in color, ranging anywhere from light tan or gray to peach or pink. The color does not affect the firebox’s quality or performance level.
This type of more delicate material must be covered after use, and preferably stored in a dry location. Any exposure to morning dew, prolonged humidity, rain, or other types of moisture will cause damage – and moisture exposure isn’t covered by the warranty!
Read more now to check prices and reviews on BBQ Guys, Wayfair, and Amazon.
6. Junior Charcoal Primo 200 PGCJRH
With Primo’s patented Primo Oval design inspired by kamado-style grills, the company’s Junior Charcoal model still offers the best cooking efficiency in a smaller, portable format.
The oval shape of this line of charcoal grills gives you two distinct cooking zones, allowing you to grill at high heat and roast at a low heat at the same time. With the right configuration of coals and optional accessories, you can choose to grill, sear, roast, bake, or smoke your food.
Check out some quick specs:
- Measures 21.5 by 21 by 16.25 inches (HxWxD)
- Weighs 100 pounds
- 210-square-inch cooking area
- Made in the USA
Compared to other portable models, this option will give you a lot of space – it’s a smart choice for anyone who still wants to get a lot of grilling done at once.
According to the manufacturer, you could simultaneously roast two 14-pound turkeys!
There are two vents: a 6-position aluminum damper on top of the lid features a protective hood for all-weather grilling, while a 5-position aluminum damper on the lower portion of the base allows you to adjust airflow going into the bed of charcoal as you cook.
The lower vent, when completely open, is also used for raking out ash.
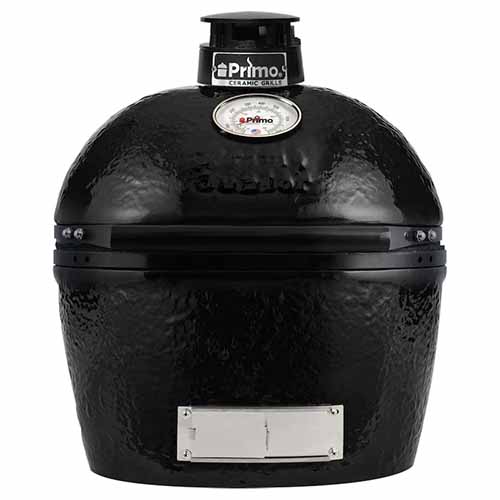
Junior Charcoal Primo, available on BBQ Guys
The grill is made of ceramic with a lead-free porcelain glaze. This gives the grill thorough heat retention to maintain consistent temperatures, which you can monitor with the built-in thermometer in the lid.
Despite the weight of the ceramic, Primo designed the hinged handle on the lid to significantly reduce the force necessary to open it.
The stainless steel cooking grid measures 13.5 by 18.5 inches. It’s easy to clean and reversible, and the cast iron charcoal grate provides a sturdy base for the bed of charcoal.
You can choose from various accessories that are available for purchase with this model or they can be purchased separately, depending where you choose to buy your grill.
You can review all of the Primo Ceramic Grill buying options from BBQ guys to customize your purchase.
But here’s just a little taste to whet your appetite…
Currently, you can purchase the Junior grill from BBQ Guys on its own, or with a handled carrier.
Accessories for the Junior available to purchase separately from BBQ Guys include a cast iron firebox divider to separate coals for varying temperatures, a ceramic heat deflector to allow better heat circulation for slow cooking, or a rotisserie kit.
Because the main parts of the grill are pre-assembled, only minimal assembly with no tools is required upon delivery – you just need to place parts inside one another. However, with the handled carrier, you will need to do more intricate assembly work.
All of Primo’s ceramic grills come with a limited lifetime warranty for all ceramic parts, a limited 5-year warranty against rust-through for all metal parts, a limited 1-year warranty against rust-through for all cast iron parts and all other parts/accessories, and a limited 30-day warranty for felt gaskets and thermometers.
Read customer comments, check all buying options and accessories, and review prices now at BBQ Guys.
7. Lodge Sportsman’s Pro LSPROG
A solid choice for tailgating, travel trailers, or the patio, Lodge Sportsman’s Pro Cast Iron Grill is a rugged hibachi-style model.
Made of durable cast iron pre-seasoned with 100% natural vegetable oil, it offers superior heat retention so you can use fewer coals.
The Sportsman’s Pro has the following specs:
- Measures 7.56 by 9.69 by 19.38 inches (HxWxD)
- Weighs 33.25 pounds
- 150.75-square-inch cooking area
- Made in the USA
The Sportsman’s Pro features a simple 4-piece design that includes the following: the bottom frame, the ash tray, the firebox base, and the grill grate.
Two handles located on either side of the firebox measure 5.625 inches in width.
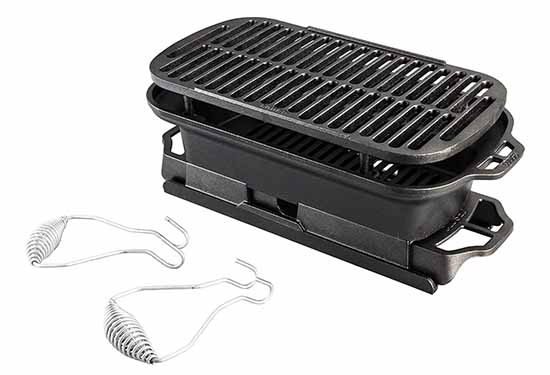
Lodge Sportsman Pro Cast Iron Grill, available on Amazon
Purchase of this model includes a set of two steel Lodge Hook and Carry Handles that you can latch onto the firebox handles for safe and secure transport.
There are 1.5 inches of clearance space between the grill grate and the top of the firebox.
The slide-out ash drawer helps you to more easily and cleanly remove ashes after cooking.
Dual air vents located on either side of the frame and ash tray give you some control of your heat and airflow as you cook – you can partially slide out the ash tray to control how much the vent is exposed or covered.
Ruggedly built, the Sportsman’s Pro is excellent at retaining heat and ideal for open or hibachi-style cooking – but the lack of a lid limits its capabilities a bit.
And being made of cast iron, care needs to be taken to prevent rust. Even though it comes pre-seasoned, don’t think this gives you an excuse to leave it out in the rain! You will also need to re-season periodically with vegetable oil to maintain it.
You can read more about how to properly season your cast iron in our helpful tutorial.
Some simple assembly is required upon delivery.
All Lodge products carry a limited lifetime warranty. If something should happen to the grill, contact Lodge’s customer service department and provide them with photos of the damage or defect. They will then review your case for a potential replacement.
Read customer reviews and find prices now on Amazon and Wayfair.
8. Oklahoma Joe’s Rambler 19402088
Oklahoma Joe’s Rambler Tabletop Charcoal Grill gives you heavy-duty barrel grilling construction, ensuring supreme durability in a portable format.
Here are some quick specs:
- Measures 21.8 by 26.8 by 19.5 inches (HxWxD)
- 218-square-inch cooking area
- Weighs 52.89 pounds
The body and four sturdy legs are made of painted heavy-gauge steel. The two removable cooking grates are made of cast iron.
Fully assembled side by side, the cooking grates create a flush cooking surface that measures 13 inches in length and 17 inches in width.
The lid operates on a hinged system, which stays securely attached to the firebox when you lift it up to check on the food and tend to the coals.
Oklahoma Joe Rambler Tabletop Charcoal Grill, available on Amazon
An adjustable steel charcoal tray can be placed at three different height settings inside the firebox – the highest setting closest to the cooking grates allows you to grill and sear on high heat, while the lowest setting farthest away from the cooking grates allows you to cook your food more indirectly and slowly.
Two air dampers, a smokestack on the top lid, and a sliding 3-vent damper system on one side of the firebox give you accurate airflow and temperature control.
A front-access, full-size removable ash pan – meaning it runs the entire depth and width of the grill – helps with any charcoal ash cleanup. You simply slide it out from the front of the firebox.
And a hefty grill needs hefty handles! There are two large and sturdy side steel handles on this model to help you pick up and transport the heavy firebox, as well as a large rubber handle grip that stays cool to the touch when you open the lid as you cook.
A lid-mounted temperature gauge measures the internal temperature precisely without requiring you to open the lid and risk allowing heat to escape. It also has glow-in-the-dark accents for easy reading.
Assembly is required upon delivery, and you will need both a screwdriver and a wrench.
A 2-year warranty covers the grates, lid, firebox, and all other parts against perforation, as well as manufacturing and material defects.
You can choose to purchase the grill with a compatible grill cover, available now on Amazon.
Review customer comments and check prices on Wayfair and Amazon.
9. Old Smokey #14
The Old Smokey Portable Charcoal Grill #14 is a lightweight cooker perfect for small families, camping trips, beach days, and tailgate parties. It can also serve as a reliable secondary support alongside your full-sized barbecue grill.
The bucket lid and firebox base are constructed of rust-resistant aluminized steel. The three legs, also made of aluminized steel, keep the base sturdy on a flat surface.
Old Smokey Portable Charcoal Grill #14 has the following specs:
- Measures 21.5 by 14.5 by 14.5 inches
- Weighs 10 pounds
- 123-square-inch cooking surface
- Made in the USA
The cooking grate measures 13 inches in diameter and the manufacturer says 6 small hamburger patties will fit on it. The charcoal bottom grate measures 11.5 inches in diameter, and sits 4.5 inches below the cooking grate.
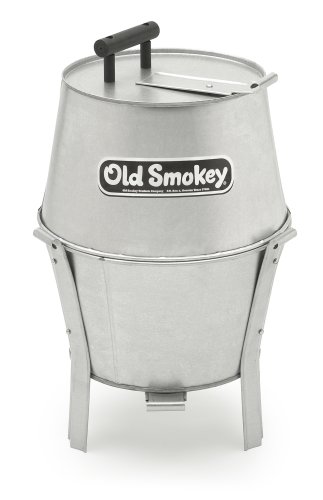
Old Smokey Portable Charcoal Grill #14, available on Amazon
With a heatproof plastic handle on top of the lid, the lid is a completely separate unit from the firebox. This may become a hassle when you need to tend to the coals or food, since you’ll either have to hold it in one hand as you use your other hand for cooking or place it down on a designated heatproof surface.
A 14-gauge steel bracket, also made by Old Smokey, can solve this problem. You can buy this bracket on Amazon.
You place the bracket on the top lip of any of the legs. Once assembled, you can safely hang the lid on the bracket while you are tending the coals or food.
The bottom charcoal grate features a series of multiple small circular vents for even burning and heat distribution.
There are two dampers, one located on the top of the lid, and the other on the bottom of the firebox. Simply slide the handle on the damper’s 8-inch cover in either direction to reveal the hole underneath for venting.
Decidedly no-frills with a simple construction, Old Smokey #14 is a tough little cooker for the patio, or for smaller gatherings.
One of the biggest flaws with this model is that it doesn’t have carrying handles or a locking lid, so take care when moving this one.
This model does not provide an ash tray either, so cleanup post-grilling might be messier than it is with other options reviewed here.
Some assembly is required upon delivery.
Old Smokey #14 comes with a 2-year warranty to be free of defects in materials or manufacturing. This does not cover normal wear, rust, or damage due to improper use.
Check out customer comments and current prices on Wayfair and Amazon.
10. Outsunny 846-023
Don’t really see the point of acquiring an unnecessarily heavy portable grill? Wish you could just pick up and carry your cooking device in one hand? That’s possible with Outsunny’s 14-inch Charcoal Barbecue Grill!
The foldable design of this lightweight model lets you transport the grill so easily, and you can carry the entire compact vessel with a single handle.
Outsunny’s 14-inch Charcoal Barbecue Grill has the following specs:
- Measures 15.25 by 23.23 by 17 inches (HxWxD)
- Weighs 7.9 pounds
- 336.25-square-inch cooking area
Made of iron coated in black enamel, the firebox can withstand high temperatures. A heat-resistant plastic handle on the lid and two handles on either side of the firebox allow you to safely open the lid and move the grill to tend to the coals or check on the food.
A vented damper located on the top of the lid allows you to control the airflow without opening the lid.
Outsunny 14-inch Charcoal Barbecue Grill, available on Amazon
Two chrome wire mesh racks allow for multi-level cooking. Use more direct heat on the larger main cooking grate closest to the coals while keeping your other food warm on the smaller grate at the higher level.
These measure 12.5 by 17.75 inches for the larger grate, and 7.5 by 15.25 inches for the smaller one.
The coals rest on a grilling rack made of the same material as the cooking racks.
The lid is attached to the firebox with a hinge, so it stays connected to the base when you open it.
The 6-inch legs are foldable, providing you with the convenience of compact transport and storage capabilities. A latch keeps the lid and firebox closed securely in storage.
Assembly is required upon delivery.
Outsunny is a sub-brand of Aosom. All of Aosom’s products include a limited one-year warranty covering any defects in material or workmanship.
Read customer reviews and check prices on Wayfair and Amazon.
11. Portable Kitchen PK360
Looking for a versatile model, one that can be easily and swiftly deconstructed and reconstructed into multiple formats? You should seriously consider purchasing the PK360 Grill and Smoker from Portable Kitchen!
The PK360 has multiple detachable components, including a standing pedestal and two plastic trays, so that you have several options for how to build and operate your grill.
Take a look at these quick specs:
- Measures 42.9 by 54.2 by 26.9 inches (HxWxD)
- Weighs 90 pounds
- 360-square-inch cooking area
The cooking chamber is constructed entirely of rust-proof cast aluminum, a material that conducts heat more efficiently than steel, allowing the heat to disperse evenly and quickly throughout the chamber.
Use of the Control Tower pedestal allows you to operate the grill like a traditional stationary charcoal model, with a working height of 42.9 inches from the ground that’s appropriate for most adult users. The stand features two wheels to help you smoothly move it across the ground.
Portable Kitchen PK360 Grill and Smoker, available on Amazon
But if you prefer, the cooking chamber can be completely detached from the standing pedestal, so you can use it on a flat, non-flammable work surface – the perfect option when you want to travel with your grill.
The removable cooking surface and charcoal grate are both made of marine stainless steel.
The cooking surface is 24.8 inches by 15.8 inches, and the hinged design of the rack makes it easy to add charcoal while you’re cooking.
The cook chamber has 5,375 cubic inches of space. With this amount of headroom inside, you can cook larger items – according to the manufacturer, you can even fit a whole turkey inside this model.
The PK360 has a 4-point venting system, with two radial vents on top of the lid and two twin cylinder vents at the base of the cooking chamber. This multi-vent construction allows you to expertly control the airflow and temperature for effortless high-heat cooking as well as indirect low-heat cooking styles.
A hole in the bottom of the capsule helps you to manage ash buildup, or this can be covered with a detachable plug.
A built-in thermometer displays the internal temperature accurately.
Foldable and detachable plastic shelves on either side of the capsule provide tough and weather-proof workspaces. They attach to the handles on either side of the cooking chamber.
When the shelves are detached, you can use the sturdy handles to carry the capsule.
The PK360 is covered by Portable Kitchen’s “30-Day Rust Free is Risk Free Satisfaction Guarantee.”
A 20-year warranty covers the cast aluminum bowl and lid, along with a 3-year warranty for the cooking grate, charcoal grate, and any plastic components, and a 2-year warranty for all other metal accessories or parts. The warranties cover defective materials or workmanship from the date of purchase.
Assembly is required upon delivery.
We’ve covered the basics here, but if you’re interested in learning more details regarding this particular model, check out Foodal’s in-depth review of the PK360!
Check prices now on BBQ Guys and Amazon.
12. Weber Go-Anywhere 121020
The Weber Go-Anywhere has the compact size, features, sturdy design, and reliable quality that make it a great choice for use on boats, camping, or road trips.
The base, which Weber refers to as the cookbox, and the lid are made of porcelain-enameled steel, a finish that prevents rusting, cracking, and peeling.
There are two separate grates, both made of durable plated steel. The fuel grate holds the charcoal, and is assembled on the bottom of the firebox. The cooking grate is assembled above the fuel grate, and is used as the cooking surface for your food.
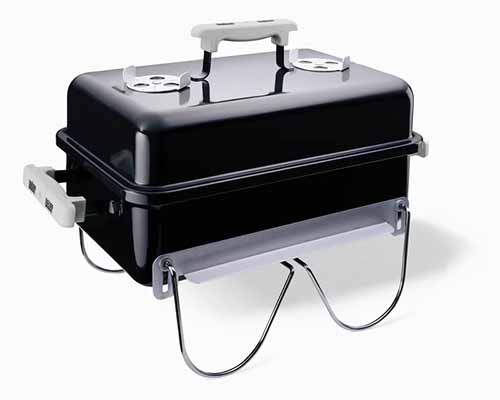
Weber Go-Anywhere, available on Wayfair
Both rust-resistant aluminum dampers situated on top of the lid can be used to adjust the airflow for accurate temperature control, without having to lift the lid. Each damper has three vent holes.
The flat, rectangular base makes it easy to arrange coals for one or two temperature zones, and the size and shape of this model will fit perfectly in the back of most cars.
There are three glass-reinforced nylon handles: two on either side of the base and one on the lid.
The sturdy, plated steel legs are designed to double as a lock. When not in use, pivot them over the top to lock the lid in place on the base for tidy storage or transport.
The Weber Go-Anywhere has the following specs:
- Measures 15 by 19.5 by 11.5 inches (HXWXD)
- Weighs 14.5 pounds
- 160-square-inch cooking surface
- Made in the USA
Some assembly is required upon delivery.
Weber provides a 10-year warranty for the base and the lid, guaranteeing no rust-through or bur- through. All plastic components – namely the nylon handles – are protected with a 5-year warranty, excluding any fading or discoloration. All remaining parts come with a 2-year warranty.
According to Weber’s customer service department, this grill can heat up to around 450°F.
Thoughtfully designed and well-built, the Go-Anywhere makes it easy to enjoy cookouts on the patio or on location at your chosen vacation destination.
The compact and lightweight Go-Anywhere is designed for fast and easy enjoyment and clean transportation. From the sturdy legs that double as a lid lock to the multiple dampers that manage temperature, Weber’s attention to detail and quality is evident throughout.
Check prices and read customer reviews now on Wayfair and Amazon.
13. Weber Smokey Joe Premium 40020
The classic kettle design and lightweight portability of Weber’s Smokey Joe Premium Charcoal Grill makes it a favorite for the beach, camping, or picnics.
The porcelain-enameled lid and bowl retain heat, providing a consistent temperature for the most even cooking. Baked on at approximately 1500°F, this finish is fused to the steel, which prevents rusting, cracking, and peeling.
It has the following specs:
- Measures 17 by 14.25 by 16.5 inches (HxWxD)
- Weighs 10 pounds
- 147-square-inch cooking area
- Made in the USA
Adjust the single aluminum damper located in the center of the lid for even burning and temperature control. A glass-reinforced nylon handle on the top of the lid allows you to safely open and close the lid while in use, and the domed lid design circulates air for a smoky flavor.
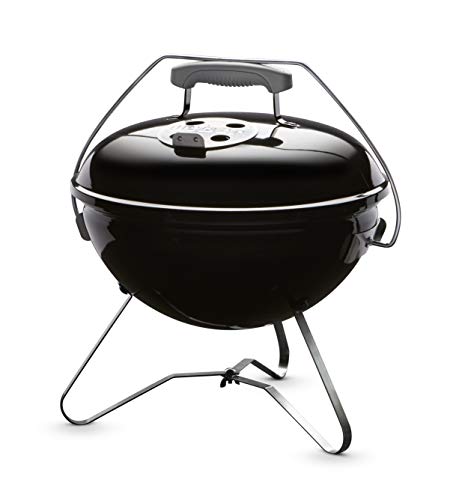
Weber Smokey Joe Premium Charcoal Grill, black, available on Amazon
Weber’s Tuck-N-Carry Lid Lock is a practical feature that allows you to carry both the body and lid of the grill with no risk of either piece disconnecting from the other. The lock system also doubles as a lid holder, so you don’t have to place the lid on the ground when tending to the food.
The durable coal grate and the 14-inch cooking grate are made of triple-plated steel. And the three-legged aluminum stand keeps the grill stable as you cook.
Some assembly is required upon delivery.
Weber provides a 10-year warranty for the bowl and lid to be free of rust-through or burn-through. The plastic components have a 5-year warranty, which excludes fading or discoloration. All remaining parts of the grill are covered with a 2-year warranty.
The Smokey Joe Premium offers lightweight convenience and an efficient design that makes it a natural in any outdoor setting.
You can purchase the Smokey Joe Premium in a variety of colors, including slate blue or black.
Read customer reviews and compare prices at BBQ Guys, Wayfair, and Amazon.
A Bit of Background
The portable charcoal grill offers a no-frills approach to outdoor cooking, with the same basic features as the one-piece kettle models first produced by Weber in the early 1950s:
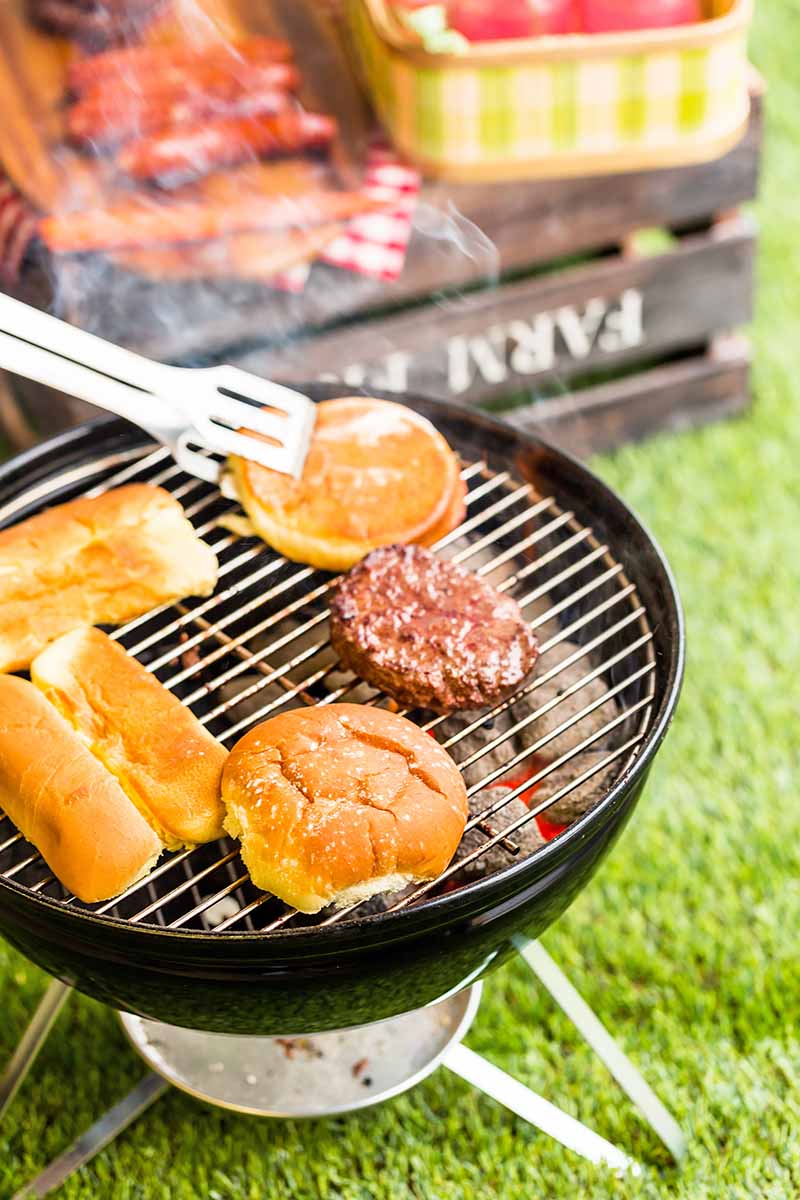
A seamless metal drum where the briquettes are placed and lit, with a metal grate placed over the top for holding the meat and veggies while they cook, plus tripod legs and a lid.
There’s not much more to it than that.
When given a bit of attention through regular cleaning and maintenance, cinder-based models can produce years of barbecuing enjoyment via their bare-bones components.
Many barbecuing aficionados still swear by charcoal, insisting that the manner in which it imbues food with its unique, smoky flavor is the premier method to cook an outdoor meal over a flame.
Types of Fuel
Did you know…
There are two primary fuels used for a portable charcoal grill, either lump coals or briquettes.
Both are produced in the same manner: the wood is burned with very little oxygen, reducing it to carbon, or coal.
Lump charcoal is also known as natural hardwood charcoal, and is mostly produced from scrap lumber. It can come in coal lumps from wood known for specific flavoring, such as apple, cherry, oak, pecan, mesquite, or hickory. It produces less ash than briquettes and burns hotter, reduced to coal without the use of any additives in the refining process.
However, it comes in unevenly sized pieces that may not be evenly charred, which can result in uneven heat. Also, the bags they come in might be packed with an excess amount of charred dust, which doesn’t burn well and acts as a barrier to oxygen when burning.
Thanks, Ford!
We can actually thank Henry Ford for today’s briquettes, as he was responsible for their initial production and availability for use in the home market.
In the early 1920s, he partnered with E. G. Kingsford to turn the large quantities of scrap lumber from his auto plant in Upper Michigan into charcoal for home consumption.
Initially called Ford Charcoal, in 1951 new owners changed the name to Kingsford, and it’s still the bestselling briquette in the US.
Learn more about the origins of American barbecue here.
Briquettes are made from sawdust with some additional ingredients added for improved burning and binding, such as coal, limestone, borax, and cornstarch.
Insta-light briquettes have been infused with flammable lighter fluid as well, for quick, easy ignition. However, this is a petroleum additive that many claim leaves an oily aftertaste on the food.
Top Charcoal Features of Note
What are some of the defining characteristics of a charcoal grill? We’ll break down all the top features right now!
Heat
Charcoal can easily reach high temperatures around 700 to 1200°F, but that range can fluctuate depending on the size and make of the firebox.

As for gas models, they won’t be able to hit that temperature. The maximum temperature of a propane grill is typically around 550°F to 600°F.
Naturally Smoky Taste
Charcoal has a naturally smoky taste that some successful BBQ pit-masters swear is the secret ingredient.
Easy to Assemble
Assembly time, especially for a kettle design, is substantially less than it would be for a gas model of the same size.
This is because these cookers boast a short list of parts: a drum base, 3 legs, a grate, a crank to raise and lower the grate, and a lid – you’re able to put it together and ready to cook in 30 minutes.
Because of the many additional parts and fittings, a mid-range gas model can take up to 2 hours to put together.
Low Maintenance
Maintenance is much simpler, as the only part likely to wear out is the grate. This may need to be replaced every few years, depending on the material, amount of use, frequency of cleaning, and winter storage.
It’s a Smokehouse
A grill full of burning embers will easily double as a smoker – although these are NOT generally capable of achieving a multi-hour cold smoke. After a couple of barbecues, you’ll figure out the temperatures and times needed to enjoy that smokehouse flavor.
Lightweight
For camping, a picnic, or a clambake where you need to bring your grill along with you, charcoal’s the way to go. Not only is the cooker itself usually lighter with most models because it’s made with fewer parts, carrying a bag of coal is much lighter than 20 pounds of propane will be.
The Drawbacks
It’s not all perfectly cooked hamburgers. When it comes to charcoal grills, there are a few disadvantages that you should be aware of before you make this significant purchase.

Here are the main points for and against the use of coal briquettes for barbecuing:
Slower Lighting
The major drawback of using charcoal rather than gas is the time factor involved in setting the coals, lighting them, and burning the briquettes until they’re sufficiently hot for grilling.
It’s a bit of a production and can take 20 to 30 minutes before the coals are red hot.
So, this is not the best technology if you just want to quickly barbecue a chicken breast while you toss a salad after a long day at work.
On the other hand, there are those who enjoy the hands-on process of cooking with charcoal – the most dedicated charcoal user sees the act as an homage to the grilling gods.
Still others will use the 20 minutes or so spent waiting for the grill to heat up as a timer for prepping the meal, so everything’s ready to go on the grate when the coals are at their prime.
Ashes
The next objection is the disposal of the ashes afterwards. It’s another step in the cleanup and it can be a messy job, particularly if it’s windy outside.
So, try to stay upwind!
Features to Look For
Now, if you’re still on board and thinking of purchasing a new model, there are some specifics to consider before making your decision.

Read more below for all of the features to look for.
Ash Catcher
An ash catcher is basically a pot or bowl-shaped container that latches onto the bottom of the kettle. Ash residue can be channeled into it via a lever in the base of the drum, which also acts as a bottom vent.
Hinged Grate
A model with a hinged grate is a nice extra feature. It allows for easy access to the ember bed, without having to remove the grate.
Electronic Gas Ignition
Some larger new models will have an electronic ignition, which is powered by a small propane tank to fire up the briquettes in just a few minutes. But note that this is rare with portable cookers.
Chimney Starter
If you don’t like using lighter fluid or prefer not to have an electronic ignition, look for models that include a chimney starter to get the coals burning fast. These are often sold separately.
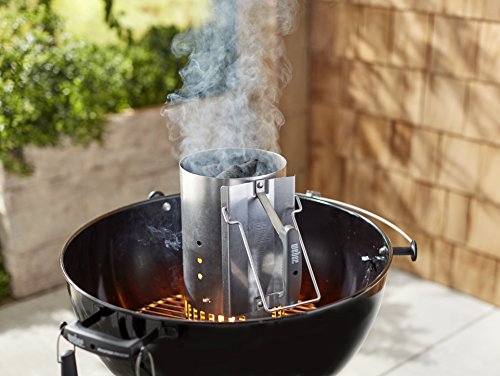
Weber Rapidfire Chimney Starter, available on Amazon
The Weber Rapidfire Chimney Starter is a durable option for producing hot coals. You can buy it now on Amazon.
Seamless Firebox Construction
Whatever the shape of the firebox, you want it to feature seamless construction to prevent corrosion from occurring.
Tight-Fitting Lid with Lock
A tight-fitting lid is a good feature on all models, but if you plan to use yours as a smoker, a good seal is mandatory. And a lid that latches is needed for transportation purposes.
Cooking Area
Pre-determine your cooking requirements before deciding on the surface area of your grate. If you often cook for big parties, more food means you’ll need a bigger size.
Grate Construction
As with other grills, grates come in a variety of materials including nickel or chrome-plated wire, stainless steel, cast iron, and enameled steel or cast iron.
Adjustable Grates
In larger models, the cinders will sit on a grate that can be raised or lowered with a crank to adjust cooking temperatures. In smaller models, look for a unit in which the cooking grate can be adjusted to create different temperature zones.
Construction Material
Materials used in construction range from clay and porcelain coated steel to cast aluminum and cast iron.
Dampers
For efficient fuel burning, these models require dampers to regulate airflow. Look for units that have dual dampers, one for intake and one for exhaust. Some models may have even more for optimal control.
Base, Stand, or Legs
Look for units that have a sturdy base, stand, or legs – you don’t want to be accidentally tipping over a grill full of hot embers!
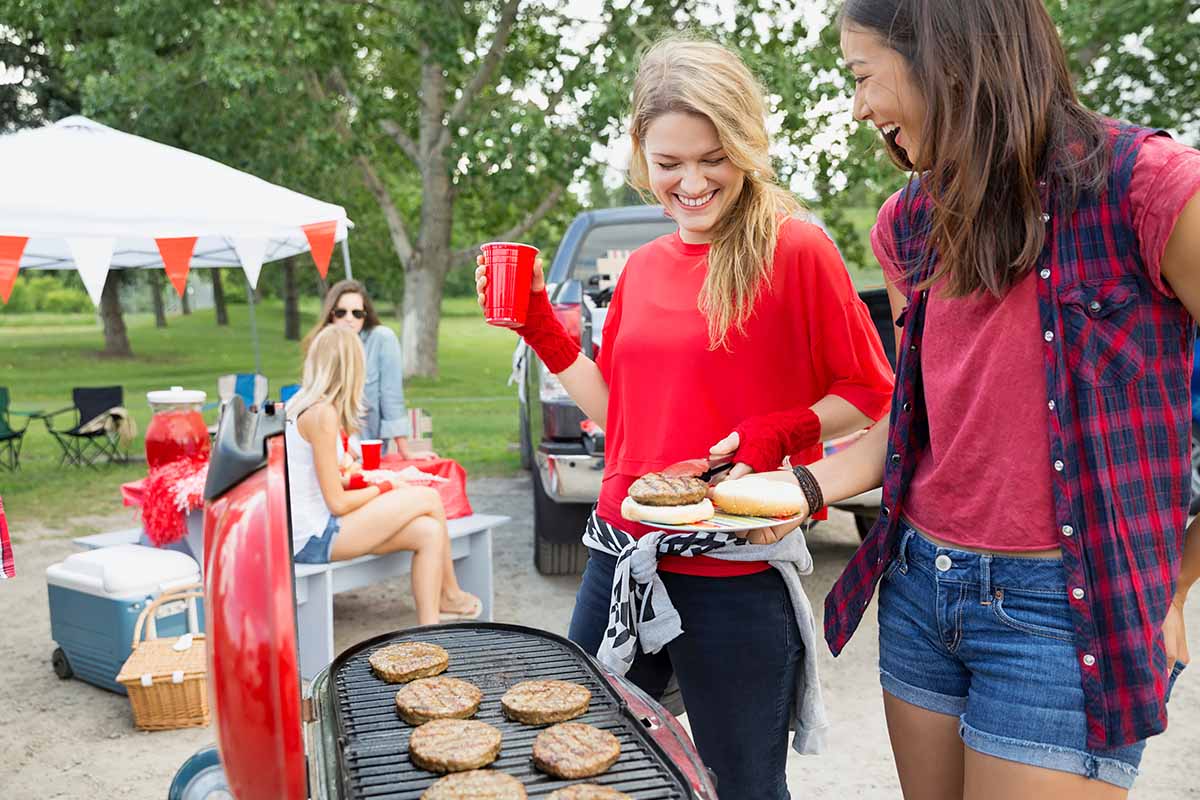
Sweet, Smoky Flavor
Now that you’ve read our review of the best portable charcoal grills, are you tempted to add sweet, smoky flavor to your barbecue season with one of our top picks?

Some are tiny and lightweight, others are big and brawny. But they’re all compact, easy to tote and load, and guaranteed to add the unmistakable flavor and fragrance of smokin’ hot coals to any alfresco meal.
Plus, they make a great secondary cooker for hosting large patio parties at home!
If you have any questions, or a favorite model you’d like to recommend, drop us a line in the comments below.
If one grill isn’t enough for all your summer fun, read up on our reviews of other outdoor cooking appliances:
- The Best Portable Gas BBQ Grills
- The Best Backyard Charcoal BBQ Grills
- The Best Full-Sized Gas BBQ Grills
© Ask the Experts, LLC. ALL RIGHTS RESERVED. See our TOS for more details. Product photos via Amazon, BBQ Guys, and Wayfair. Uncredited photos via Shutterstock. Originally published on May 22, 2015. Last updated on April 30, 2023. With additional writing and editing by Nikki Cervone.
About Lorna Kring
Recently retired as a costume specialist in the TV and film industry, Lorna now enjoys blogging on contemporary lifestyle themes. A bit daft about the garden, she’s particularly obsessed with organic tomatoes and herbs, and delights in breaking bread with family and friends.

I really never gave much thought to charcoal before this post. The extent of my knowledge was that you stick it in the barbecue, light it, wait, then cook. So this info was fascinating to read. At the moment I don’t have much need for a portable grill, but if that changes, this is a great guide and I’ll be sure to refer to it.
Glad you found the post interesting Leopard. And as you say, if you ever do need a portable model you have a starting point for reference info.
I have the Cuisinart portable 14incher and am in freaking love with it. I bought mine at Target for 16.99 (I can’t remember if that was a sale price or not) about two months ago and when I brought it home my boyfriend LAUGHED at me. I’m the one laughing now because we have seriously used that thing at least three times a week since buying it. We have taken it to the river, to the beach and camping and it is so easy and low maintenance.
That’s awesome dandeliion, thanks for letting us know how it’s working for you. And at that price, I’d say you’re getting your money’s worth out of it!
Ah, what excellent timing! My husband had been wanting a grill and we recently signed a lease for our new 1 bedroom apartment where the property management gave us the okay to get our BBQ on in the backyard 🙂 We are definitely in the market for an outdoor cooker such as this, though we haven’t quite decided whether to go gas or go charcoal; my husband says charcoal because he loves the smokey taste, but I say gas because it is easier to light.
The products listed here all seem amazing and at a reasonable price, so I will definitely have to do some online shopping and some more reviewing. Thank you for the breakdown of each item!
So cool that you can use a BBQ in your new digs tangela… glad you found the post when you needed it!
I didn’t know there was more than one type of fuel. My family has only used Kingsford. That is the only brand I’m familiar with period. I never knew Henry Ford was behind all of this. I’ve got to say, he is quite the business man.
Kingsford is what I remember from the early family bbq’s too. And yes, he was quite a visionary…
I like the webber go anywhere charcoal grill the best. Ever try hauling around a normal size charcoal grill? it is a pain to say the least.
The Weber portable is a nice choice nyte, much more convenient that a regular size!
This makes me really excited to see the summer time come around. I have my old trusty portable grill ready to go, but the truth is is that it is probably getting towards the end of its run, which has been great, and I might be in the market for a new one here pretty soon. Loved the article and it really got my mouth watering for some BBQ.
Warm temperatures and BBQ are just natural together rz3300! Glad you found the post useful, and hope you find a good replacement for your old companion.
My husband has a charcoal grill for tailgating, but it is heavy, awkward, and a little rusty. It is such an eyesore that I wanted to put it in storage, but my husband apparently thinks that he cannot possibly continue to draw breath if it is not in our apartment . He has not used it since before we were married, so it just sits there and collects dust.
I will take a look at some of the options that you shared; I am sure that I can find one that will not embarrass me if visitors to our apartment see it, plus I think he will be surprised that I bought him one. He can be so tough to buy for, so I am glad that I stumbled across this article!
Lol! He sounds pretty attached to his tailgating buddy CS, but maybe a new one would ease any separation anxiety! Glad the post gave you some gift ideas for a hard-to-buy-for guy.
I currently have a full size charcoal grill- it does have a propane start, which makes things easier. I wouldn’t switch it for gas any day. The flavor that briquettes provide is an irreplaceable taste. After reading this I am considering getting a small one. Having the possibility for portability would be fantastic for all of the reasons you mentioned above. Now I have some ideas on where to look and what to look for. Thanks!
Charcoal certainly has its own unique flavor contribution julesm07. And if you’re a fan, having a portable one can take picnics or a day at the beach to a whole new level! Hope you find what you’re looking for.
I’ve been using a portable grill only once in my lifetime and it was just perfect for a picnic on the backyard! Sometimes those heavy grills can be way too much, so it’s good that you have an option that can save you from dragging a heavy machine from place to place. Portable grills are also good for those who live in block of flats, since you can use them in balconies. They hardly take any space and are easily to be moved around.
Ah, talking about BBQ makes my tongue water. This makes me wait for the summertime even more!
A portable model is a sweet option indeed heavymetalkilos. Ours is getting dusted off this weekend for an Easter Monday picnic!
O my goodness! You gave us so many options my head is spinning, in a good way of course. This article came right on time for me. With the weather heating up where I live, cooking outside becomes something I like to do more. I have two large grills on my patio but it’s just too much work for two people. I was in Goodwill the other day and saw a little portable model. I decided not to get it because I wasn’t sure if all the pieces were there. I checked out the small Weber suggestion you had listed and I think I’ll pick one of those up. It seems perfect for me and my weeknight needs. I think I’ll get a little table to put it on because I’m not comfortable with leaving it so low to the ground. I have a lot of crickets in my yard and I’m not interested in barbecuing them up hehe.
You can’t go too far wrong with a Weber,, and the Smokey Joe is a people’s favorite! Ideal for those mid-week Q’s for 2.
A little table’s a good idea Beantowntobmore – much easier on the back… and the crickets!!
I must confess I’m one of those purists when it comes to grilling meat, I prefer coal over gas, the food just tastes differently, it adds that little something special. This post couldn’t come at at better time, my old portable Cuisinart died on me last week and while I love my big Weber Master Touch, it isn’t really an option if I’m cooking only for the two of us. Thank you for the great tips, I was planning to replace my Cuisinart but I hadn’t any ideas about what to look for. I think I’ll go for another Weber, the Smokey Jeo sounds like a great choice.
A nice compact portable’s very convenient for two Snarya, and the Smokey Joe is a really popular choice with online shoppers. Hope you enjoy grilling season!
Thanks for this comprehensive look at a wide variety of grills. I have been thinking about outdoor cooking for some time now, but my apartment complex frowns upon it. Still, they do provide us residents with a few stationary grills that we can use whenever we like. We just can’t use a grill in our apartments is all. I really wasn’t aware that gas was more economical than the cinder style, which is interesting. I’m all for saving money whenever possible, so this is good information to have.
Apartment dwellers do have a unique situation Novelangel, and we’ve just finished a post on the best outdoor electric grills – something many apartments will allow. And most are quite compact, suitable for small balconies, and economical too. Stay tuned to this dial for a solution many apartment/condo folks are turning to!
My choice of a BBQ set has to be charcoal version, somehow , I feel that a gas BBQ does not do justice to the whole concept of barbecuing. You can always grill on the gas inside the house, but it’s a whole different ball game when you have steaks on a fire and getting all that smokey flavor into the meats, now, that’s what I call a BBQ.
Lol, those are the sentiments of a true BBQ purist healthandvitality! Thanks for sharing.
Weber and Cuisinart are the best. We have one made by Weber and it has been long lasting. They are not that that easy to use but if you are a purist, you would prefer to have your food with a true wood-fired taste rather than being simply seared over a gas flame. And by the way, its doubles up as a heater and we often sit around it in the winter time. Also, I’d like to add, that the little snippet about Henry Ford being one of the pioneers of briquets is really fantastic!!
Both are reliable brands arunava2016, and give that rich wood-fired taste! Thanks for your thoughts, and glad you enjoyed the post.
I haven’t considered owning a barbeque or grill until now. I’ve been to friends’ places and had braais there, but I never considered actually doing one myself because I always assumed that it was a lot of work to get the fire going and all that. I think it’s time to choose one and give it a go. Who knows I might love it…
You might indeed NormaD! And once you get used to the timing, charcoal grills really aren’t much more work than gas – and it’s tough to beat that flavor!
Oh, my husband would love one of these. We definitely prefer char grilling. It would be handy to have a more compact model to drag along to the lake. The nearest lake has some areas that provide them near the tables, but my husband won’t use them. He always wants to bring his own. The one we have now though, is just too big.
Perhaps if I surprise him with one of these, we will get more trips to the lake! It’s an all day affair, so we have to be able to cook up something yummy for the kids and grandkids.
A nice little portable would be ideal for a day trip to the lake Zyni, fun for the whole family! And I like your strategy…
It is currently March 2020 and although this website lists an article date of January 28, 2020, the comments and Mrs. Kring’s responses are from 2015. Half of the linked products are no longer available on Amazon.
Thanks for the useful article. I have a portable charcoal grill and I lost the lid. I’ll purchase WEBER GO-ANYWHERE for my next backyard picnic. It’s still available on Amazon for $55.
thanks for sharing details of different model and its usage.