If you’re a WordPress user, you’re likely familiar with the power and flexibility this content management system (CMS) offers. However, when you have multiple WordPress sites, managing them individually isn’t necessarily the most efficient or effective approach.
In many cases, it makes more sense to create a WordPress Multisite network, especially if there are overlapping similarities between them. Multisite enables you to run a large number of sites from one WordPress installation.
In this tutorial, we’ll introduce you to WordPress Multisite and discuss the benefits of it. Then, we’ll walk you through how to install and set up a WordPress Multisite network in six simple steps. Let’s jump in!
What Is a WordPress Multisite Network
WordPress Multisite, formerly known as WordPress Multi-User (WPMU), is a feature that lets you create a network to run multiple sites from one WordPress install. WordPress first started offering this feature back with WordPress 3.0. It has since become a popular and preferred method of managing and maintaining multiple related sites.
With a multisite, your domain is your network address. The sites that belong to your network can either be subdomains (e.g. site1.yourdomain.com) or subdirectories (e.g. yourdomain.com/site1). You can also leverage domain mapping to point sites to your network, though this can be a complex process.
Once you install and set up your multisite network, you can quickly and easily create new sites, as well as allow other users to do so. The most popular example of a multisite network is WordPress.com:

It hosts a ton of sites ranging from small blogs to global enterprises. Users can quickly create their own site as part of the network.
There are many other use cases and examples of WordPress Multisite networks. Some of the most common ones are for online magazines and newspapers, as well as schools and colleges.
The Benefits of Using a WordPress Multisite Network
The primary advantage of using WordPress Multisite is that it can make managing multiple sites significantly easier. More specifically, it can help streamline a wide variety of maintenance and development tasks and save you time by eliminating the need to jump between sites.
For example, with WordPress Multisite, you can:
- Update all of your sites on the network with a single click, rather than having to log in to each one separately.
- Use a WordPress theme as a parent theme, then customize it for individual sites. This is particularly helpful if your sites share common layout and design elements.
- Install a WordPress theme and plugins once to use across the network.
Another benefit of using WordPress Multisite is the control and flexibility it offers site administrators. Every site within the network can have its own administrator(s) as well as an advanced feature and screen for configuring network and admin settings.
Of course, WordPress Multisite isn’t without its cons, which should be considered when deciding whether it’s right for you. For example, since all the sites on the network share resources, if one goes down, it can take all the other ones with it.
You’ll also need to make sure you have a hosting plan sufficient for managing server resources and handling unexpected traffic. This could mean an increase in your site costs compared to what you’re used to paying.
However, WordPress Multisite is an effective and powerful tool when you want to enhance your workflow efficiency and manage multiple sites from a single account. Plus, you can set one up in just a few easy steps.
What You Need to Install and Set Up a WordPress Multisite Network
The process of setting up a WordPress Multisite network will be quicker if you have everything ready to go. As such, there are a handful of requirements for installing a WordPress Multisite network. The preparation involved will depend on whether this is a fresh WordPress installation or an existing site.
If you haven’t already, you can download WordPress for free from WordPress.org:
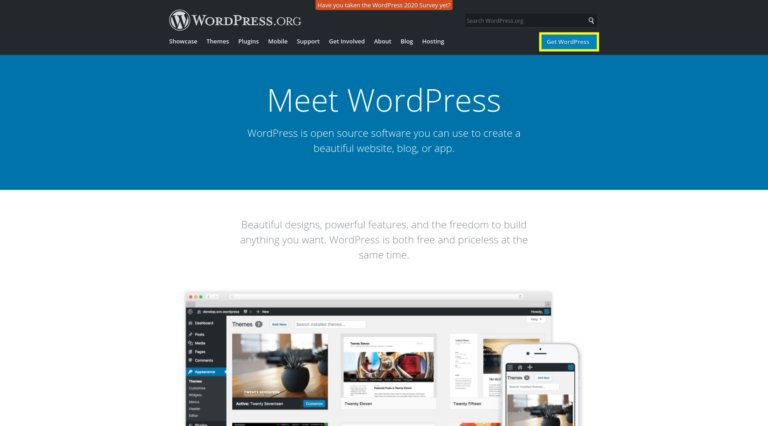
You’ll also need to purchase a hosting plan and domain. There are a handful of quality WordPress hosting providers for you to choose from that offer high-performance plans, such as Kinsta, WP Engine, and SiteGround.
When deciding, be sure to look for a plan that supports multiple domains. For a multisite network, I recommend a Virtual Private Server (VPS), dedicated hosting, or managed WordPress hosting.
If you’re creating a multisite network on an existing WordPress site, it’s important to create a backup of your database and files. When you set up a multisite network, it automatically updates WordPress to the latest version. You don’t want to risk losing any critical data.
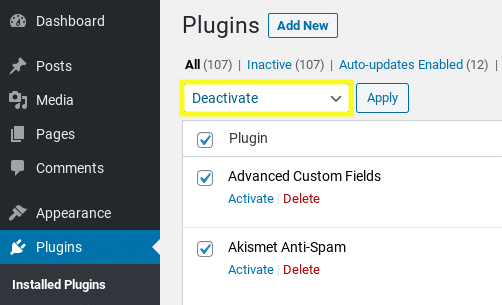
Next, you’ll need to deactivate all of your WordPress plugins. You can do this by navigating to Plugins > Installed Plugins from your WordPress dashboard (select All, then click on Deactivate from the drop-down menu, followed by the Apply button):
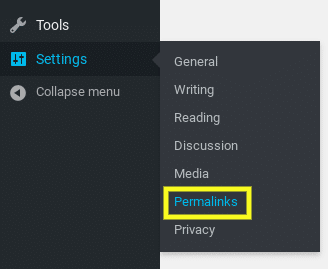
It’s also important to confirm that Pretty Permalinks are activated on your WordPress site. You can do this under Settings > Permalinks from your WordPress admin dashboard:
Finally, you’ll need File Transfer Protocol (FTP) access. In case you’re unfamiliar, this lets you edit and transfer files between your computer and network.
There are various FTP clients to choose from. For example, FileZilla is a popular and free option. If your hosting provider offers cPanel, you can also edit your files there.
How to Install and Set Up a WordPress Multisite Network (In 6 Steps)
Once you have all the technical requirements squared away, it’s time to get to work. Let’s look at how you can install and set up a WordPress Multisite network in six simple steps.
Step 1: Enable the WordPress Multisite Feature
By default, WordPress installations come with the multisite feature disabled. Therefore, your first task will be to turn it on by adding a line of code to your site’s wp-config.php file.
To do this, you have a couple of options. You can go through cPanel (if your hosting provider offers it) or connect via FTP. Once you locate and open the wp-config.php file from your site’s root directory, browse to where it says
/* That's all, stop editing! Happy blogging. */
.
Then place the following snippet directly above it:
define( 'WP_ALLOW_MULTISITE', true );
When you’re done, save your file (or upload it if you’re using FTP). Now, the WordPress Multisite feature is enabled.
Step 2: Install your WordPress Multisite Network
Once the multisite functionality is enabled, the next step is to install your network in WordPress.
From your WordPress dashboard, navigate to Tools > Network Setup:
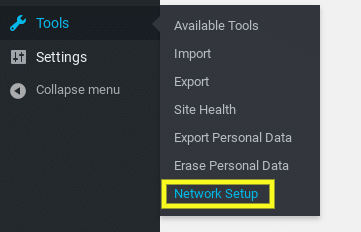
This will bring you to the Network Setup screen. Here, you can choose between using subdomains or subdirectories as your structure:
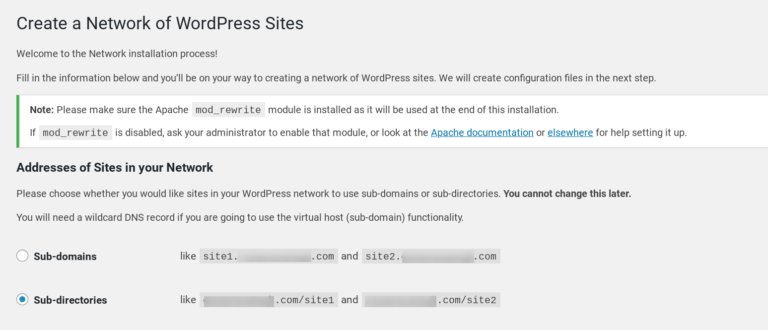
Note that you cannot change this setting later, so be sure to choose carefully. If you need help deciding which is best to use for your specific circumstances, you can check out this article about subdomains vs subdirectories.
Next, navigate to the Network Details section:
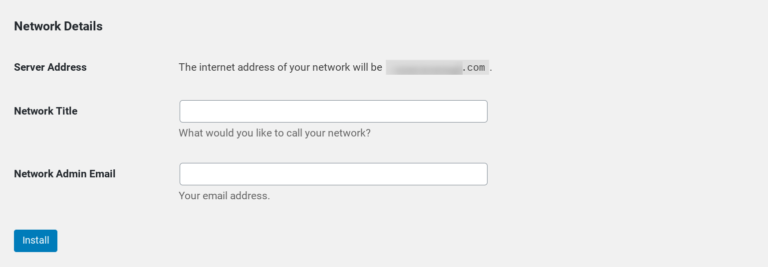
Input the title you want for your network in the Network Title field, as well as the admin email address. Once you’re done, click on the Install button.
Step 3: Add Code Snippets to Your WordPress Files
When you click on the Install button, you’ll be automatically redirected to a screen containing two snippets of code. One is to copy and paste in your wp-config.php file and the other is for your .htaccess file:
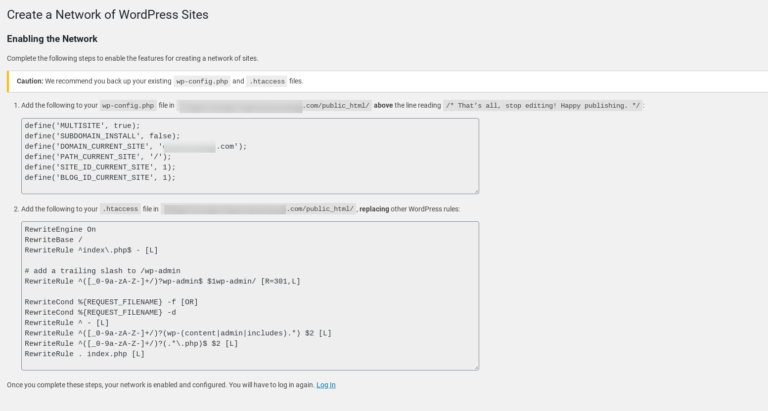
As with the first step, you can do this by going through cPanel or via FTP. In your wp-config.php file, you can paste it below the code you added in step one to enable Multisite.
In your .htaccess file, you can copy and paste the appropriate code to replace the default rules. When you’re done, save both files to complete the setup.
Step 4: Configure Your Network Settings
Navigate back to your WordPress admin and click on the Log In link located at the bottom of the Network Setup page.
After you log in, you might notice a few changes to your dashboard. For example, there will now be added menu items, including My Sites and Network Admin:
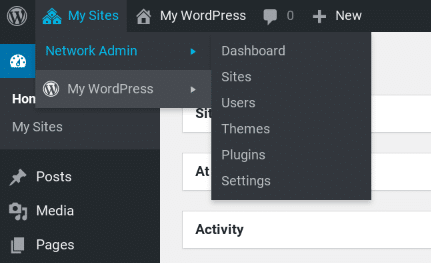
From here, you can also find the Dashboard, which is where you’ll go to add new sites and users to your network. You can view all of your sites on your network under the Sites tab and configure user administration and roles under the Users tab.
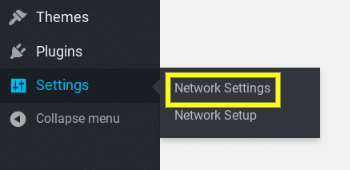
First, it’s important to configure your network settings. To do this, click on Settings from your Network Admin dashboard, followed by Network Settings:
On this screen, you’ll see that the network title and admin email address are automatically populated. Below that is the Registration Settings section:
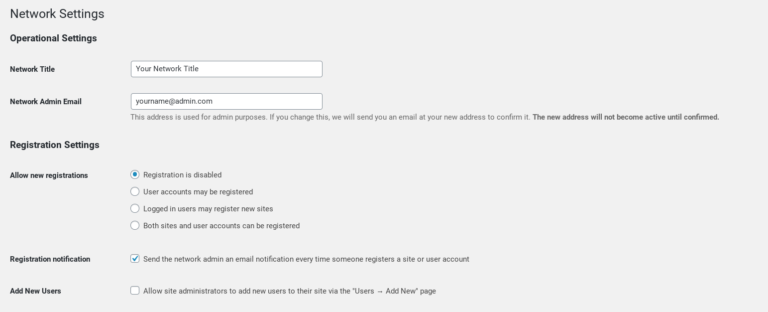
Both user and site registrations are disabled by default. However, you can open registrations on your multisite network to allow users to register on your site or create new sites.
You can also configure the settings to receive registration email notifications, limit registrations, and permit individual site admins to add users.
Next, navigate to the New Site Settings section:
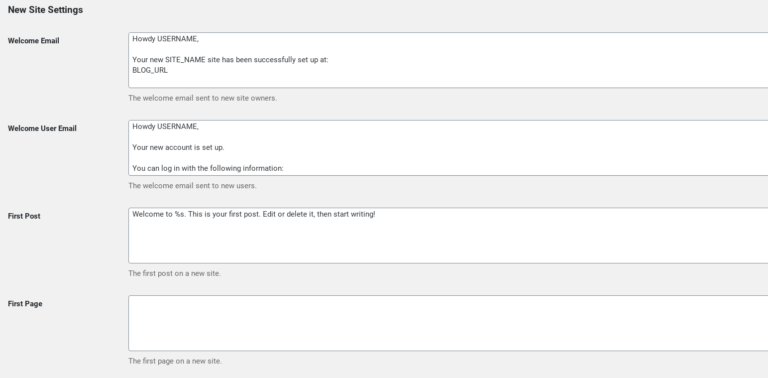
This is where you can choose and customize the options for new sites created and added to your WordPress Multisite network. For example, you can personalize the welcome emails and change the default post, page, and comment settings.
There are additional settings you can explore and experiment with, such as the upload and plugin menu settings. You can always come back to change these at any time. When you’re done, click on the Save Changes button at the bottom of the screen.
Step 5: Add a New Site to Your Network
Congratulations! You now have a WordPress Multisite network almost entirely installed and set up. However, there are still a few things left to do. The first is to add a new site to make it an actual multisite.
To add a new site, navigate to My Sites > Network Admin > Sites, then click on Add New:
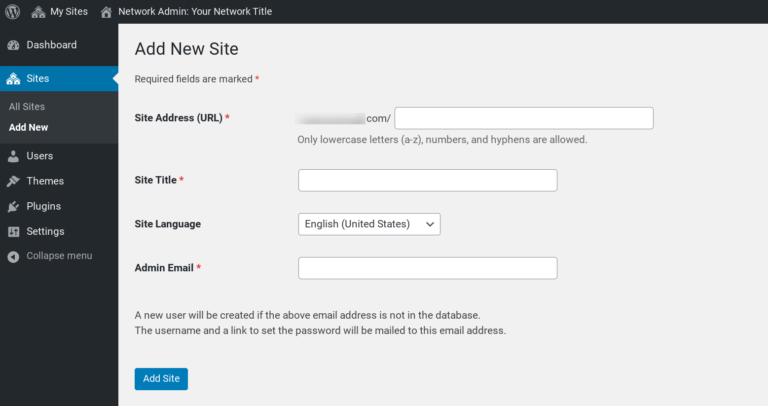
Here, enter the site address URL you want to use, a site title, the site language, and an admin email. Note that this email has to be different than the one used for the entire network.
When you’re done, click on the Add Site button at the bottom of the screen. This site will now be added to the Sites list on your network dashboard. You can do this at any time and for as many websites as you wish.
Step 6: Install Plugins and Themes on Your Multisite Network
With WordPress Multisite, by default, only network admins can install plugins and themes. However, the plugins and themes that you do install will be available to individual sites on the network.
Of course, the plugins you choose will depend on the type of site you have and which features and functionality you’re looking to add. Once you know which plugins you want to install, you can do so by going to My Sites > Network Admin > Plugins:
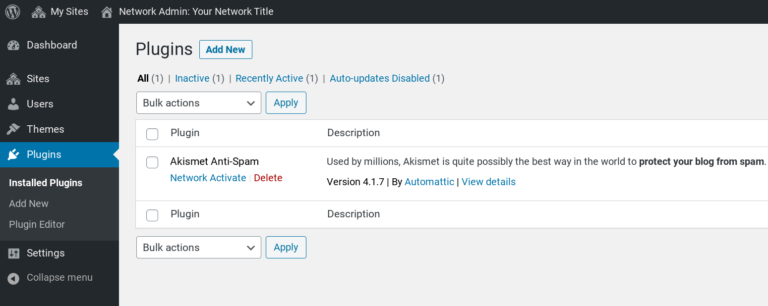
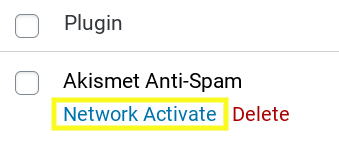
To install a new one, select Add New. When you want to activate a certain plugin on your network, simply click on the Network Activate link below it:
The process is similar for installing themes, only you’ll go to My Sites > Network Admin > Themes:
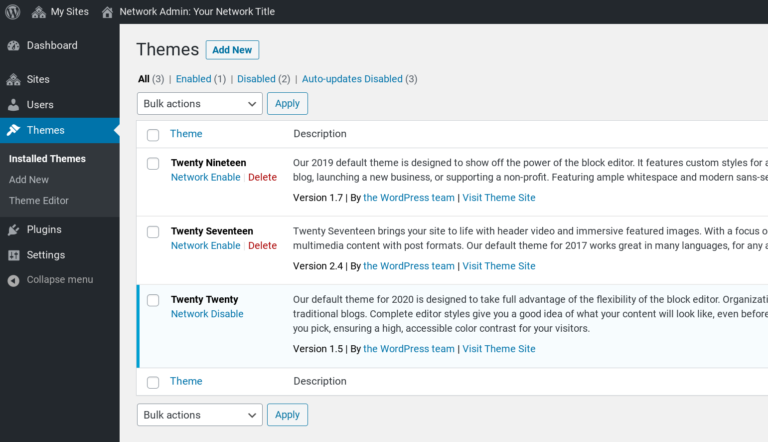
This screen displays any themes currently installed on your multisite. To install a new theme, click on the Add New button. Then, to make it available to other sites on the network, click on the Network Enable link under the theme.
That’s it! You now have a fully functioning WordPress Multisite network.
Conclusion
When you have a large number of sites, managing them individually can be time-consuming and tedious.
A more practical and efficient approach is to create a WordPress Multisite network. However, if you’re unfamiliar with this tool, getting started with it may seem confusing and challenging.
As we discussed in this post, you can install and set up a WordPress Multisite network in six simple steps:
- Enable the WordPress Multisite feature by editing your wp-config.php file.
- Install your WordPress Multisite network from the Network Setup section of your admin dashboard.
- Copy and paste the network installation code into your wp-config.php and .htaccess files.
- Configure your network settings.
- Add a new site to your WordPress Multisite network.
- Install WordPress themes and plugins on your network.
Do you have any questions about using WordPress Multisite? Let us know in the comments section below!
